
Our hallway had gorgeous bones and absolutely nothing to show for it. Beneath a heavy, dated orange-brown stain, the original wood paneling was actually beautifully detailed, but you’d never know it walking past the dark, glossy finish, which swallowed every bit of natural light and made the whole space feel smaller and older than it actually was. For years I told myself I loved “the character,” when honestly, I was just avoiding a project that felt too intimidating to start.
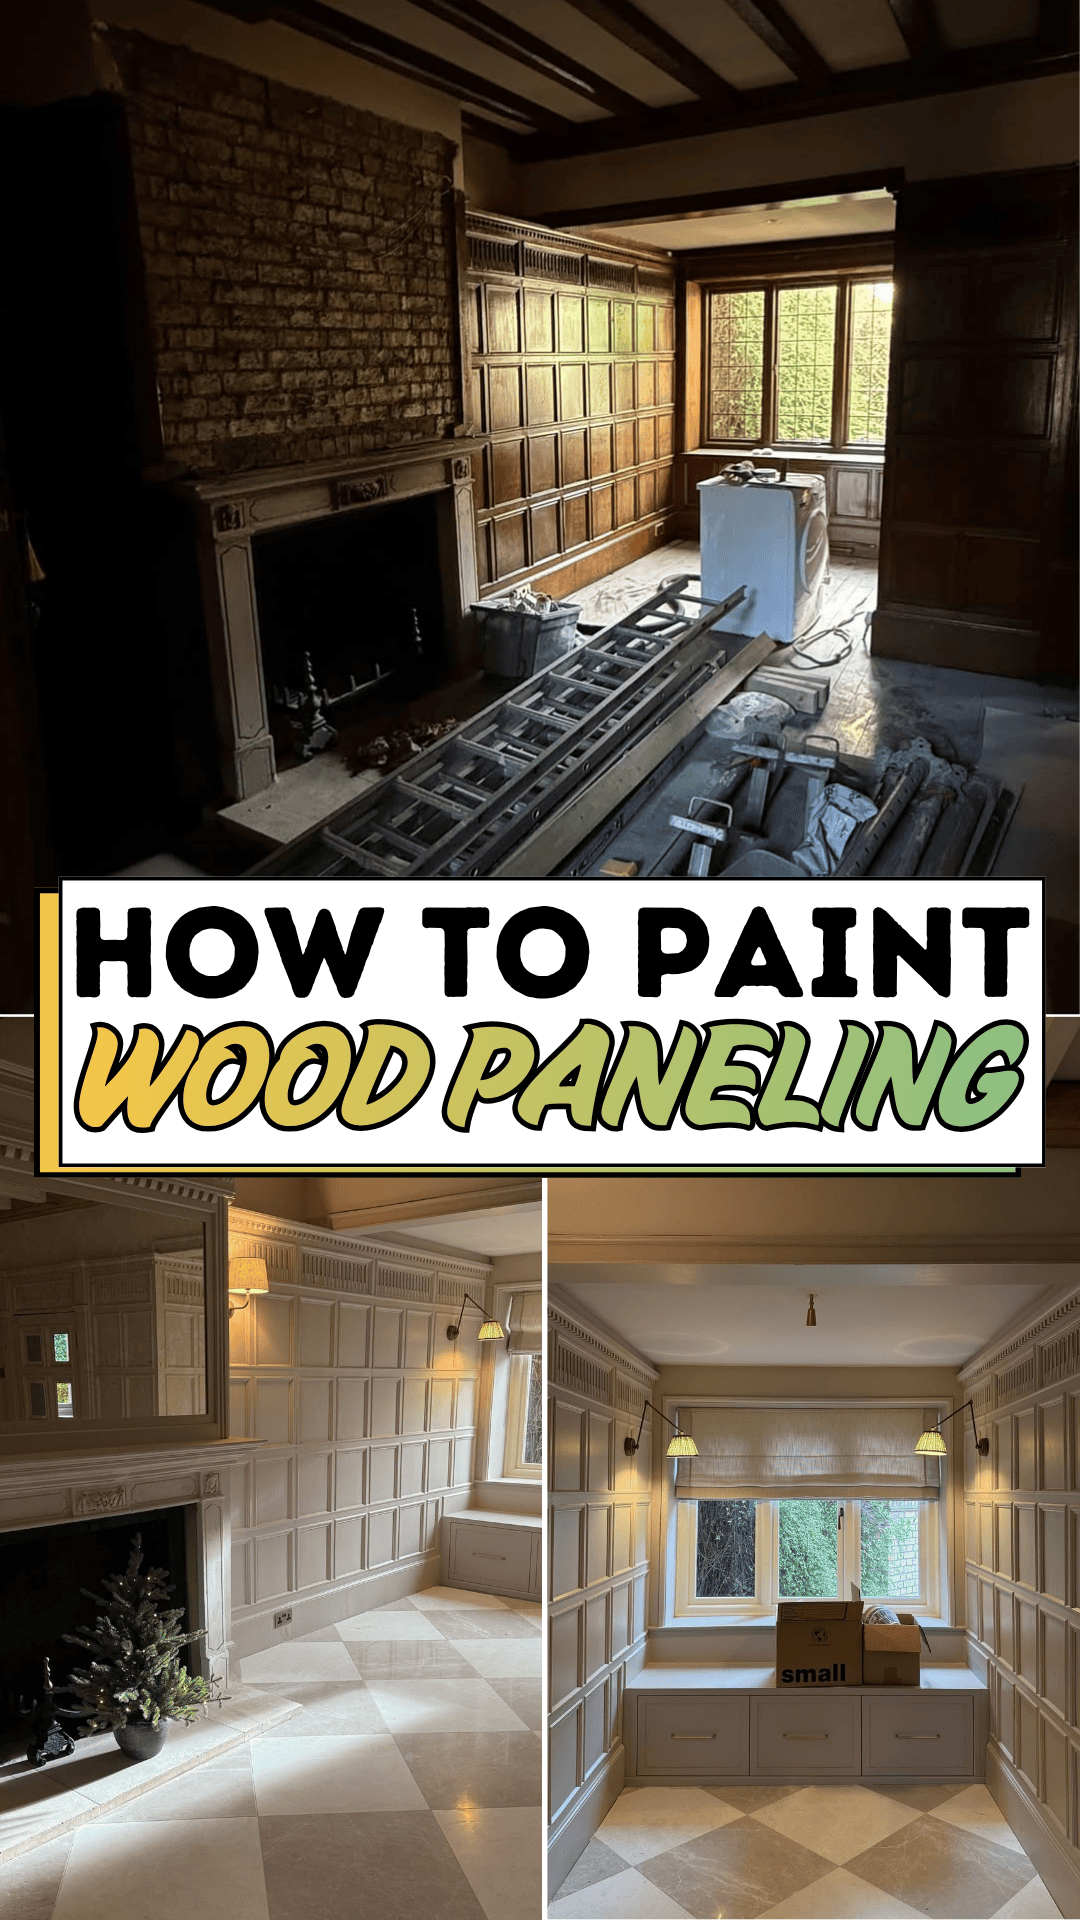
That hesitation is incredibly common with wood paneling. It carries real architectural value, but a heavy, outdated finish can make it look like a liability instead of an asset, and painting over real wood feels like a bigger decision than it should. Between worrying about proper prep, adhesion, and whether the paint job will actually last, a lot of people just leave the paneling as-is, year after year, even when they know a fresh coat would completely change the room.
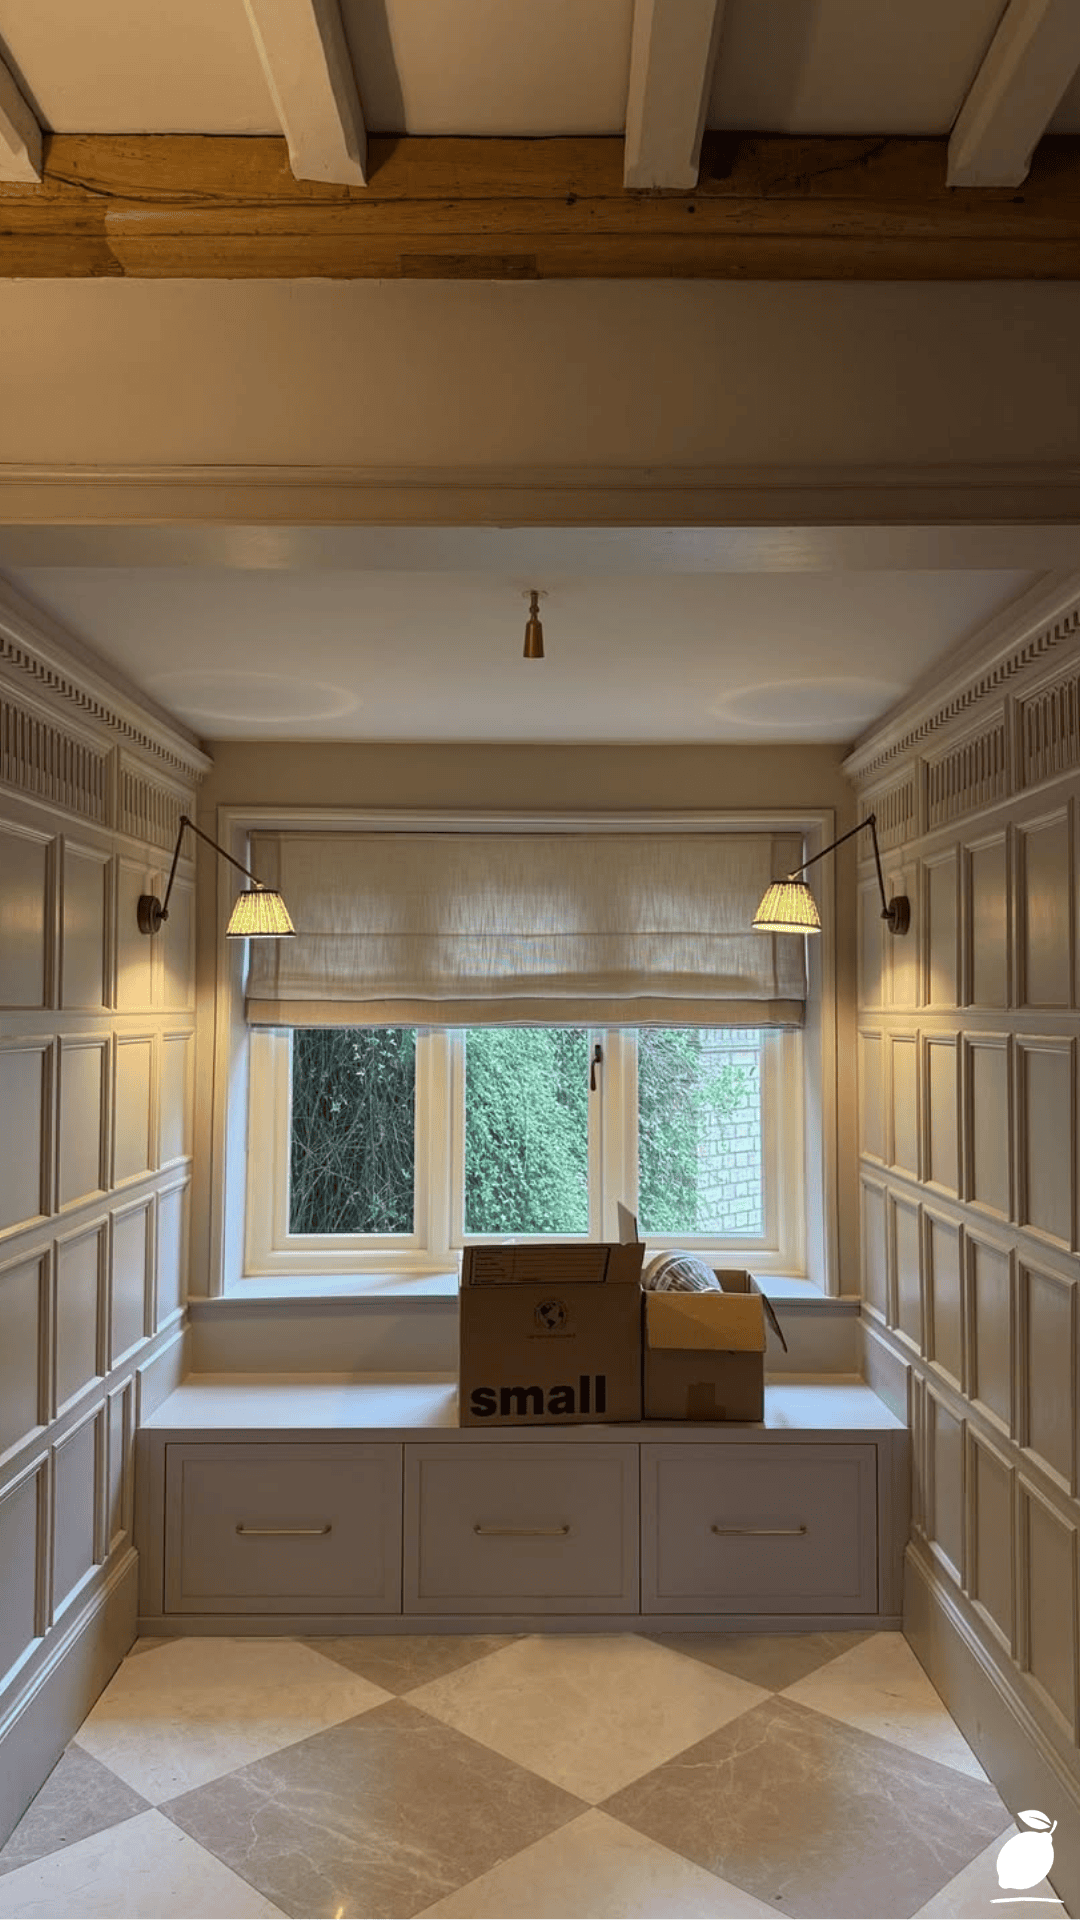
What finally convinced me was seeing exactly what’s possible: crisp white paneled walls with an ornate, Georgian-style pattern, warm wooden ceiling beams left as an intentional contrast, soft natural light pouring in, a marble checkerboard floor grounding the whole elegant space. That transformation didn’t require ripping anything out just proper prep and paint, applied the right way. Here’s exactly how to paint wood paneling so it looks polished, intentional, and every bit as elegant as that finished hallway.
The Wood Paneling Blueprint
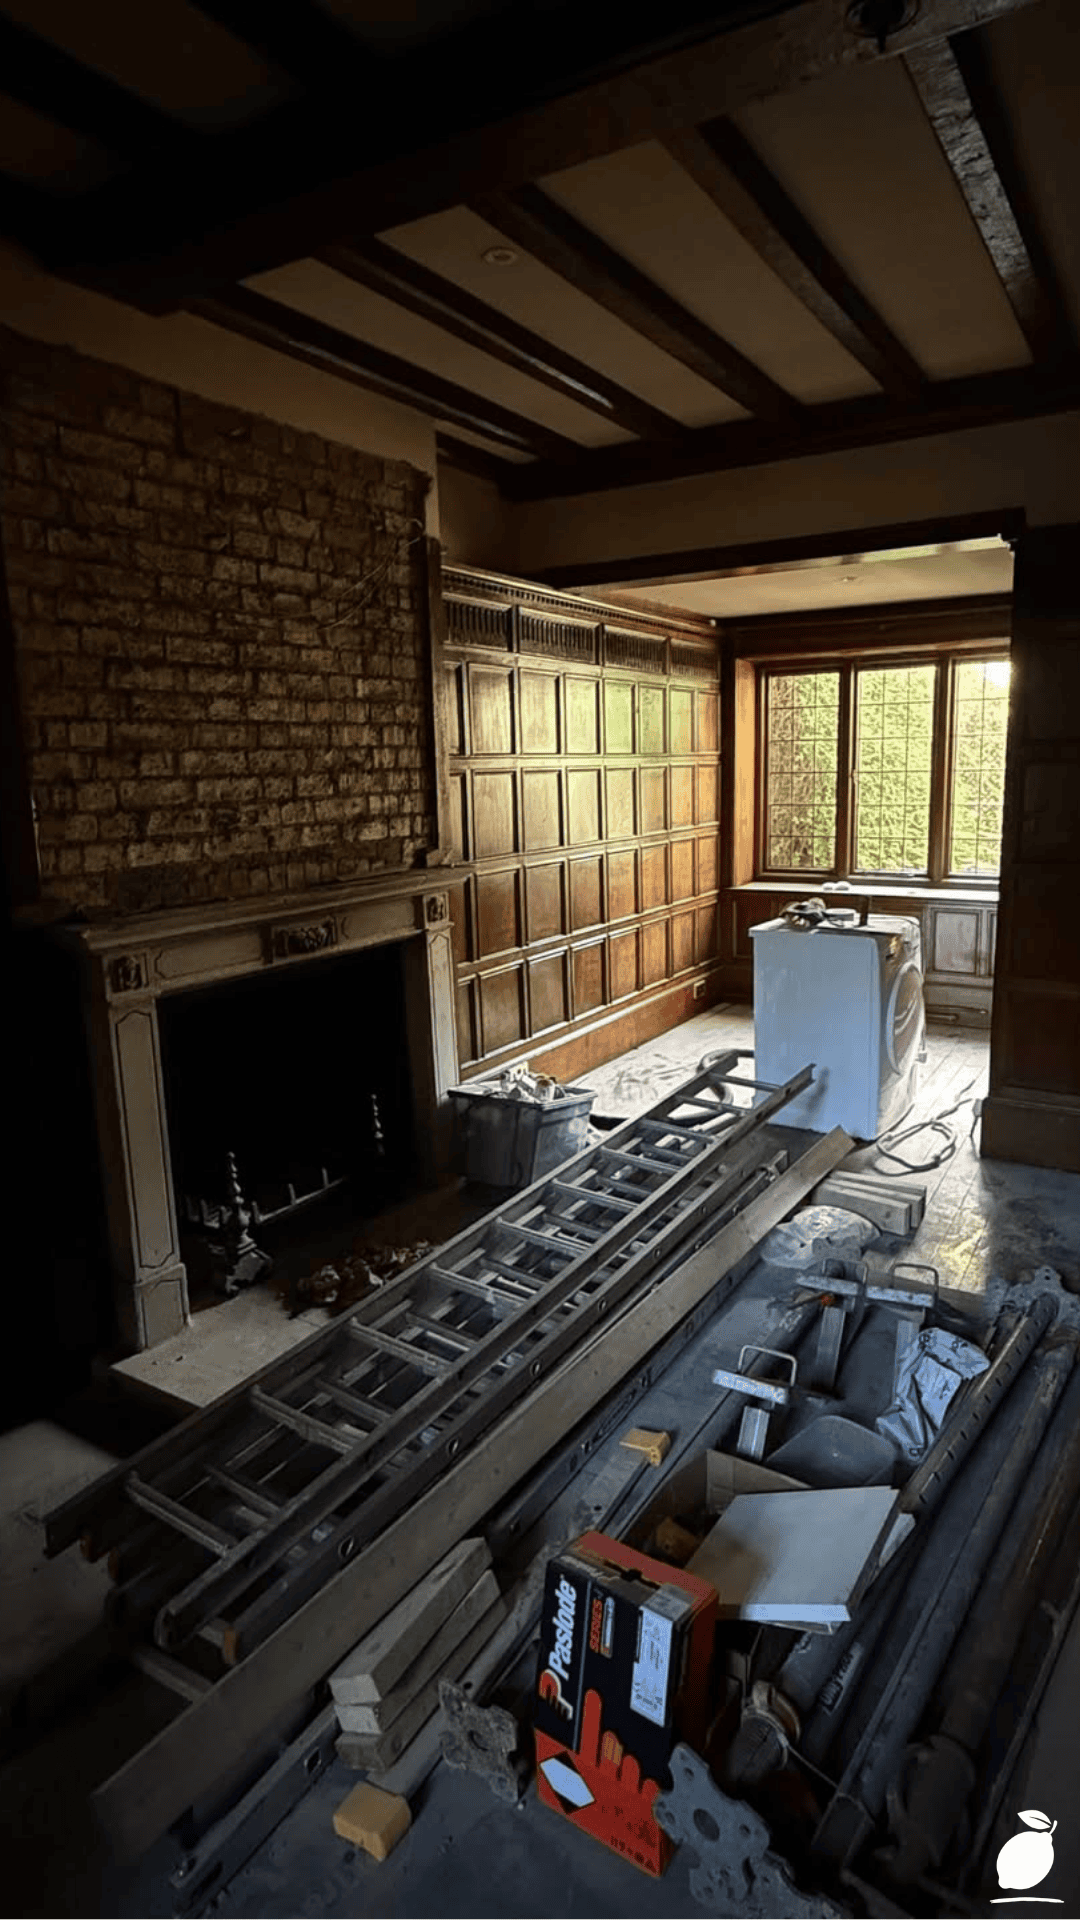
Painting wood paneling successfully comes down to thorough prep work followed by careful application. Here’s the full process for a lasting, professional-looking finish.
Step 1: Clean the Paneling Thoroughly
Wash the entire surface with a degreasing cleaner or a mixture of TSP substitute and water to remove years of dust, oil, and residue. Skipping this step is one of the most common reasons paint fails to adhere properly to wood paneling.
Step 2: Repair Any Damage
Fill dents, gouges, or gaps between panels with wood filler, then sand smooth once dry. Address any loose or damaged sections before moving forward, since a solid surface is essential for a lasting finish.
Step 3: Sand the Entire Surface
Lightly sand all wood paneling with fine-grit sandpaper to rough up the glossy factory finish, which helps primer and paint grip properly instead of peeling later.
Step 4: Fill the Grooves if Desired
If you want a smoother, more traditional painted look rather than visible wood grain lines, fill deep grooves between panels with paintable caulk before priming.
Step 5: Wipe Down and Prime
Remove all sanding dust with a tack cloth, then apply a stain-blocking, adhesion-promoting primer designed specifically for wood paneling. This step prevents old stains or tannins from bleeding through your finished paint color.
Step 6: Apply the First Coat of Paint
Using a high-quality brush and roller combination, apply your first coat of paint in thin, even layers, working the brush into grooves and detailed areas first before rolling the flat sections.
Step 7: Sand Lightly Between Coats
Once the first coat is fully dry, lightly sand any rough spots with fine-grit sandpaper and wipe away dust before applying your second coat for a smooth, professional finish.
Step 8: Apply a Second Coat
Add a final coat of paint, ensuring full, even coverage across the entire wood paneling surface, paying close attention to detailed molding or paneling patterns.
Step 9: Cure and Style the Space
Allow the paint to cure fully, typically several days to two weeks depending on the product, before adding furniture or décor back into the room to avoid marking the fresh finish.
Expert Secrets for Success
Pro-Tips for a Better Result
Use a bonding primer specifically for wood paneling. These primers are formulated to grip glossy, factory-finished surfaces far better than standard wall primer.
Work in thin, even coats. Applying paint too thickly on wood paneling leads to drips and pooling in grooves, especially on detailed or ornate patterns.
Choose a durable finish like satin or semi-gloss. These finishes hold up better to cleaning and daily wear than flat paint, especially in high-traffic hallways.
Leave some architectural detail exposed for contrast. Pairing painted wood paneling with a natural wood ceiling beam or trim detail, as shown above, adds warmth and visual interest to an otherwise crisp, painted space.
Test your color in the actual room first. Lighting varies significantly by space, so testing a sample swatch on your wood paneling before committing to a full room ensures the color reads the way you expect.
Common Mistakes to Avoid
Skipping the cleaning and sanding steps. Paint applied directly over a dirty or glossy surface is far more likely to peel or chip within months.
Using the wrong type of primer. A standard wall primer often fails to block stains or properly bond to wood paneling, leading to bleed-through or poor adhesion.
Rushing dry time between coats. Painting over a coat that hasn’t fully dried can trap moisture and lead to a tacky, uneven finish.
Ignoring grooves and detailed molding. Uneven coverage in deep grooves is one of the most visible signs of a rushed paint job on wood paneling.
Ignoring proper ventilation during the project. Painting in a poorly ventilated space extends dry time significantly and can affect the quality of the final finish.
Why Wood Paneling Matters
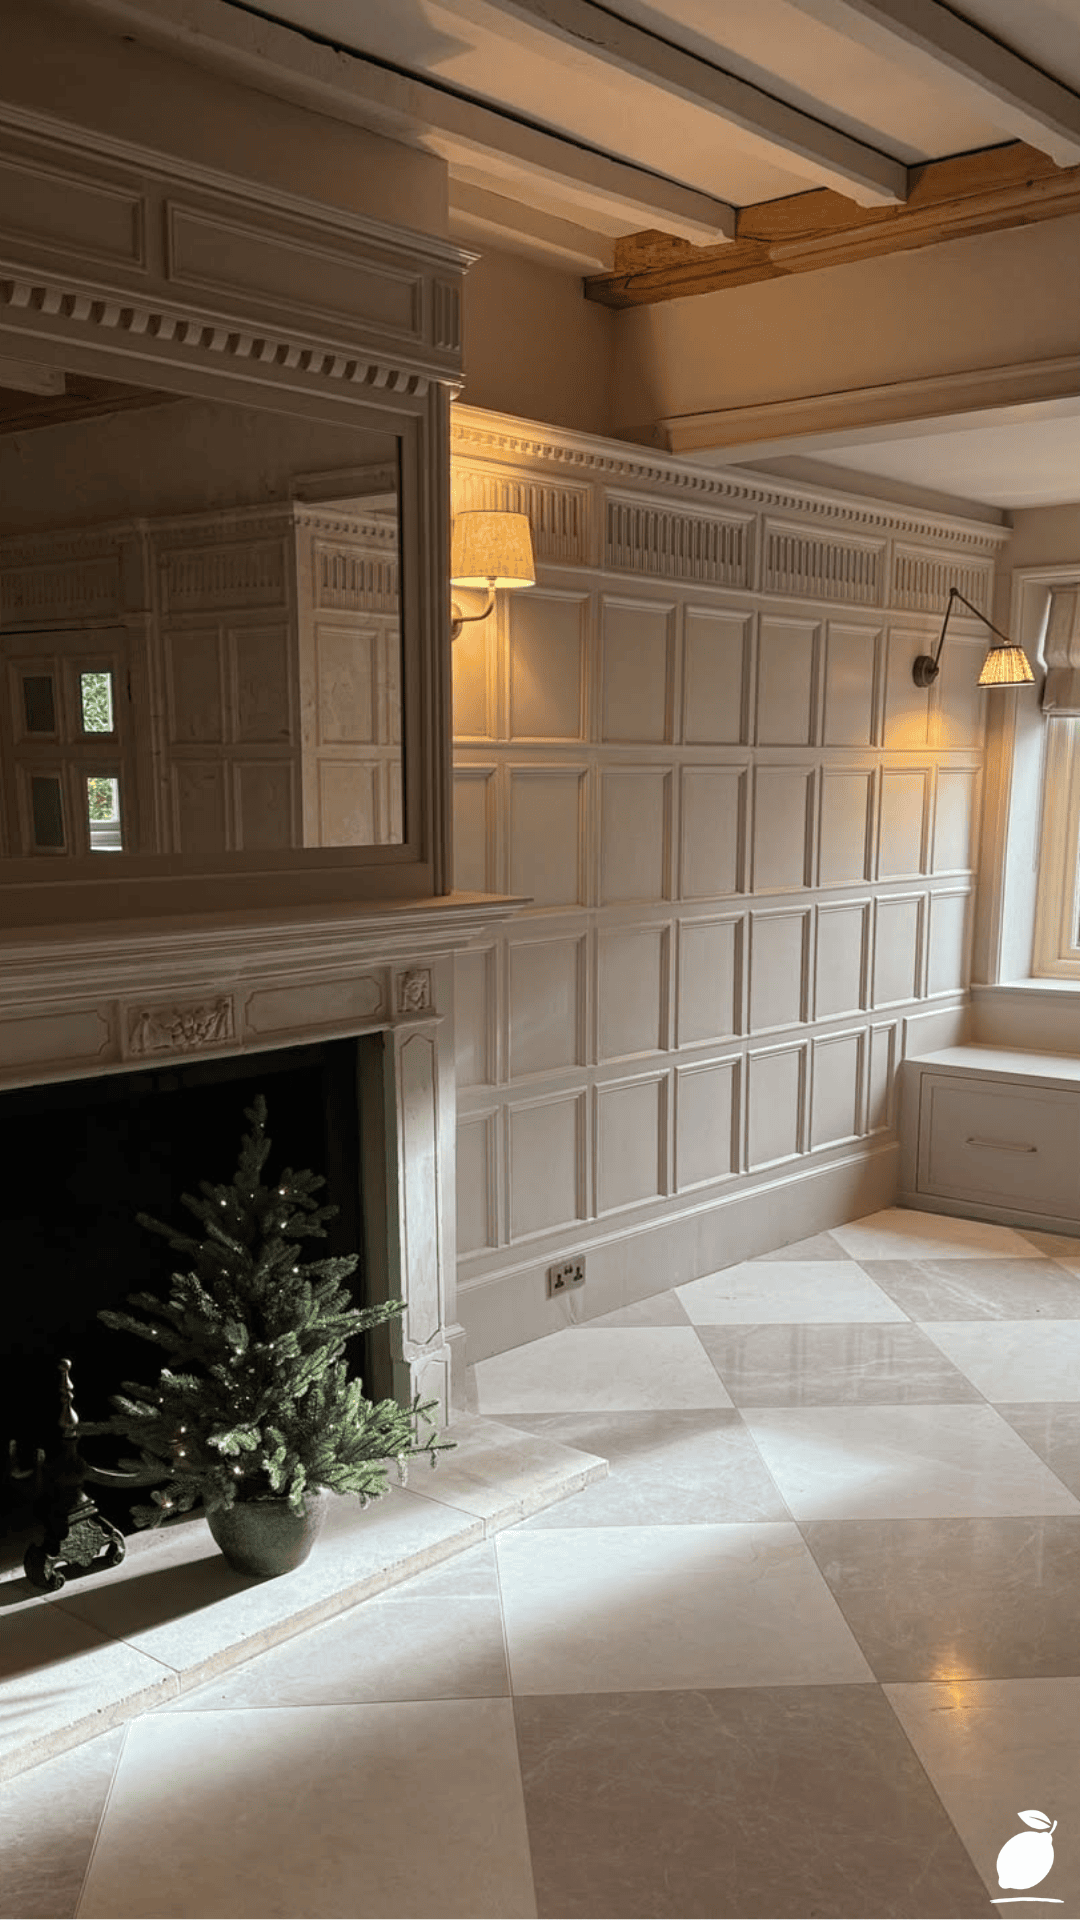
There’s a real sense of relief that comes from finally transforming a space you’ve been quietly avoiding for years. Our hallway used to feel dim and dated; now it’s bright, elegant, and genuinely one of my favorite parts of the house. Learning how to paint wood paneling didn’t just update a wall; it completely shifted how the entire space feels to walk through every single day.
Home projects like this offer something beyond aesthetics. There’s real mental clarity in finally tackling a task that’s been sitting on your to-do list, proof that a project you were once intimidated by is actually within reach with the right process. That accomplishment tends to spill over, making the rest of the home feel a little more cared for and complete.
At Easy Peasy Life Matters, this is exactly the kind of transformation we love supporting: not a full renovation, but a properly executed paint project that changes how an entire room feels. Painting wood paneling is proof that some of the most valuable architectural details in a home just need the right update to finally shine.
FAQ
Do I need to sand wood paneling before painting it?
Yes, lightly sanding the surface to remove the factory sheen is essential for helping primer and paint adhere properly and prevents peeling down the line.
What type of primer works best on wood paneling?
A stain-blocking, adhesion-promoting bonding primer designed specifically for glossy or previously finished wood surfaces gives the best results and prevents old stains from bleeding through.
How long does it take to paint wood paneling?
A typical hallway or room can usually be completed in a weekend, though full cure time for the paint may take several days to two weeks depending on the product used.
Can I paint wood paneling without filling the grooves?
Yes, many people choose to leave grooves visible for a traditional, textured look, though filling them with caulk creates a smoother, more contemporary finish if that’s your preference.
What paint finish works best for wood paneling in high-traffic areas?
Satin or semi-gloss finishes are generally recommended for wood paneling in hallways or high-traffic rooms, since they hold up better to cleaning and everyday wear than flat paint.







