The basement does not become a disaster in a single afternoon. It happens the way most household chaos happens incrementally, reasonably, one deferred decision at a time. The holiday decorations go down there because the attic is full. The sports equipment follows because the garage is full. The boxes from the last move, the ones you told yourself you’d sort through in the first month, go against the back wall because the first month became the first year became three years ago.
You still know, roughly, where things are. You can find the camping gear if you move four boxes and the old fan. The kids’ outgrown clothes are in one of the black garbage bags on the left, or possibly the right. Every time you go down there for something specific, you leave with the low-grade stress of a person who knows that system is not a system at all.
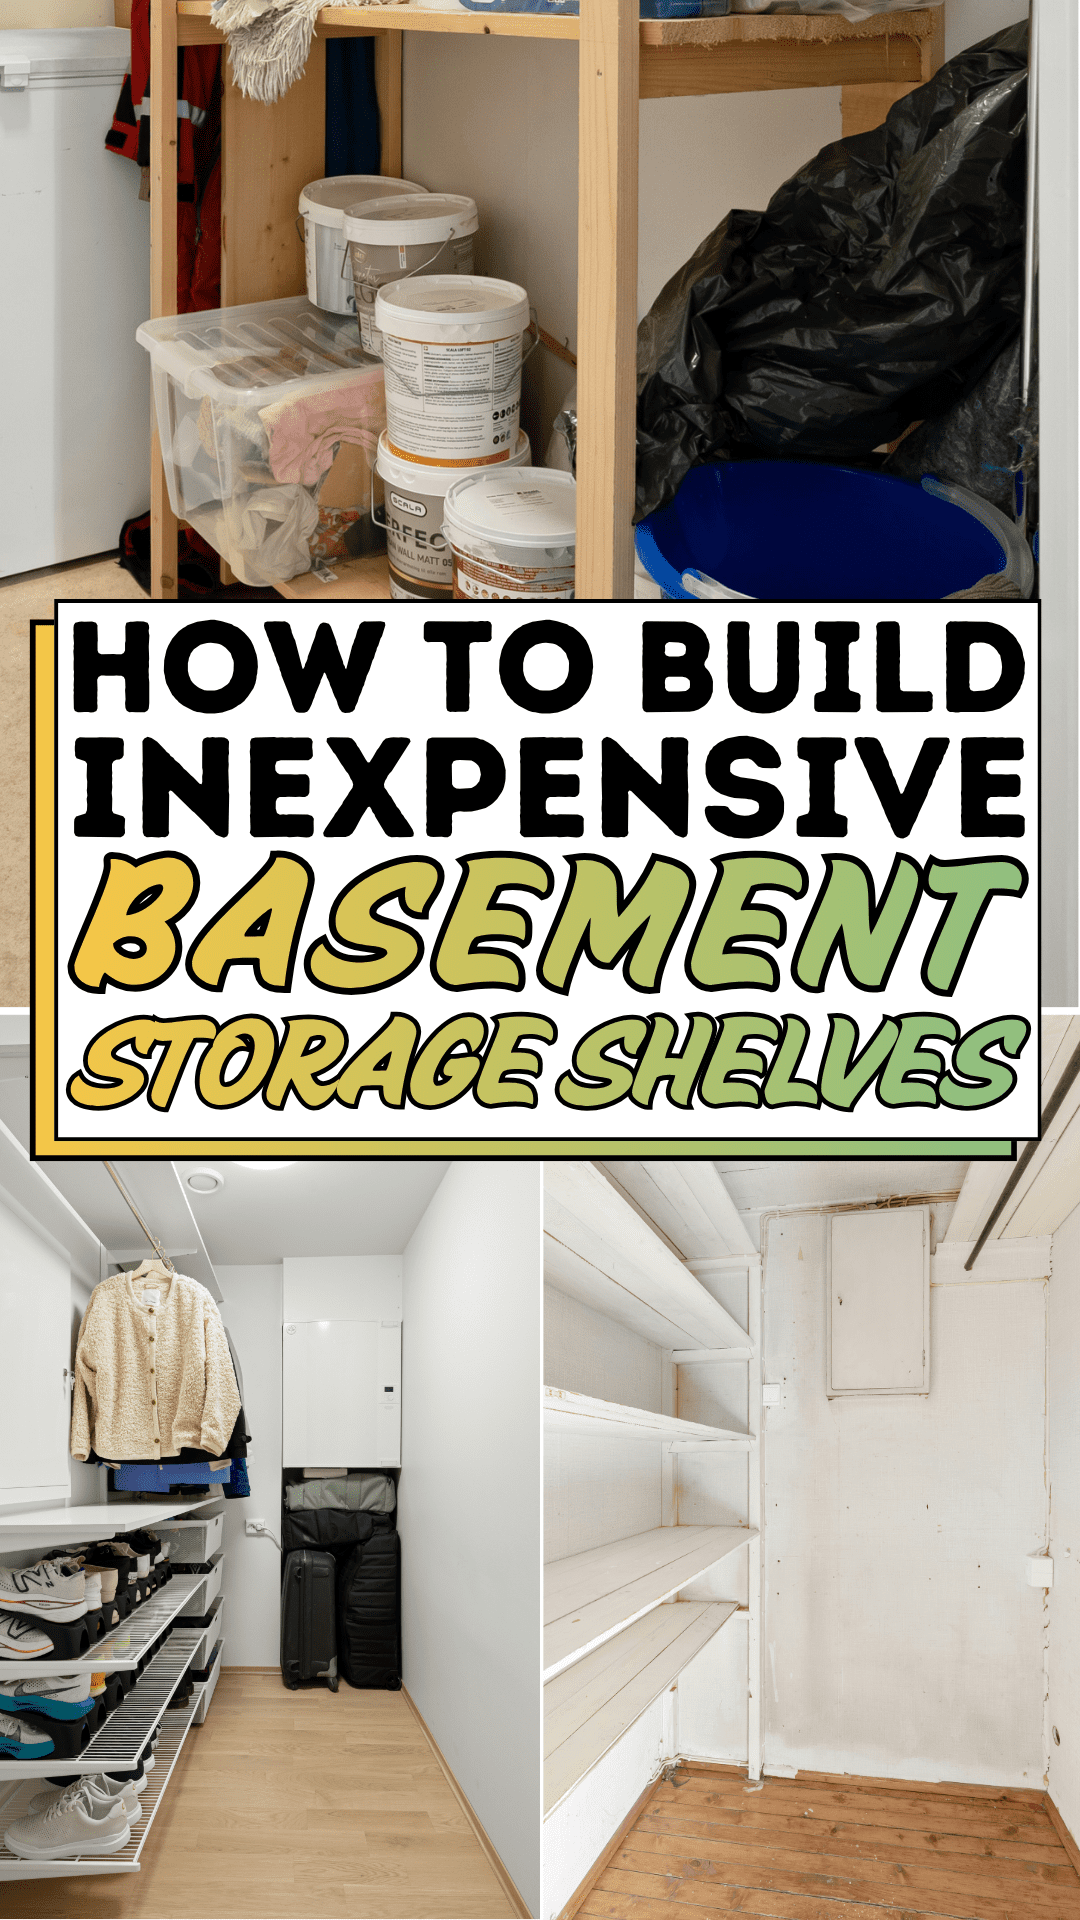
The distance between that basement and the one in the image above is not a renovation budget. It is a building weekend and a decision. The walk-in storage space in the image has white shelving rising from floor to ceiling, shoes arranged on wire shelves, suitcases stacked vertically with intention, every item visible and reachable was built from the same raw material as any basement: vertical wall space, horizontal floor area, and the ceiling as the upper boundary. What changed was not the architecture. What changed was the presence of a structure that made every object’s location permanent rather than provisional. Built-in basement storage shelves are that structure. They are also, when built correctly, among the most inexpensive permanent home improvements available to any homeowner with a free weekend and a basic tool set.
This guide gives you every step to build them. It follows the logic of the image exactly: floor-to-ceiling reach, clean vertical divisions, dedicated zones for different item types, and a result that holds its organization over years rather than weeks. The materials cost a fraction of flat-pack furniture. The result outlasts it by decades. And the basement that has been a source of low-level household friction since the second year of ownership becomes, finally, a room that does what a room is supposed to do: hold what the house needs without demanding anything in return.
The Basement Storage Blueprint

Step 1: Audit the Basement and Define Your Storage Zones
Before a single board is cut, the basement needs to be emptied enough to assess what it is actually being asked to hold. This is not a full decluttering exercise; it is a categorization exercise. Pull every item from the wall areas where shelving will be installed and sort into categories on the open floor: seasonal items, sports and recreation equipment, luggage and travel gear, archived documents and keepsakes, tools and hardware, and household overflow.
The category list determines the shelf configuration. The image above demonstrates this clearly: shallow shelves on the lower runs for footwear, deeper compartments above for boxed storage, and open vertical bays tall enough to store stacked suitcases without forcing them horizontal. Your basement storage categories will produce a different but equally specific set of dimensional requirements. Seasonal decoration boxes are typically 60cm deep and 40cm tall. File boxes are shallower. Luggage varies widely but benefits from a minimum 90cm vertical clearance per suitcase unit. Knowing your inventory before you build means the basement storage shelves you build will actually fit what they are being asked to hold.
Measure the available wall runs, ceiling height, and any obstructions, pipes, ducts, electrical panels, and window wells that will interrupt the shelving layout. Photograph each wall with the measurements marked. This documentation becomes the working blueprint for every material calculation that follows.
Step 2: Design the Shelf Layout on Paper Before Purchasing Materials
Basement storage shelves fail most often not because of poor construction but because of inadequate design, shelves built at the wrong height for the objects they hold, runs that stop short of the ceiling and leave unusable space above, configurations that ignore the natural sorting logic of the items they store. Spend time on paper before you spend money at the lumber yard.
Sketch the longest available wall to scale on graph paper. Mark the ceiling height. Draw the vertical upright positions first, typically spaced at 60cm to 90cm intervals, depending on the anticipated load and the lumber span rating. Then draw the horizontal shelf positions, working from the floor up: bottom shelf at 20cm to 30cm from the floor to allow floor-level airflow and keep items off the concrete; subsequent shelves at heights determined by the tallest items in each category; top shelf positioned as close to the ceiling as safe ladder access permits.
The floor-to-ceiling configuration in the image maximizes every centimeter of vertical space, the most abundant and most underused resource in any basement storage system. Design toward that model. A basement with a 2.4m ceiling can accommodate five or six shelf runs between floor and ceiling; a standard 1.8m freestanding unit uses only three. The additional runs at the top, dedicated to clearly labeled long-term storage boxes, can double the effective basement storage capacity of the same wall footprint without consuming any additional floor area.
Step 3: Calculate and Purchase Materials
Basement storage shelves built from construction-grade lumber, specifically 38mm × 89mm (2×4) framing lumber for the uprights and frame, and 19mm × 286mm (1×12) boards for the shelf surfaces, are the most cost-effective approach for a result that is structurally sound, dimensionally accurate, and capable of holding several hundred kilograms of household goods without deflection.
Calculate uprights first: multiply the number of vertical support positions by the ceiling height, then add 10% for waste and error. For a standard 3-meter wall run with uprights at 60cm spacing, you need seven vertical uprights. Each runs full ceiling height. Calculate horizontal ledger pieces next: each shelf requires a front and back horizontal ledger, the full length of the wall run, plus cross-pieces between uprights at each shelf level. Plywood sheets 18mm or 22mm thickness can substitute for individual board shelving where wider, continuous surfaces are preferred, and are typically less expensive per square meter of shelf surface.
Purchase materials from a single supplier where possible, so cut lengths are consistent. Ask the lumber yard to make your primary rip cuts if your home setup does not include a table saw. Most suppliers offer this service at low or no cost for significant purchase volumes, and dimensional accuracy in the uprights determines whether the finished basement storage shelves look built-in or improvised.
Step 4: Prepare the Basement Walls and Floor for Installation
Concrete basement walls require different attachment approaches than stud-framed walls, and identifying your wall type before installation day prevents the moment of discovering that your hardware is wrong when the drill is already running. Poured concrete and concrete block walls require concrete anchors, sleeve anchors, or wedge anchors rather than wood screws. Stud-framed basement walls covered in drywall or OSB allow standard wood-screw attachment directly into the studs.
Test the basement floor for level across the full length of the planned shelving run using a long spirit level or a laser level. Basement floors, particularly older poured concrete, are rarely perfectly flat, and an out-of-level floor means the first shelf, built level, will visibly gap from the floor at one end. Shim the base frame as needed during installation rather than cutting uprights to the floor’s uneven surface.
Address moisture before shelving is installed. Basement storage shelves built against a wall with active moisture intrusion will deteriorate regardless of lumber quality. Check the full wall area for efflorescence (white mineral deposits indicating water migration), damp patches, or active seepage. Treat identified moisture issues before shelving installation rather than after removing installed shelving to access a moisture problem. This is a project of a different order entirely.
Step 5: Build and Install the Frame
Assemble the primary frame before raising it against the wall. Cut all uprights to an identical height, ceiling height minus the thickness of the top mounting ledger. Cut front and back horizontal ledgers to the full length of the wall run. Assemble the frame flat on the basement floor: lay the two back ledgers (top and bottom) parallel, set the uprights between them at the designed spacing, and fasten with 90mm screws through the ledgers into the upright ends.
Raise the assembled back frame against the wall with a helper and check for plumb in both directions before fastening. Attach to the wall through the top and bottom back ledgers using the appropriate fastener for your wall type, concrete anchors at 60cm intervals for masonry, 75mm screws into studs at every upright position for framed walls. The back frame carries the majority of the shelf load and transfers it to the wall structure; its fastening is the most critical construction step.
Add the front uprights and front ledgers to complete the three-dimensional frame. The front uprights sit on the floor and are connected to the back uprights at each shelf level by the shelf support ledgers running front-to-back. Cross-brace the frame with a diagonal cut of scrap lumber at the top if the assembled structure has any lateral movement. A rigid frame is the foundation of basement storage shelves that hold their alignment over years of loading and unloading.
Step 6: Install Shelf Surfaces and Finishing Details
Cut shelf boards or plywood panels to fit between uprights at each level. For standard lumber shelving, two boards per shelf bay, each 19mm × 140mm, leave a narrow ventilation gap between them that prevents moisture accumulation on the shelf surface and reduces the weight of the overall structure. For closed shelf surfaces, a single 19mm plywood panel cut to fit provides a flat, continuous surface that is preferable for small items, shoes, and anything that would fall through or between individual boards.
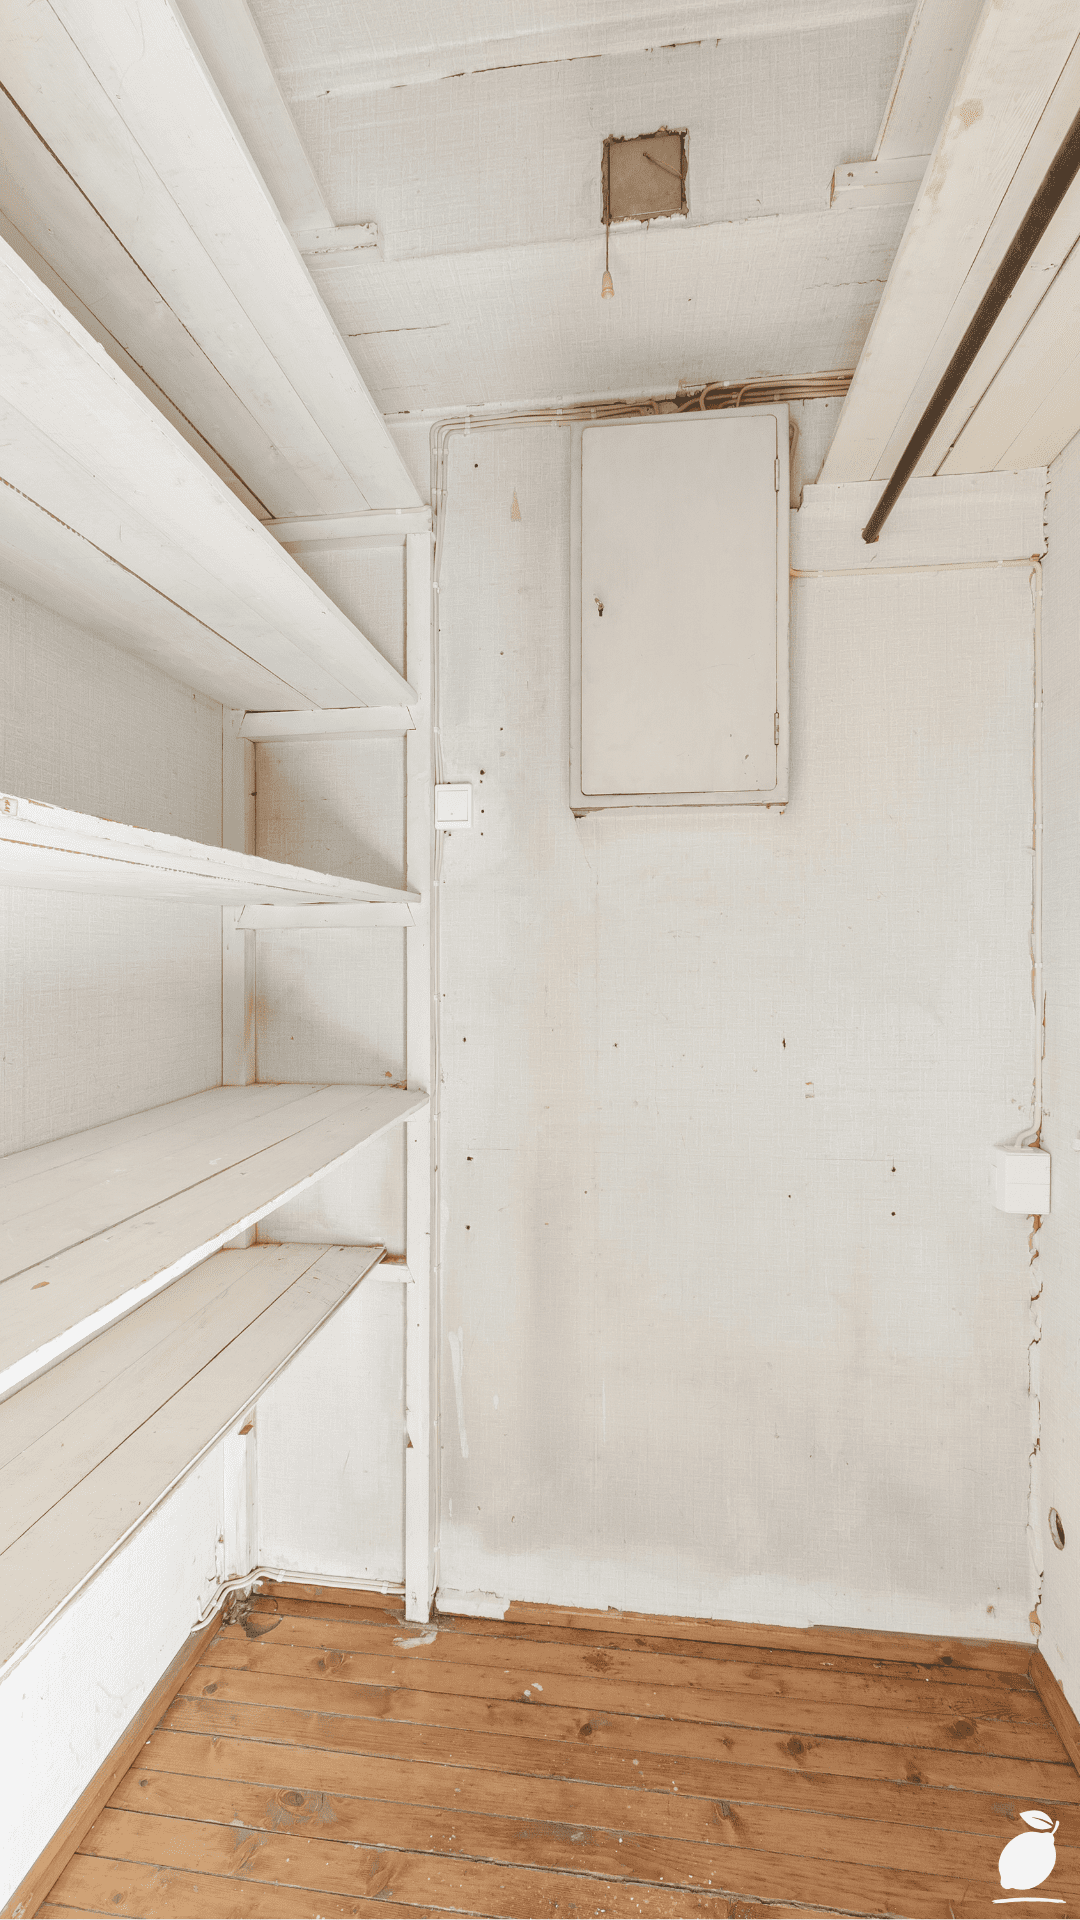
Sand all cut edges before installation. Raw lumber edges will catch and snag stored items repeatedly over the years of the shelf’s life. A single pass with 120-grit sandpaper on all exposed edges takes fifteen minutes across a full shelf run and eliminates years of minor frustration. Paint or seal the shelf surfaces if the basement environment is variable in temperature and humidity. An oil-based primer followed by one coat of floor-grade enamel makes the shelves wipeable and resistant to moisture absorption. The white finish in the image contributes significantly to the basement storage system’s clean, organized appearance; the same dimensional structure in raw lumber looks half as finished even when equally well-built.
Install wire shelf inserts on lower runs where shoes, sports equipment, or items benefiting from airflow will be stored. These are available in standard widths at any home improvement center and drop directly onto the installed horizontal ledgers without additional fastening.
Expert Secrets for Success

Pro-Tips for a Better Result
Use a laser level for the full installation. The single tool investment that most dramatically improves the quality of built basement storage shelves is a self-leveling laser level. It projects a perfectly level horizontal line across the full wall run at the height of each shelf, allowing shelf ledgers to be marked and fastened at consistent heights even when working alone. A spirit level requires two people to hold and check simultaneously; a laser level allows one person to mark and fasten an entire shelf run without assistance. Rental is available at most tool hire shops for less than the cost of a lunch.
Build shelf depth to match the deepest item in each zone, not the deepest item overall. The instinct is to build all basement storage shelves at maximum depth, 60cm or more, for maximum capacity. In practice, deep shelves for small items create the same inaccessibility problem as deep cabinets: things disappear behind other things, and the back half of the shelf becomes dead storage. Match shelf depth to the category: 30cm for shoes and books, 45cm for standard storage boxes, 60cm for large seasonal items. Varying depth across the height of the same shelf run, as the image demonstrates, produces a more functional basement storage system than a uniform depth throughout.
Add a back panel of pegboard or painted OSB to open-frame shelving. The wall behind an open shelf run is often unfinished concrete or masonry, a surface that absorbs light and makes the basement storage system feel darker and less finished than its components. A back panel of 6mm pegboard painted white (or the same color as the shelf surfaces) transforms the visual quality of the installation, reflects light into the shelf bays, and provides an additional surface for hooks, small shelf brackets, and hanging storage for items that don’t stack well.
Label every zone before you store the first item. The organizational logic of newly built basement storage shelves is obvious to the person who built them and invisible to everyone else in the household. Label each section printed labels on the front edge of each shelf run, clearly designating the category before the first item is stored. Household members who can read the labels maintain the system. Household members who cannot guess the system eventually stop trying, and the basement storage shelves revert to the same undifferentiated accumulation they replaced.
Common Mistakes to Avoid
Don’t skip the moisture assessment before building. New basement storage shelves built against a wall with active water intrusion are a temporary installation at best and a mold problem at worst. The presence of shelving against a damp wall traps the moisture, accelerates the deterioration of both the wall and the stored items, and produces an air quality problem in the basement that extends into the living areas above. The thirty minutes spent checking the wall for moisture before building prevent a problem that cannot be easily fixed afterward.
Don’t build shelves too close to the electrical panel or HVAC equipment. Building codes in most jurisdictions require a minimum of 90cm of clear working space in front of electrical panels, and HVAC equipment requires service clearances that vary by unit type. Basement storage shelves that encroach on these clearances create safety and code compliance issues that will be identified at the worst possible time during a home sale inspection. Map all utilities before finalizing the shelf layout and maintain all required clearances in the design.
Don’t underestimate the weight of loaded shelves when choosing fasteners. A shelf bay holding archived documents, canned goods, or automotive supplies can easily exceed 150kg per shelf. The fasteners holding that load to the wall and the wall anchors carrying it into the structure need to be rated for the application. A 38mm wood screw into a drywall anchor is not rated for that load. Sleeve anchors in concrete and lag screws into structural framing are. Over-engineer the fastening at the design stage; the consequence of under-engineering it is not gradual and is not safe.
Don’t paint or seal shelves after installation. Painting basement storage shelf surfaces after they are installed in position, already fastened to the wall and assembled into the frame, means painting around every fastener, into every corner, and over every surface that is now partially inaccessible. The result is an uneven finish and wasted time. Paint shelf boards before installation, on sawhorses, where all surfaces are accessible, and a roller or spray can reach every edge. Fasten them into the frame when dry. Touch up fastener holes after installation if needed.
Why Basement Storage Matters
There is a specific kind of household stress that does not announce itself as stress. It arrives as a slightly longer pause before going downstairs for something. As the decision to buy a replacement rather than find the original. As a vague awareness, somewhere below conscious attention, that a part of your home is not working, that it is holding things without organizing them, storing without serving, occupying space without contributing to it. Basement storage that has outgrown its system is that kind of stress: ambient, chronic, and entirely resolvable.
The research on environmental disorder and psychological well-being is consistent: visual clutter and disorganized storage environments elevate cortisol levels, reduce the ease with which people transition between activities, and create a low-level cognitive load that compounds across hundreds of daily interactions with the disorganized space. The basement is not a living room; it is not a space most families occupy for comfort and leisure. But it is a space most families use daily, accessing it for tools, seasonal items, sports equipment, and the practical machinery of a functioning household. When that access is reliable and frictionless, when the thing needed is exactly where it is expected to be and reachable without moving four other things, the transaction costs of daily life decrease. That decrease is not dramatic in any single instance. Accumulated across years, it is significant.
Easy Peasy Life Matters is built on the conviction that the quality of a home is determined not by its most impressive rooms but by the cumulative ease of living in all of them, including the ones that guests don’t see. A basement storage system that works is an investment in that ease. It is the reason a Saturday morning errand takes five minutes instead of twenty. It is the reason the camping trip comes together without a household-wide search. It is the reason the person who goes down for the holiday lights comes back up in a good mood rather than a complicated one. These are small things. They are also exactly the kind of small things that a well-considered life is made of.
Frequently Asked Questions
How much does it cost to build inexpensive basement storage shelves?
A floor-to-ceiling basement storage shelf system covering a standard 3-meter wall run built from construction-grade lumber typically costs between $150 and $350 USD in materials, depending on regional lumber prices, the number of shelf levels, and whether wire inserts or plywood panels are used for shelf surfaces. This compares favorably with flat-pack shelving units in the same space, which typically cost $200 to $600 for equivalent capacity and provide significantly less structural stability and load-bearing capability. The primary cost variable is lumber quantity, which is determined directly by the number of shelf levels and the length of the wall run.
What is the best wood to use for basement storage shelves?
Construction-grade SPF (Spruce-Pine-Fir) framing lumber is the most cost-effective and widely available choice for basement storage shelf frames and uprights. For shelf surfaces, 19mm pine boards or 18mm to 22mm plywood panels provide adequate strength for most household storage loads. In basements with higher humidity levels, pressure-treated lumber for the bottom frame members, those closest to the concrete floor, adds resistance to moisture and insect damage without significantly increasing material cost. Avoid MDF (medium-density fiberboard) in basement environments; it absorbs moisture readily and swells permanently, making it poorly suited to the temperature and humidity variability of most basement spaces.
Do I need a permit to build basement storage shelves?
In most jurisdictions, freestanding or wall-attached shelving that does not involve electrical work, plumbing modifications, or structural changes to the basement does not require a building permit. However, regulations vary by municipality, and it is always advisable to confirm with your local building department before beginning any work. If the basement storage shelving installation requires moving or extending electrical circuits, adding outlets for lighting, for example, that work will typically require a permit and, depending on local code, a licensed electrician. When in doubt, a ten-minute call to the local building department is substantially less complicated than a stop-work order.
How do I keep basement storage shelves from getting moldy?
The most effective mold prevention strategy for basement storage shelves combines three practices: controlling moisture at the source, ensuring airflow around stored items, and selecting storage materials appropriately. Control moisture by addressing any active water intrusion before shelving is installed, maintaining a basement dehumidifier at 50% relative humidity or below during humid months, and sealing concrete floors and walls with a penetrating masonry sealer. Ensure airflow by keeping the bottom shelf at least 20cm above the floor, leaving gaps between shelf boards rather than using solid panels where possible, and avoiding the dense packing of items that blocks air circulation. Store items in sealed plastic bins rather than cardboard boxes, which absorb moisture and provide an ideal environment for mold growth.
How do I organize a basement storage system once the shelves are built?
The most durable organizational approach for a built basement storage system assigns fixed zones to categories before the first item is stored and maintains those zones consistently. Group items by retrieval frequency: things accessed monthly or more frequently at the most accessible shelf heights (between hip and shoulder); things accessed annually at the lowest and highest shelf positions. Label every zone clearly. Store items in uniform, stackable containers where possible; consistent box sizes allow shelves to be used to their full depth without the irregular stacking that leads to avalanche risk and eventual disorganization. Conduct a single annual basement storage audit, typically before the winter holiday season, to remove items that have moved from active use to permanent storage limbo and should be donated, discarded, or archived differently.