The dorm room walls had been blank for the first three weeks of the semester, which was longer than I had intended and exactly as long as it took for the blank walls to start feeling like a statement of their own, not a neutral absence of decoration but an active, daily reminder that I had not yet made this room mine. Every dorm wall decor option I considered seemed to fall into one of two unsatisfying categories: the poster from the campus bookstore that every third room on my floor also had, or the elaborate gallery wall projects from dorm decor inspiration accounts that assumed a budget, a printer, and a level of design confidence I did not have in week three of my first semester away from home. I wanted the room to feel specific to me, not generic, not a copy of someone else’s curated dorm aesthetic, but every attempt I made at dorm wall decor felt like I was either trying too hard or not trying at all, with no comfortable middle ground between a bare wall and an overdesigned one.
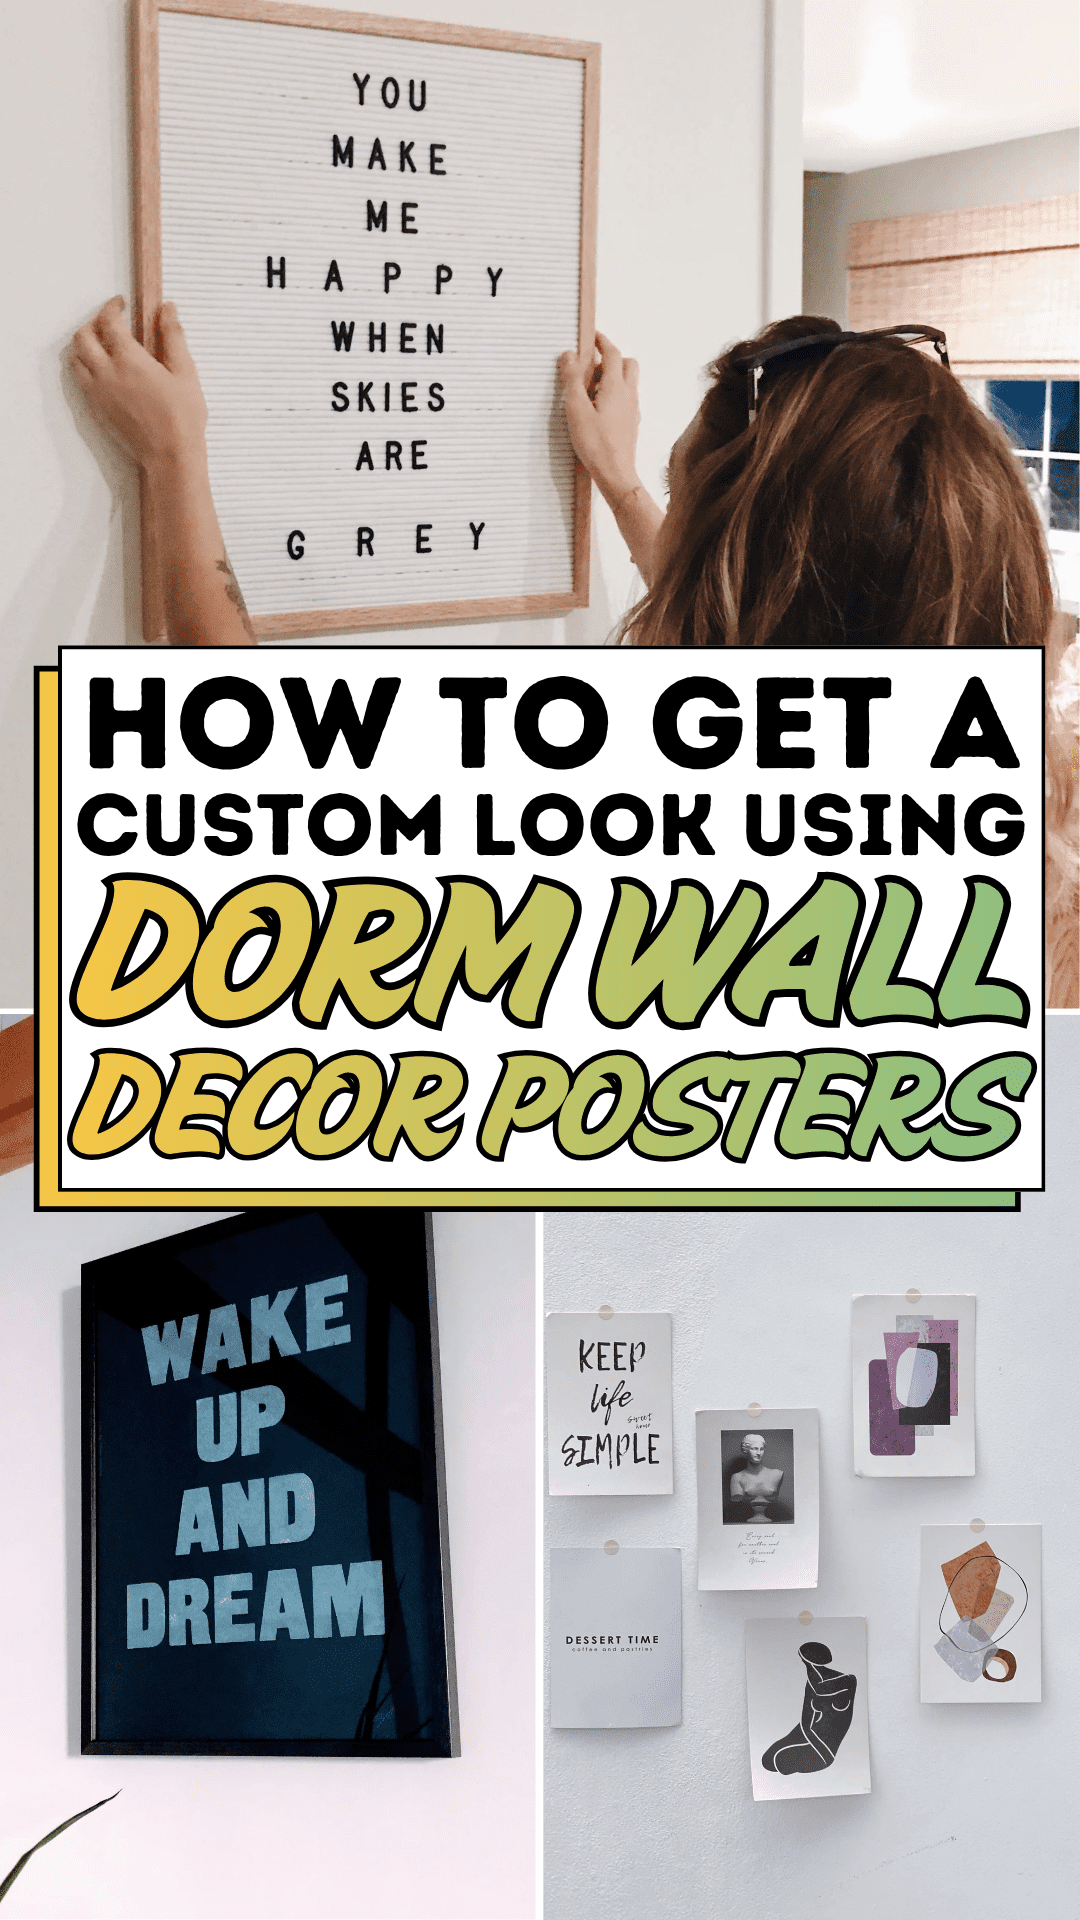
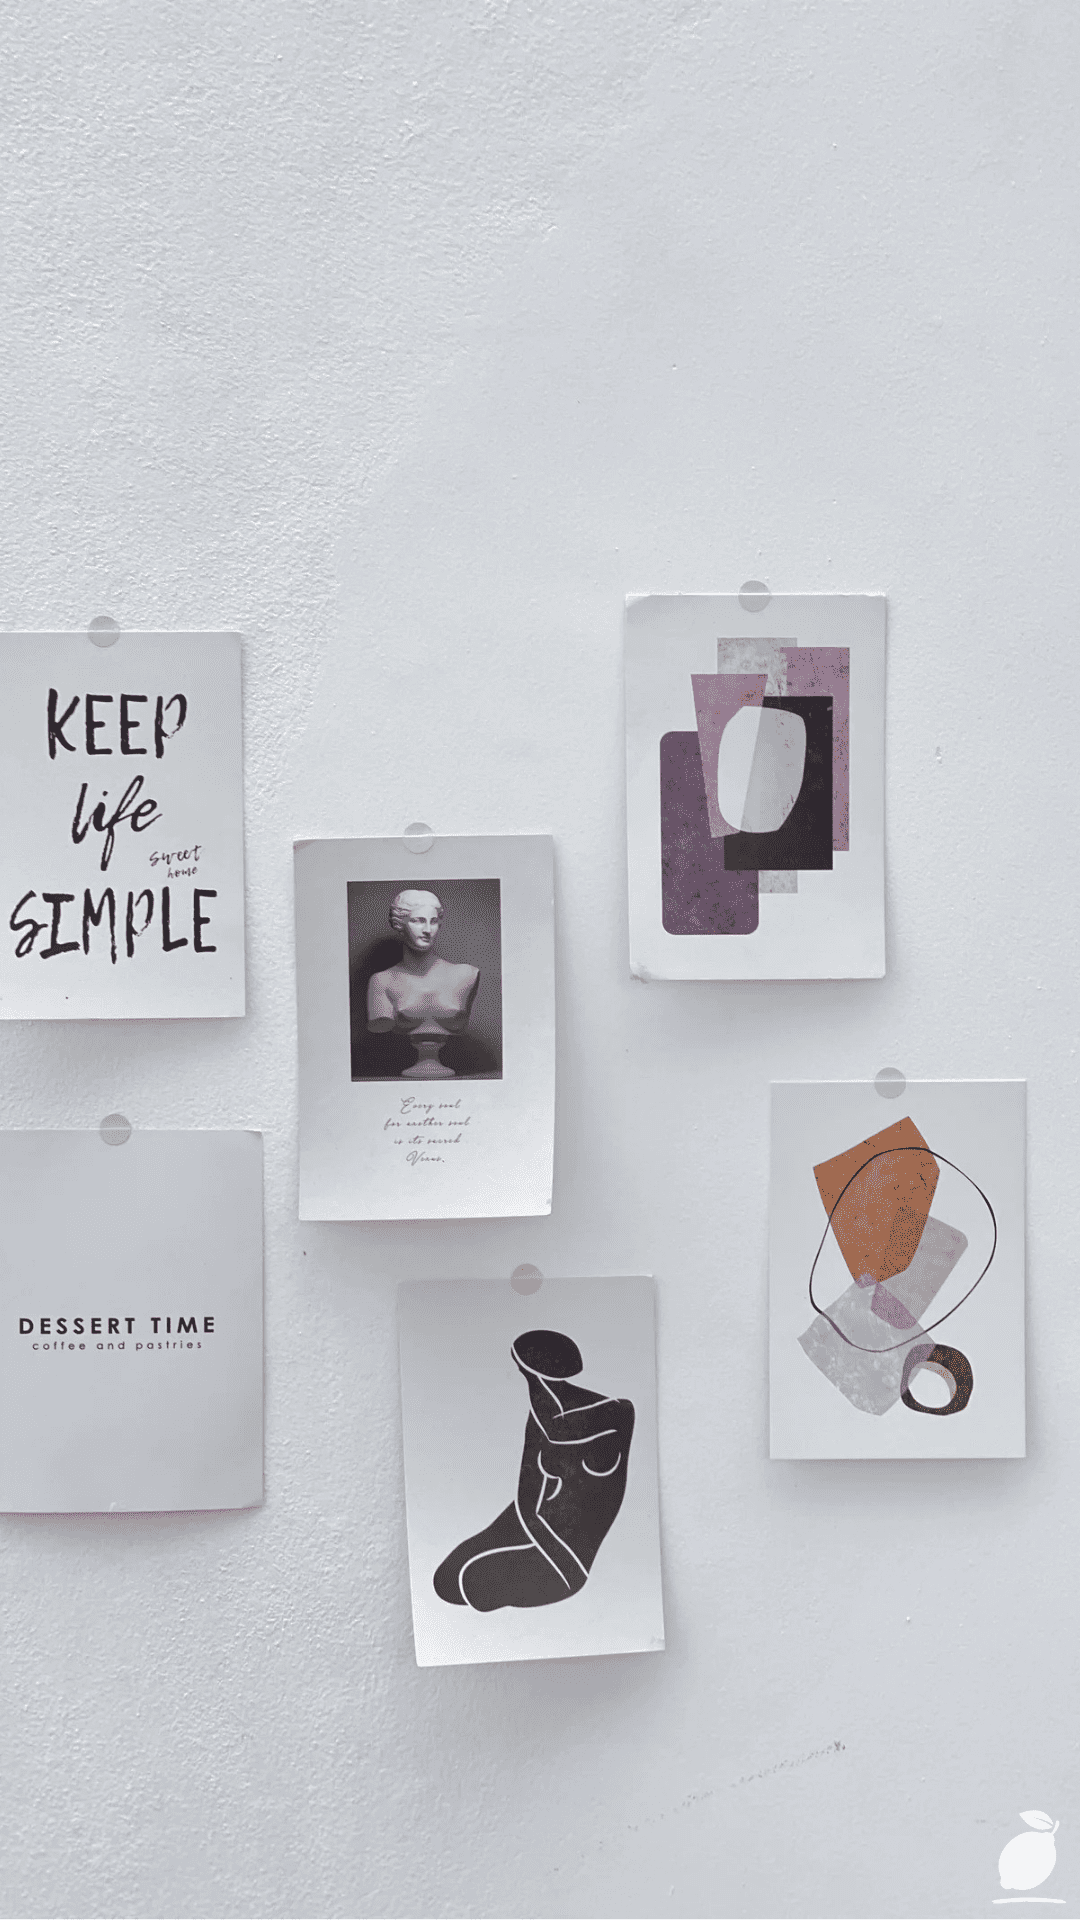
The wall in the image above is the comfortable middle ground I had been missing. Five white cards, all the same size, mounted with clear tape in an asymmetrical arrangement on a plain white wall, a handwritten “KEEP life SIMPLE” card, a “DESSERT TIME” card, a black and white classical bust photograph, a geometric purple and lavender abstract design, and a black and orange curved abstract illustration. Nothing about this dorm wall decor arrangement requires expensive framing, a complicated layout plan, or content that has to mean something profound. It requires five pieces of cardstock, a printer or a marker, some clear tape, and the willingness to let an arrangement be asymmetrical and slightly playful rather than perfectly matched. The dorm wall decor in the image works because it commits to a simple system of same-size cards, evenly spaced, varied content, rather than attempting an elaborate gallery wall with mismatched frames and complex hanging hardware that a dorm room’s cinder block walls and no-nail policies usually cannot accommodate anyway.
The dorm wall decor ideas in this guide follow the image’s exact system: uniform card size, simple removable mounting, varied content that ranges from text to photography to abstract art, arranged with intentional asymmetry rather than a rigid grid. This guide covers everything from sourcing or printing the content, to the specific mounting methods that work on dorm walls without violating housing deposit policies to the layout technique that produces the image’s professional, gallery-quality asymmetry rather than a random scatter of cards. These dorm wall decor ideas are achievable in a single afternoon, cost under $30 in total materials, and produce a wall that looks specifically, intentionally yours.
The Dorm Wall Decor Blueprint

Step 1: Choose the Dorm Wall Decor Card System and Plan the Content Mix
The image’s dorm wall decor system is built on a specific structural decision that makes the whole arrangement work: every card is the same size. This uniformity is the dorm wall decor idea that most efficiently produces a professional, gallery-quality result without requiring any framing or matting. When every element shares the same dimensions, the eye reads the arrangement as a designed system rather than a haphazard collection, even when the spacing between cards is asymmetrical, and the content varies dramatically from card to card.
Choose a single card size for your dorm wall decor project, A5 (14.8cm × 21cm) or a square 15cm × 15cm format, which are the most versatile sizes for a five-to-nine card dorm wall decor arrangement, large enough to be legible and visually present on the wall, small enough that multiple cards fit comfortably within a standard dorm room’s available wall space. Standard cardstock at 250gsm to 300gsm weight provides the rigidity that keeps cards flat against the wall without curling, which is the specific quality that makes the image’s cards read as crisp and intentional rather than slightly warped and casual.
Plan the content mix before printing or creating any individual card: the image’s five-card dorm wall decor arrangement includes one handwritten-style text card, one second text card in a different tone, one photographic image, one geometric abstract design, and one illustrative abstract design, with five distinct content types that together create visual variety without any single card competing directly with another for the same visual role. For your own dorm wall decor content mix, aim for this same diversity: at least one text-based card (a quote, a single word, a phrase that means something to you), at least one photographic or representational image, and at least one or two abstract or pattern-based designs that provide color and visual texture without representational content.
Step 2: Source or Create the Dorm Wall Decor Card Content
The text cards in the image “KEEP life SIMPLE” and “DESSERT TIME” demonstrate the most accessible dorm wall decor content category: a short phrase in a handwritten or hand-lettered style, printed or hand-drawn directly onto the card. This is the dorm wall decor content type that requires no design software and no specialized printing, a black marker or pen, a steady hand, and a phrase that means something to you (a favorite quote, an inside joke, a single evocative word), producing a card with genuine personal character.
For dorm wall decor card content that requires printing, free design tools (Canva is the most widely used, with a free tier sufficient for simple card design) provide templates for text cards, photo cards, and abstract pattern cards at the exact dimensions chosen in Step 1. The classical bust photograph in the image’s center card is the dorm wall decor content type most easily sourced from free stock photography sites (Unsplash, Pexels) search for “classical sculpture,” “marble bust,” or similar terms to find black and white photography appropriate to this card’s specific aesthetic role in the arrangement.
For the abstract geometric cards, the purple and lavender rectangles and the black and orange curved shapes in the image, Canva’s shape and design tools allow simple abstract compositions to be built in minutes using basic rectangle, circle, and freeform shape tools in a chosen color palette. Alternatively, source abstract pattern designs from free design resource sites, or create genuinely hand-made abstract cards using cut colored paper, paint, or marker on the same cardstock used for the other dorm wall decor cards. Hand-made abstract elements add a layer of authenticity to the dorm wall decor arrangement that printed content alone does not provide.
Step 3: Print and Prepare the Dorm Wall Decor Cards
Print all dorm wall decor cards at a consistent quality level and on consistent cardstock, mixing printer paper weights or finishes across the cards in a single arrangement (some glossy, some matte, some on standard printer paper) undermines the unified, designed quality that the image’s arrangement achieves through its material consistency. Use a single cardstock weight and finish for the entire dorm wall decor set, whether that is a matte 250gsm cardstock (the most versatile choice, working equally well for text, photographic, and abstract content) or a specific finish chosen to match a particular aesthetic direction.
For dorm wall decor cards printed at a campus library, copy center, or home printer, trim all cards to the same final dimension using a paper cutter rather than scissors a paper cutter (often available free at campus libraries and copy centers) produces perfectly straight, consistent edges across all cards, which is essential to the uniform-size system that makes the image’s dorm wall decor arrangement read as professionally designed. Hand-cut cards with scissors, even carefully done, typically show slight dimensional inconsistency that becomes visible once the cards are mounted and compared side by side on the wall.
For handwritten or hand-illustrated dorm wall decor cards, complete the lettering or drawing before cutting the card to its final size. If working freehand, this sequence allows for adjustment of the composition within the larger sheet before the final crop, producing better-centered final cards than attempting to write or draw within an already-cut small card surface, where there is no margin for error.
Step 4: Plan the Dorm Wall Decor Layout Before Mounting Any Cards
The asymmetrical arrangement in the image’s dorm wall decor, with five same-size cards positioned with varying spacing rather than in a rigid grid, is the layout decision that produces the arrangement’s specific gallery-wall quality. Asymmetrical layouts read as more contemporary, more personally curated, and more visually dynamic than perfectly symmetrical grid arrangements, but they require more careful planning than a grid does, because there is no formula of equal measurements to fall back on; each card’s position must be assessed visually rather than calculated mathematically.
For dorm wall decor layout planning, lay all finished cards on the floor in the planned arrangement before mounting any of them to the wall. Step back and assess the layout from a standing position, checking that the overall arrangement reads as a balanced cluster; no single corner of the layout should feel significantly heavier or lighter than the others, and the spacing between cards should feel similar in scale, even though it does not need to be mathematically identical. Photograph the floor layout from directly above using a phone camera, which provides the clearest assessment of the overall composition’s balance before any commitment is made to the wall.
Use painter’s tape to mark the planned position of each card’s corners directly on the wall before mounting any actual cards. This allows the full dorm wall decor layout to be assessed in its actual wall position, adjusted if needed, and confirmed before any card is permanently mounted. This planning step is the dorm wall decor technique that most prevents the need to remove and reposition mounted cards, which risks wall damage and card damage in a dorm room environment where mounting and remounting need to be minimized.
Step 5: Mount the Dorm Wall Decor Cards Using Dorm-Safe Methods
The clear tape mounting method visible in the image is among the simplest dorm wall decor mounting approaches, but most dorm housing policies prohibit standard tape on painted walls due to the paint damage that tape removal can cause. For dorm wall decor mounting that satisfies most housing policy requirements while replicating the image’s clean, minimal mounting aesthetic, use clear poster putty (also called museum putty or mounting putty) at each card’s four corners poster putty holds securely, removes cleanly without paint damage on most painted surfaces, and is visually similar to the image’s tape corners when applied neatly and in small, consistent quantities.
For dorm rooms with cinder block walls (extremely common in dormitory construction) where adhesive products do not bond reliably to the textured block surface, Command strips designed specifically for cinder block or rough surfaces provide the most reliable dorm wall decor mounting solution. These products use a stronger adhesive formulation than standard Command strips and are specifically marketed for dormitory and cinder block applications. Alternatively, a length of removable adhesive hook strip mounted at the top of the dorm wall decor arrangement, with a length of fishing line or clear thread strung horizontally, allows cards to be clipped to the line with small binder clips or clothespins, a mounting method that requires only a single point of wall adhesion for an entire row or cluster of dorm wall decor cards.
Apply the chosen mounting method at consistent positions on the back of each card, typically all four corners for poster putty or strip methods, to ensure that the cards sit flat against the wall surface without curling or peeling at the edges, which is the specific quality failure that makes a dorm wall decor arrangement look careless rather than considered within the first week of being mounted.
Step 6: Maintain and Update the Dorm Wall Decor Arrangement Through the Semester
The dorm wall decor system demonstrated in the image has a uniform card size, simple mounting, varied content, and has a significant advantage over more elaborate or permanent dorm decoration approaches: individual cards can be swapped, added, or removed throughout the semester without disrupting the overall system. A card that no longer feels relevant, a photograph that has been replaced by a new favorite, or simply the desire to refresh the dorm wall decor arrangement partway through the semester can be addressed by replacing a single card rather than redesigning the entire wall.
For dorm wall decor maintenance, keep a small supply of blank cardstock cut to the established size on hand throughout the semester, allowing new cards to be created and added to the existing arrangement as needed a ticket stub from a concert, a photograph from a weekend trip, a new quote that resonates can each become a new card added to the existing dorm wall decor system without requiring any new planning or layout work, since the established card size and general arrangement logic already accommodates new additions.
Expert Secrets for Success
Pro-Tips for a Better Result
Use a single consistent font or handwriting style across all text-based dorm wall decor cards. The image’s two text cards, “KEEP life SIMPLE” and “DESSERT TIME,” share a consistent handwritten-style typeface that creates visual continuity between them despite their different content and sentiment. Dorm wall decor text cards using multiple inconsistent fonts or handwriting styles read as visually disorganized even within an otherwise cohesive arrangement. Choose one font (if printing) or develop one consistent hand-lettering style (if writing by hand) and use it across every text card in the dorm wall decor set.
Limit the dorm wall decor color palette to two or three colors plus black, white, and gray. The image’s color content, the purple and lavender geometric card, and the orange accents in the abstract illustration are limited to a tight palette that allows the black-and-white and text cards to anchor the arrangement without color competition. Dorm wall decor arrangements that introduce many different colors across multiple cards read as visually chaotic; arrangements that limit color to two or three accent tones against a neutral (black, white, gray) majority read as intentionally curated.
Leave an equal margin space around the dorm wall decor arrangement’s outer edge. The image’s five-card cluster occupies a defined area of the wall with visible blank wall space surrounding the full arrangement. This negative space is as important to the composition as the cards themselves, framing the dorm wall decor arrangement and preventing it from reading as a wall that happens to have some cards on it rather than a deliberately composed display. Leave a minimum of 15cm to 20cm of blank wall space around the full perimeter of any dorm wall decor card cluster.
Take a reference photo of the finished dorm wall decor layout for easy reassembly if cards need to be removed for room inspections or move-out. Many dormitory housing agreements require periodic room inspections or end-of-semester move-out cleaning that necessitates removing all wall decorations. A clear reference photograph of the completed dorm wall decor arrangement, including measurements or notes on each card’s position, allows the exact layout to be reconstructed quickly after any required removal, preserving the planning work invested in the original layout.
Common Mistakes to Avoid
Don’t use standard masking tape, duct tape, or packing tape on dorm walls. These tape types frequently cause paint damage on removal, particularly on the painted cinder block or drywall surfaces common in dormitory construction, and most housing agreements specifically hold residents financially responsible for this damage at move-out. Use only products specifically designed for damage-free removal of poster putty, Command strips rated for the specific wall surface, or washi tape (which has a genuinely low-tack adhesive, unlike most decorative tapes marketed similarly) for dorm wall decor mounting.
Don’t mix more than three distinct visual styles within a single dorm wall decor arrangement. A dorm wall decor cluster combining photorealistic photography, hand-drawn illustration, geometric abstraction, typography, and a fourth or fifth distinct visual style produces a result that reads as unplanned rather than intentionally eclectic. The image’s five cards span only three visual styles: text, photography, and abstract design, which is the upper limit for a cohesive small-scale dorm wall decor arrangement. Limit your own dorm wall decor content to two or three visual styles maximum.
Don’t position dorm wall decor cards in a perfectly symmetrical grid if attempting to replicate the image’s specific aesthetic. A symmetrical grid arrangement is a legitimate and simpler alternative to dorm wall decor layout, but it produces a fundamentally different visual effect from the image’s asymmetrical cluster, more formal, more orderly, less casually curated. If the asymmetrical gallery-wall aesthetic is the goal, commit fully to varied spacing and slightly offset positioning rather than producing a layout that is almost symmetrical but not quite, which reads as an error rather than a deliberate style choice.
Don’t overcrowd the dorm wall decor arrangement by adding cards until the wall feels full. The instinct to keep adding content to a dorm wall decor cluster until no blank wall space remains consistently undermines the negative-space quality that makes the image’s five-card arrangement feel composed rather than cluttered. Establish the planned number of cards before beginning the project (five to seven is the range that produces the image’s quality of considered restraint), and resist the temptation to exceed that planned quantity even if additional content ideas emerge during the project.
Why Dorm Wall Decor Matters

The dorm room is, for many students, the first living space that is entirely their own to decorate, the first opportunity to make a room reflect personal taste, personal history, and personal sense of humor without negotiating with parents, siblings, or roommates from a shared household. Dorm wall decor that genuinely reflects the person who lives in the room, rather than a generic poster or a Pinterest-board approximation of someone else’s aesthetic, contributes meaningfully to the psychological adjustment that the first months in a new living environment require, particularly for students living away from home for the first time.
Research in environmental psychology has identified personalization of living space as a significant factor in psychological adjustment to new environments, including the specific transition to college dormitory living: students who personalize their dorm rooms meaningfully through decoration, photography, and objects that reflect genuine identity rather than generic dorm-room defaults report faster psychological adjustment to the new environment, reduced homesickness symptoms, and stronger sense of belonging in their new living space than students whose rooms remain undecorated or decorated with purely generic elements. Dorm wall decor of the type this guide describes is not merely an aesthetic exercise it is a meaningful contributor to the psychological work of making a new, unfamiliar space feel genuinely like home.
Easy Peasy Life Matters is built on the conviction that every living space, regardless of its size, its temporary nature, or its budget constraints, deserves intentional decoration that reflects the specific person who lives in it and that dorm wall decor, executed with the simple system this guide provides, produces a wall of genuine personal character at minimal cost and within the practical constraints that dormitory living specifically imposes. The five-card arrangement in the image is proof that meaningful, beautiful dorm wall decor does not require an elaborate budget or professional design skill. It requires a system, some intention, and the willingness to let a wall be specifically, recognizably yours.
Frequently Asked Questions
What is the cheapest way to decorate a dorm wall?
The most cost-effective dorm wall decor approach follows the card system this guide describes: blank cardstock (available for $5 to $10 for a pack of 50 sheets), a black marker for hand-lettered text cards, free printable content from sites like Canva or Unsplash for any printed cards, and poster putty or Command strips for mounting ($5 to $10). A complete five-to-seven-card dorm wall decor arrangement is achievable for under $20 total, significantly less than purchased poster sets or framed prints, while producing a more personalized and more visually interesting result than mass-produced dorm decor products.
How do I hang dorm wall decor without damaging the walls?
The safest dorm wall decor mounting methods for avoiding wall damage are: poster putty (also called museum putty), applied in small, equal-sized balls at each card’s corners, which holds securely and removes without residue on most painted surfaces; Command strips specifically rated for the wall surface type (standard Command products for painted drywall, heavy-duty or cinder-block-rated versions for textured concrete block walls common in dormitories); and washi tape, which has a genuinely low-tack adhesive suitable for lightweight cardstock. Always test any new mounting product on an inconspicuous wall area before applying it to the full dorm wall decor arrangement, and check your specific housing agreement for any explicitly prohibited mounting methods before beginning the project.
How many pieces should I include in a dorm wall decor gallery arrangement?
For a dorm wall decor arrangement following the image’s asymmetrical cluster style, five to seven same-size cards produce the optimal balance of visual interest and compositional restraint, enough variety in content to create genuine visual interest, and few enough pieces that the arrangement does not become visually overwhelming or require an excessively large wall area. Smaller dorm wall decor arrangements of three cards can work for narrow wall sections or shared spaces with limited available wall area; larger arrangements of nine to twelve cards work well for a dedicated feature wall in a single room, but require more careful layout planning to maintain the same quality of intentional asymmetry that smaller arrangements achieve more easily.
Can I do dorm wall decor without a printer?
Yes — entirely hand-made dorm wall decor is a fully legitimate and often more personally meaningful approach than printed content. Hand-lettered text cards (using a black marker, a calligraphy pen, or simple handwriting), hand-drawn illustrations, painted abstract designs, and physical photographs (printed at a drugstore photo kiosk or pharmacy, which most students have easy access to without needing a home printer) can fill every card position in a dorm wall decor arrangement. Many successful dorm wall decor projects combine hand-made and printed elements, using whichever method is most accessible for each card’s specific content.
What content works best for dorm wall decor cards?
The most effective dorm wall decor content mix, following the image’s example, combines text (a meaningful quote, phrase, or single word that reflects personal sentiment or humor), photographic or representational imagery (a personal photograph, a favorite artwork reproduction, or a stock image that resonates aesthetically), and abstract or pattern-based design (geometric shapes, color-blocked compositions, or abstract illustration that adds visual texture and color without representational content). This three-category content mix, text, image, and abstract, provides the variety that makes a small dorm wall decor arrangement feel genuinely curated rather than repetitive, while keeping the overall planning and creation effort manageable for a single-afternoon project.