
The ceiling is the room’s most overlooked surface, the one that gets painted once and ignored for decades while every other surface in the same room is rethought, repainted, refurnished, and reconsidered in successive waves of home improvement energy. Most ceilings in contemporary homes are flat white plasterboard: functional, invisible, and entirely without character. They don’t do anything wrong, exactly. They simply do nothing at all, and in a room where significant thought has gone into the flooring, the furniture, the walls, and the lighting, a flat white ceiling starts to read less as a neutral background and more as an unfinished thought. The room feels like it maxed out at five surfaces and forgot the sixth.

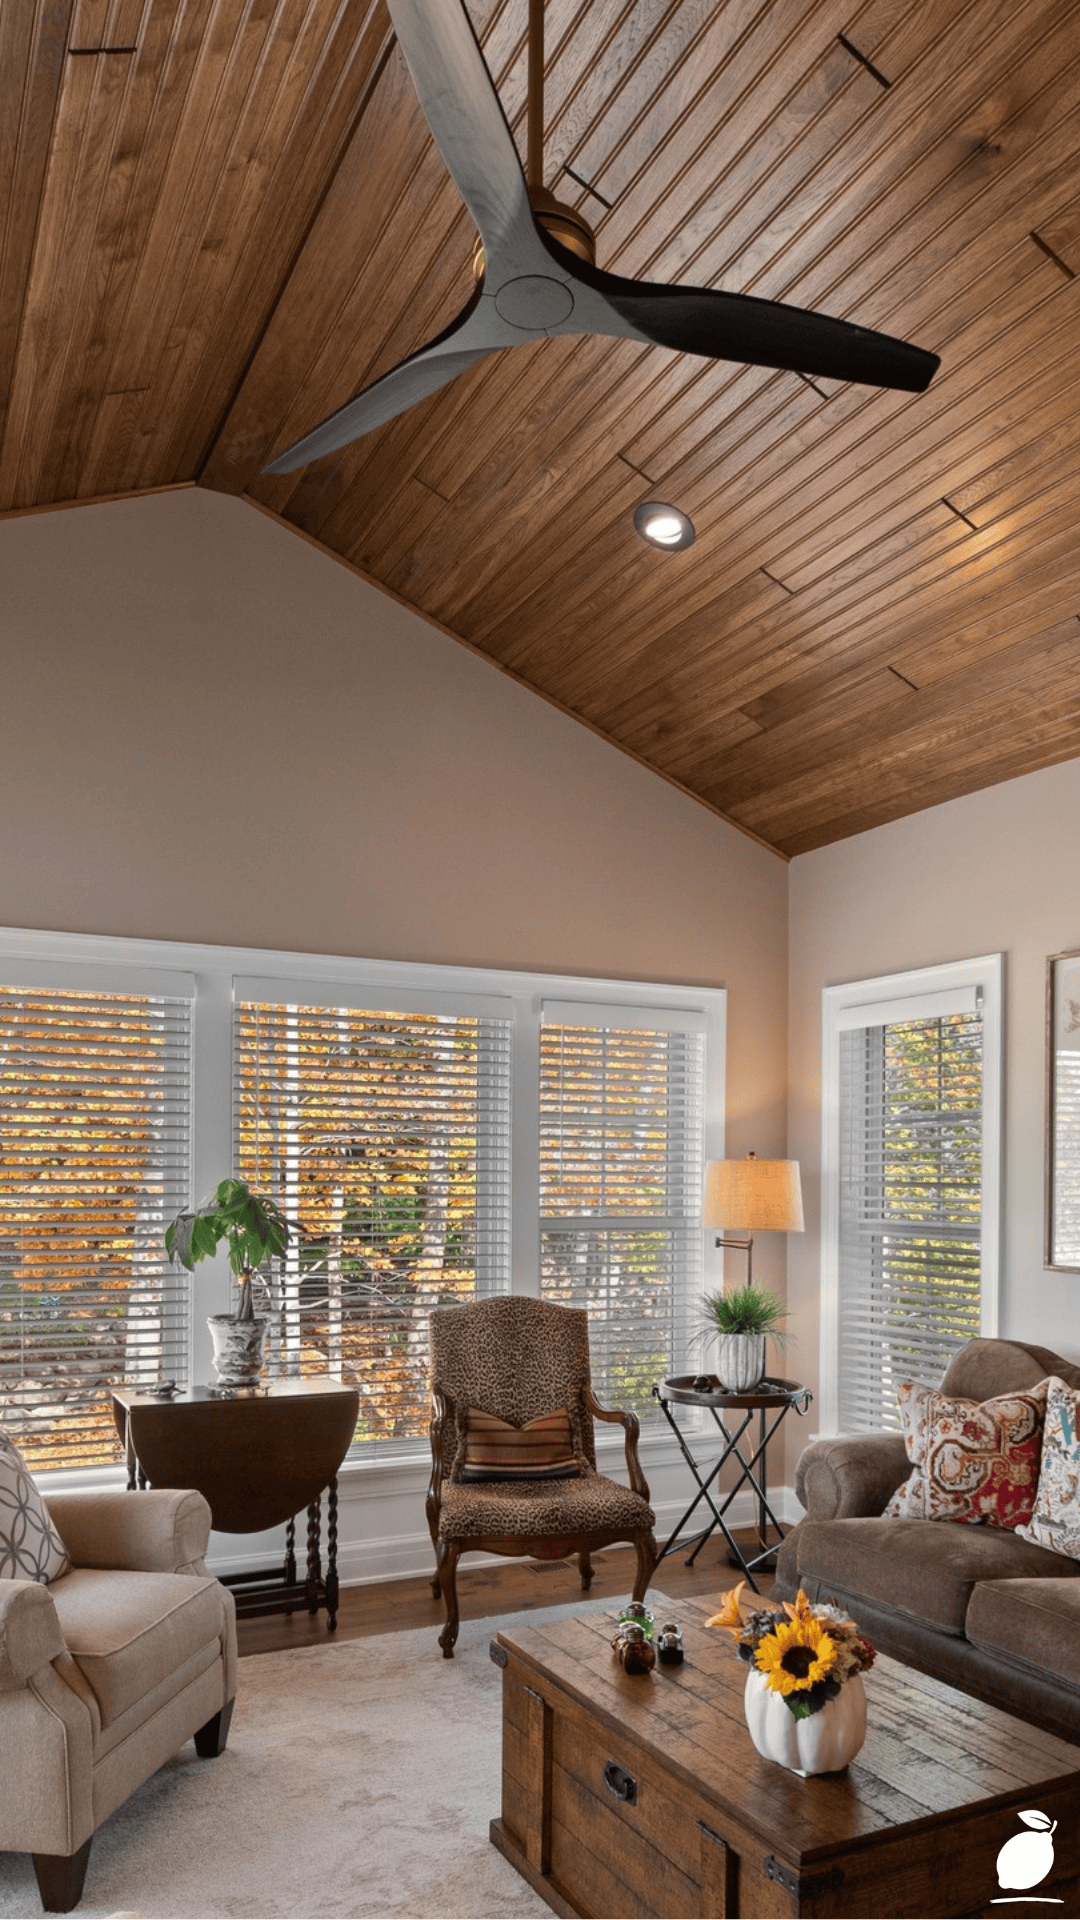
A wooden false ceiling, also called a drop ceiling, suspended ceiling, or false ceiling with timber elements, is the intervention that addresses this specifically and permanently. The living room in the image above demonstrates what a well-designed wooden false ceiling does to a room’s overall character: diagonal wooden planks in rich brown tones span the ceiling between exposed beams, creating a textural overhead plane that transforms the room from a collection of walls and furniture into a complete architectural environment. The contemporary chandelier with cascading glass elements drops from this wooden ceiling as naturally as it would from a traditional timber structure. The beige sectional, the light oak hardwood floor, the white walls everything in the room works in dialogue with the ceiling rather than being independent of it.
Wooden false fall ceiling designs have become one of the most-searched home renovation categories in 2026 precisely because they deliver the warmth, character, and architectural authority that flat-plaster ceilings cannot provide at a cost and complexity level that is genuinely within reach for homeowners willing to invest a focused weekend of skilled work. This guide covers every step of planning, designing, and installing a wooden false fall ceiling that achieves the quality of the room above, from the initial structural assessment through to the finishing details that make the difference between a timber ceiling that looks installed and one that looks inherent.
The Fall Ceiling Blueprint
Step 1: Assess the Existing Ceiling and Structural Conditions
Every wooden false fall ceiling project begins with a structural and dimensional assessment of the existing ceiling, not just a visual evaluation of what the ceiling currently looks like, but a technical understanding of what it is built from, what is concealed within it, and what constraints those conditions place on the false fall ceiling installation.
The most important structural question for any false fall ceiling project is ceiling height. A wooden false fall ceiling typically reduces the room’s clear height by 8 to 15cm (3 to 6 inches), depending on the configuration of the mounting system, the depth of the timber elements, and whether lighting is integrated into the false fall ceiling assembly. In rooms with standard 2.4m (8-foot) ceilings, a false fall ceiling that reduces height by 15cm produces a finished clear height of 2.25m, acceptable for most living spaces but potentially compressive in smaller rooms. In rooms with 2.7m (9-foot) or taller ceilings, like the room in the featured image, the wooden false fall ceiling has room to be visually generous without creating compression.
Measure the room’s clear ceiling height at a minimum of six points: the four corners and the two midpoints of the longest walls using a laser measure or a long tape. Ceilings that sag or vary in height across the room require a leveling step in the false fall ceiling installation that flat, consistent ceilings do not. Note the position of all ceiling-mounted fixtures, existing light fittings, smoke detectors, sprinkler heads, and HVAC diffusers that will need to be relocated or integrated into the false fall ceiling assembly.
Locate ceiling joists using a stud finder before marking any positions. All primary mounting hardware for the wooden false fall ceiling must be anchored into joists, not into plasterboard alone, which will not carry the sustained weight of a timber ceiling assembly. Photograph and sketch the joist layout to inform the false fall ceiling’s structural grid design.
Step 2: Design the Wooden False Fall Ceiling Layout
The design of the wooden false fall ceiling the layout of beams, planks, or panels that will form the ceiling’s visual pattern is the decision that most directly determines the finished room’s character and the installation’s structural logic. There are three primary layout approaches for wooden false fall ceiling designs, each producing a distinct aesthetic outcome.
Exposed beam with infill plank is the approach shown in the featured image: primary structural beams spanning the room in one direction (or exposed as design elements), with diagonal or directional timber planks infilling the spaces between them. This false fall ceiling layout produces the highest visual impact and the strongest architectural character; it references traditional timber-frame construction while delivering a contemporary aesthetic when executed in clean-lined, modern materials. The diagonal plank direction in the featured image adds dynamism to the ceiling plane that horizontal or square-grid layouts don’t produce.
Flat plank ceiling applies tongue-and-grooved or shiplap timber boards horizontally across the full ceiling surface, without structural beam elements, creating a uniform wood-clad ceiling that reads as more contemporary and less rustic than the exposed beam approach. This false fall ceiling layout works particularly well in rooms where the ceiling design should recede rather than dominate, where the furniture, art, and other room elements are the primary visual interest.
Box beam grid creates a coffered ceiling effect using hollow timber box beams arranged in a grid pattern on the false fall ceiling surface, with the recessed panels within the grid either left as plasterboard (painted to match or contrast) or infilled with additional timber planking. This false fall ceiling layout is the most formally architectural and the most demanding to execute with precision; the grid must be level, square, and consistently proportioned in a way that the more organic exposed beam layout doesn’t require.
Step 3: Select the Timber Species and Profile for the False Fall Ceiling
The timber species and profile selected for the wooden false fall ceiling determine the room’s tonal character and the material’s long-term performance as a ceiling element. Not all timber species perform equally in interior ceiling applications, and the selection should account for both the visual quality of the finished surface and the practical requirements of overhead installation.
For exposed beam wooden false fall ceiling designs, solid timber in species with strong, visible grain Douglas fir, oak, pine, and cedar produces the most visually compelling overhead plane. The featured image’s rich brown diagonal planks have the warm, open grain pattern characteristic of Douglas fir or warm-toned pine, a species choice that complements the room’s beige, white, and light oak palette without competing with the floor’s light tone.
For flat plank wooden false fall ceiling designs, tongue-and-groove pine or cedar boarding is the most widely available and most cost-effective material, and the consistent profile and factory-finished surface quality reduce the installation and finishing complexity significantly compared to solid structural timber.
For box beam wooden false fall ceiling designs, hollow lightweight MDF or engineered wood box beams are the most practical choice; they provide the visual depth and shadow lines of solid beams at a fraction of the weight, which reduces the structural load on the mounting system and makes the installation accessible without heavy lifting equipment.
Determine the timber profile, the width and depth dimension of each ceiling element in proportion to the room’s dimensions. A wide room benefits from wider spacing between false fall ceiling beams; a low-ceilinged room benefits from shallower beam profiles that reduce the visual weight overhead. As a general proportion guide: beam width should be approximately 1/20 to 1/25 of the room’s shorter span dimension.
Step 4: Install the Primary Mounting Structure
The primary mounting structure of the wooden false fall ceiling the framework that carries the weight of the timber elements and transfers that load to the ceiling joists is the most structurally critical installation stage and the one that determines the false fall ceiling’s long-term performance.
For an exposed beam wooden false fall ceiling, the primary beams are typically supported by timber hangers (metal joist hangers or threaded rod suspensions) secured to the ceiling joists above. Each primary beam requires a minimum of one hanger per 600mm (24 inches) of span, with additional hangers at each end. Use structural screws rated for the combined weight of the false fall ceiling assembly, typically M8 coach screws for timber-to-timber connections, or M10 threaded rod for suspended installations.
For flat plank wooden false fall ceiling designs, install a primary grid of ceiling battens (25mm x 50mm timber or equivalent metal furring channel) across the ceiling surface at 400mm centers, secured into the ceiling joists with appropriate fasteners. This batten grid is the substrate to which the tongue-and-groove planks are blind-nailed or clipped; it provides the level reference surface that makes the finished false fall ceiling appear flat and consistent regardless of any variation in the existing ceiling above it.
Level all primary mounting elements using a laser level before securing a false fall ceiling that is out of level is visible and cannot be corrected after the timber elements are installed without complete disassembly. The laser level is the most important tool in the wooden false fall ceiling installation and the one that the most consistent installation mistakes occur without.
Step 5: Install the Timber Elements
With the primary mounting structure installed and confirmed level, the timber installation stage can proceed. The sequence of timber installation differs between the three false fall ceiling layout types, but all share the principle of working from a fixed reference point outward rather than starting at a random position.
For exposed beam wooden false fall ceiling designs: install the primary beams first, confirming that each is level and at the correct position before proceeding to the next. Install the infill planks between beams, working from one end of the room to the other, with consistent gaps or abutting joints depending on the design specification. The final plank in each section will require ripping to width on a table saw; measure and rip these pieces last.
For flat plank wooden false fall ceiling designs: begin at the room’s most visible wall (the wall first seen on entry) and work away from it, so that the inevitable narrow rip cut required at the room’s opposite end is the least visible element of the finished false fall ceiling. Blind-nail each board through its tongue at a 45-degree angle to the batten below; this secures the board without surface-visible fastener holes and allows the next board’s groove to cover the nail head.
For all wooden false fall ceiling types: leave an expansion gap of 3mm per metre of timber run at perimeters and at any point where the timber meets a dissimilar material. Timber expands and contracts with humidity changes, and a false fall ceiling installed without expansion allowance will develop buckling or gap opening as the material responds to seasonal moisture variation.
Step 6: Finish and Seal the Wooden False Fall Ceiling
The finishing applied to the wooden false fall ceiling determines its tonal character and its long-term maintenance requirements. The three most common finish approaches produce distinct results.
A natural clear finish a penetrating oil, hard wax oil, or clear polyurethane applied to the raw timber preserves and enhances the wood’s natural grain color. The featured image’s warm brown ceiling tones are consistent with a natural clear finish on a warm-toned species, allowing the wood’s inherent character to provide the ceiling’s visual richness.
Stained finish: an oil-based or water-based wood stain applied before sealing allows the false fall ceiling to be shifted toward any point in the brown spectrum: lighter for a Scandi-influenced look, darker for a more dramatic, lodge-like quality. Apply stain with a cloth or brush, wiping excess before it sets, to prevent blotchy absorption that is particularly visible on pine.
White-washed or limed finish: a diluted white paint or liming wax worked into the grain and wiped back to reveal the underlying grain character produces the Hamptons or coastal farmhouse false fall ceiling quality that has become increasingly prevalent in contemporary interior design. This finish suits the featured room’s palette of whites, beiges, and light tones and would produce a ceiling that reads as slightly lighter and airier than the natural clear finish shown.
Expert Secrets for Success

Pro-Tips for a Better Result
Pre-finish all timber before installation, not after. Applying finish to timber elements before they are installed on the ceiling is significantly more efficient and produces more even, complete coverage than finishing in place, where overhead application produces fatigue, drips, and difficult-to-reach edges between adjacent pieces. Pre-finish all planks and beams to their final appearance on sawhorses at a comfortable working height, allow to cure completely, and then install. Touch up only the joints and cut ends where finishing was disturbed during installation.
Design the false fall ceiling’s lighting integration before installation begins. The wooden false fall ceiling in the featured image’s chandelier mounting is integrated into the ceiling structure, not added after the mounting point is planned as part of the ceiling’s structural design rather than as a retrofit. Plan all ceiling-mounted lighting, recessed fixtures, or pendant drop locations before installing the primary mounting structure, and run the electrical conduit within the false fall ceiling void before closing it with timber elements.
Use a chalk line to establish the primary beam positions before cutting any timber. The visual quality of a wooden false fall ceiling depends significantly on the accuracy and consistency of beam spacing across the ceiling plane. Snap chalk lines for every primary beam position after confirming the layout is level and evenly spaced. These lines provide the installation reference that prevents cumulative spacing error across the full ceiling run.
Acclimate all timber in the installation room for a minimum of one week before installation. Timber that is installed without acclimation to the room’s specific temperature and humidity conditions will expand, contract, or warp after installation as it equilibrates to its new environment. Stack all false fall ceiling timber loosely in the room where it will be installed, allowing air to circulate between pieces for a minimum of seven days before beginning any cutting or fitting.
Common Mistakes to Avoid
Don’t attach the false fall ceiling mounting to plasterboard without joist anchoring. Plasterboard has no structural capacity to carry the sustained load of a wooden false fall ceiling. Every primary mounting fastener must penetrate through the plasterboard and into the timber joist to a minimum 50mm penetration into the joist. Fasteners that miss the joist and terminate in plasterboard will pull out under load, potentially causing partial collapse of the false fall ceiling assembly.
Don’t install a wooden false fall ceiling before addressing any existing moisture issues in the ceiling void. Moisture trapped in the ceiling void above a wooden false fall ceiling from a roof leak, inadequate insulation, or condensation from a bathroom above will cause the timber to swell, stain, and eventually rot within the false fall ceiling, requiring complete removal and reinstallation. Inspect and resolve all moisture sources before closing the ceiling void with timber elements.
Don’t underestimate the weight of the false fall ceiling assembly per square metre. A solid timber wooden false fall ceiling in 25mm pine planking weighs approximately 12 to 15kg per square metre, a significant load on the mounting system and the ceiling joists above. Calculate the total assembled weight of the false fall ceiling before specifying mounting hardware, and consult a structural engineer if the calculation reveals a total load above the ceiling joists’ rated capacity. This calculation is especially important in older homes where ceiling joist sizing may not meet contemporary load standards.
Don’t skip the expansion gap allowance at the false fall ceiling perimeter. A wooden false fall ceiling installed without expansion allowance at walls and perimeters will develop visible buckling or joint opening as the timber responds to seasonal humidity changes, typically in late winter when heating reduces indoor humidity significantly. The 3mm per metre rule produces gaps that are concealed by the ceiling’s cornice or edge trim during installation and are invisible in the finished room.
Why Fall Ceiling Matters
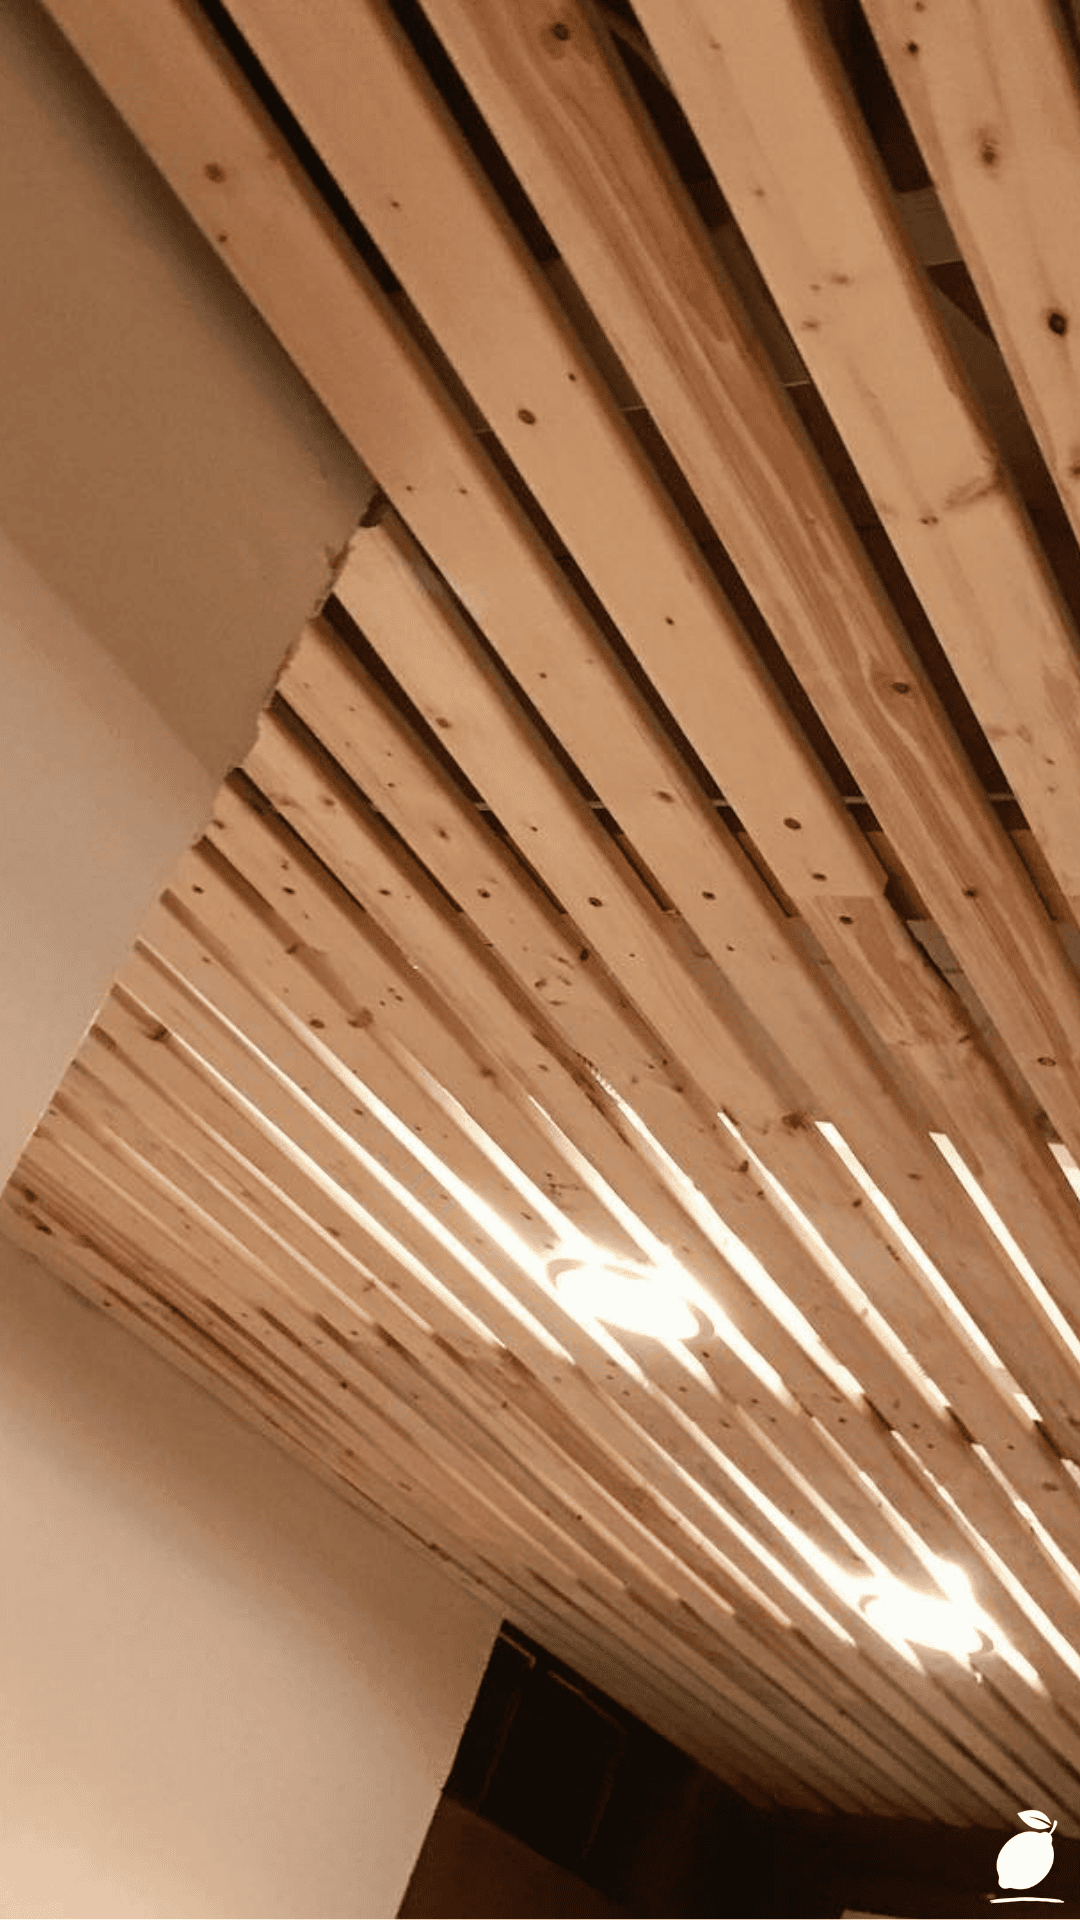
The ceiling is the surface that defines a room’s vertical scale, the overhead plane that the brain uses to calibrate the sense of enclosure, intimacy, and spatial character. A flat white ceiling communicates one thing: maximum height, minimum character. A wooden false fall ceiling communicates something entirely different: warmth, craft, the specific quality of a space that was made with intention rather than built to minimum specification. Research in environmental aesthetics consistently identifies textural overhead surfaces, particularly warm-toned timber, as among the most significant contributors to a room’s perceived comfort and the occupants’ sense of being in a well-considered environment.
For families, the living room’s ceiling is the surface that children look at during the countless hours spent lying on the floor, on the sofa, in the specifically horizontal relationship with domestic space that childhood produces more freely than adult life allows. A wooden false fall ceiling is, in this context, not simply an architectural feature. It is part of the visual environment that children grow up inside, that shapes their implicit understanding of what a well-made room looks and feels like, that becomes the unconscious standard against which they assess every room they occupy in adult life. The investment in a wooden false fall ceiling is an investment in the quality of the sensory environment that a family inhabits daily.
Easy Peasy Life Matters is built on the conviction that the home’s most permanent surfaces deserve the most intentional treatment and the ceiling, as the only surface that is visible from every position in a room, is the most permanent of all. A wooden false fall ceiling installed correctly and finished with care is a feature that improves the room for the entire life of the home. It doesn’t fade with the season. It doesn’t go out of style in the way that paint colors and furniture trends do. It simply becomes part of what the room is: warm overhead timber, the specific richness of grain catching afternoon light, the quality that makes visitors look up when they enter and understand, without needing to say it, that this room was built with care.
Frequently Asked Questions
How much does a wooden false fall ceiling cost to install?
The cost of a wooden false fall ceiling installation depends on the room size, timber species, and whether installation is DIY or contractor-executed. DIY flat plank pine installations typically cost $15 to $35 per square metre in materials (timber, mounting hardware, finish). Professional installation adds $25 to $60 per square metre in labour, producing a typical total cost of $40 to $95 per square metre. Exposed beam wooden false fall ceiling designs with premium hardwood species and integrated lighting can reach $120 to $200 per square metre professionally installed. A living room of 30 square metres budgeted at $70 per square metre produces a reasonable total estimate of $2,100 for a quality mid-range wooden false fall ceiling.
How much height does a wooden false fall ceiling remove from the room?
A standard wooden false fall ceiling installation removes between 8 and 20cm of ceiling height depending on the configuration. Flat plank installations on battens remove the least, typically 8 to 10cm. Exposed beam installations with structural hanging systems remove 12 to 15cm. Box beam coffered ceiling designs remove 15 to 20cm. Lighting integration within the false fall ceiling void may require additional depth depending on the fixture type. Rooms with ceiling heights below 2.5m should plan the wooden false fall ceiling carefully to ensure the finished clear height remains comfortable; rooms with 2.7m or higher ceilings accommodate all false fall ceiling configurations without perceptible compression.
Can a wooden false fall ceiling be installed over an existing plasterboard ceiling?
Yes, and this is the most common installation scenario. The wooden false fall ceiling mounting system is attached to the ceiling joists above the existing plasterboard, with the plasterboard remaining in place as the void’s upper surface. This approach avoids the cost and waste of plasterboard removal and provides a useful surface within the false fall ceiling void for running electrical conduit and other services. The plasterboard’s weight must be factored into the joist load calculation; the joists must carry both the existing plasterboard and the new wooden false fall ceiling assembly without exceeding their structural capacity.
What maintenance does a wooden false fall ceiling require?
A well-finished wooden false fall ceiling requires minimal ongoing maintenance. Annual dusting with a microfibre cloth or a vacuum with a brush attachment removes accumulated dust from the timber surface and from any beam joints without requiring contact that might disturb the finish. In rooms with high humidity variability (kitchens, bathrooms), re-application of the protective finish coat every three to five years maintains the timber’s surface integrity. Deep cleaning of a wooden false fall ceiling for smoke, cooking residue, or water staining is most effectively done with a diluted wood-safe cleaner applied with a damp cloth, followed by re-application of the appropriate finish. A high-quality initial finish application of penetrating oil or hard wax oil rather than a surface film finish is the most effective preparation for long-term low-maintenance performance.







