There is a moment in embroidered work that experienced stitchers quietly live for: the moment a flat line of thread becomes a petal. When the shading on a rose catches the light, and the fabric beneath it disappears, when the thing you’re making starts to look like the thing you imagined, the satisfaction is physical, immediate, and completely disproportionate to how it sounds when you describe it to someone who hasn’t felt it. Embroidered botanical work in particular, with its layered color, textured stitching, and capacity for near-photographic realism, produces that feeling regularly. It is one of the more quietly extraordinary things a person can learn to do with their hands.
What undermines the experience, consistently and predictably, is the workspace around it. The four thread spools that become fourteen, which become an uncategorized pile. The scissors migrated to the other room. The hoop balanced on a coffee mug because there was nowhere else to put it. The pattern reference is pinned somewhere, probably. A messy embroidered workspace isn’t just aesthetically displeasing; it actively erodes the meditative quality that makes embroidered work worth doing. Visual disorder fractures attention. Searching for a needle interrupts the flow. Starting a session in chaos means spending the first ten minutes managing it rather than stitching, and what should feel like a restoration of energy ends up feeling like one more task.
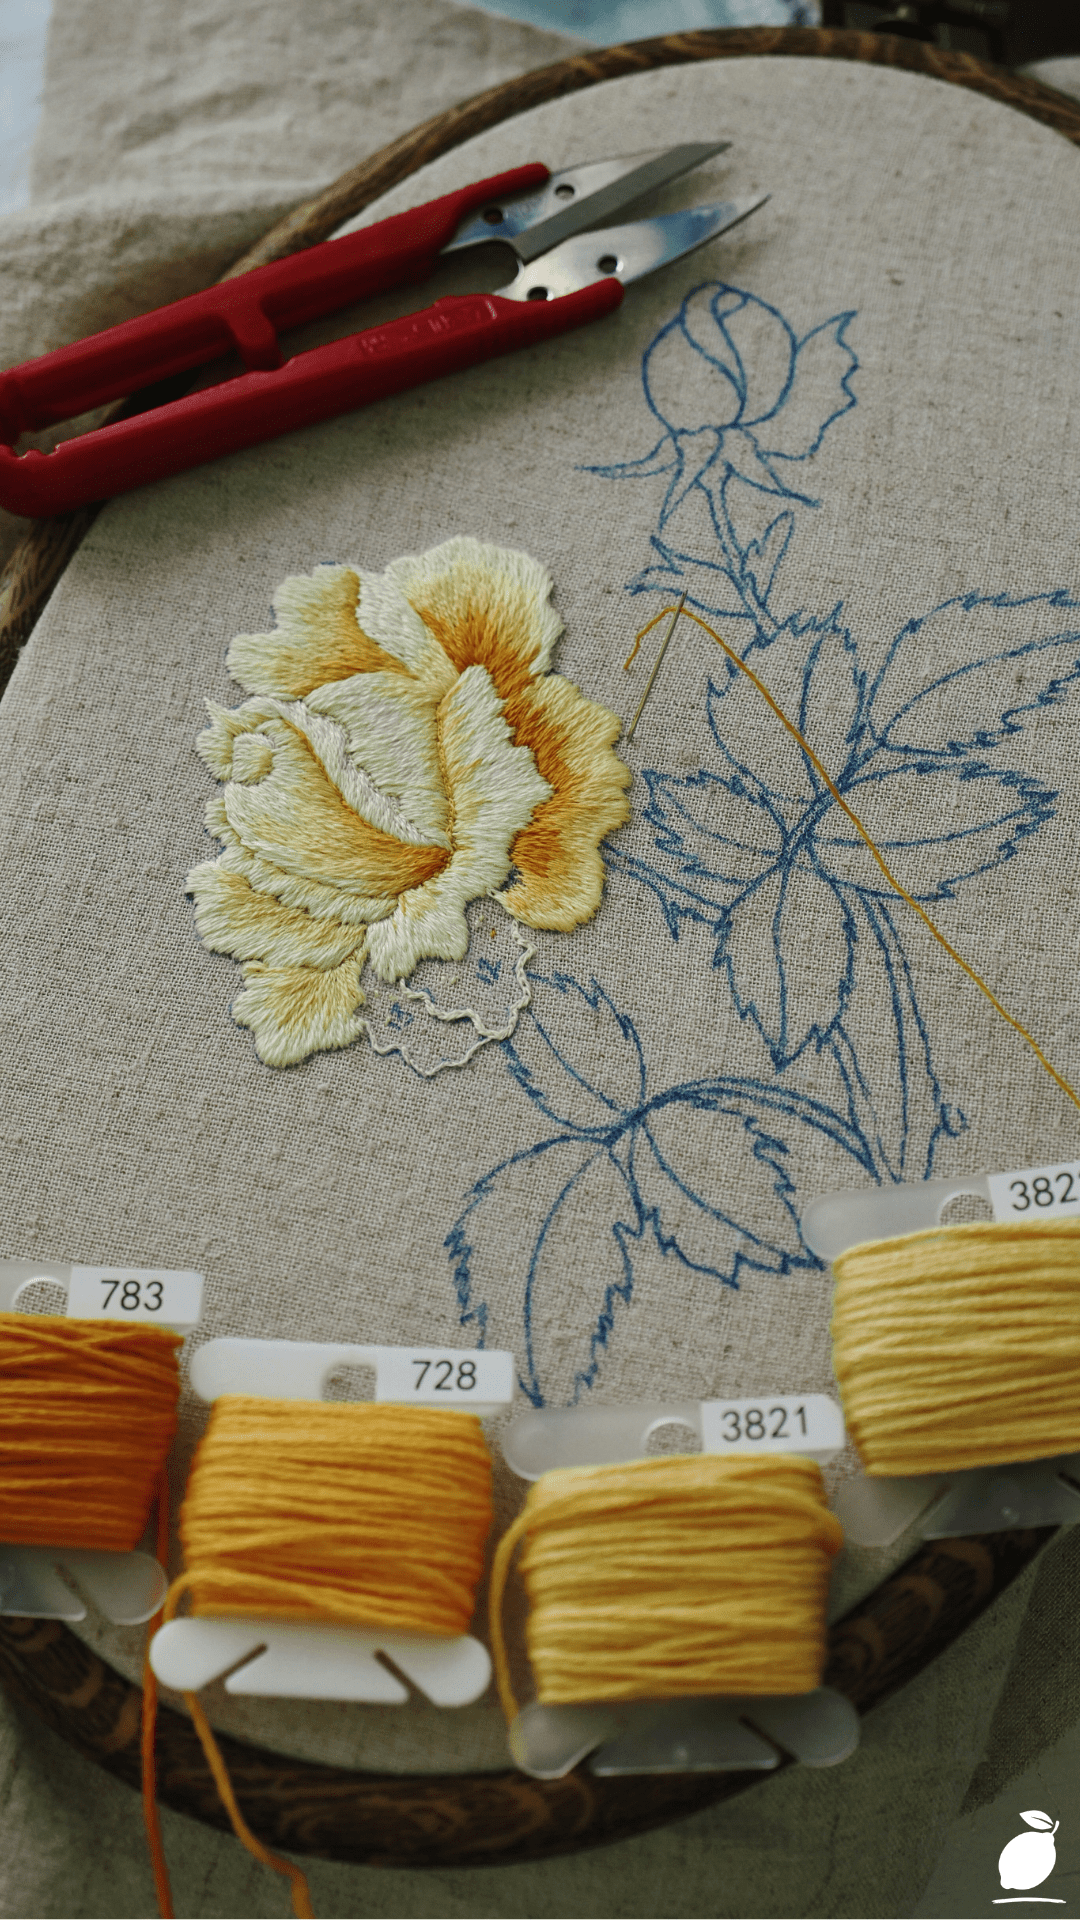
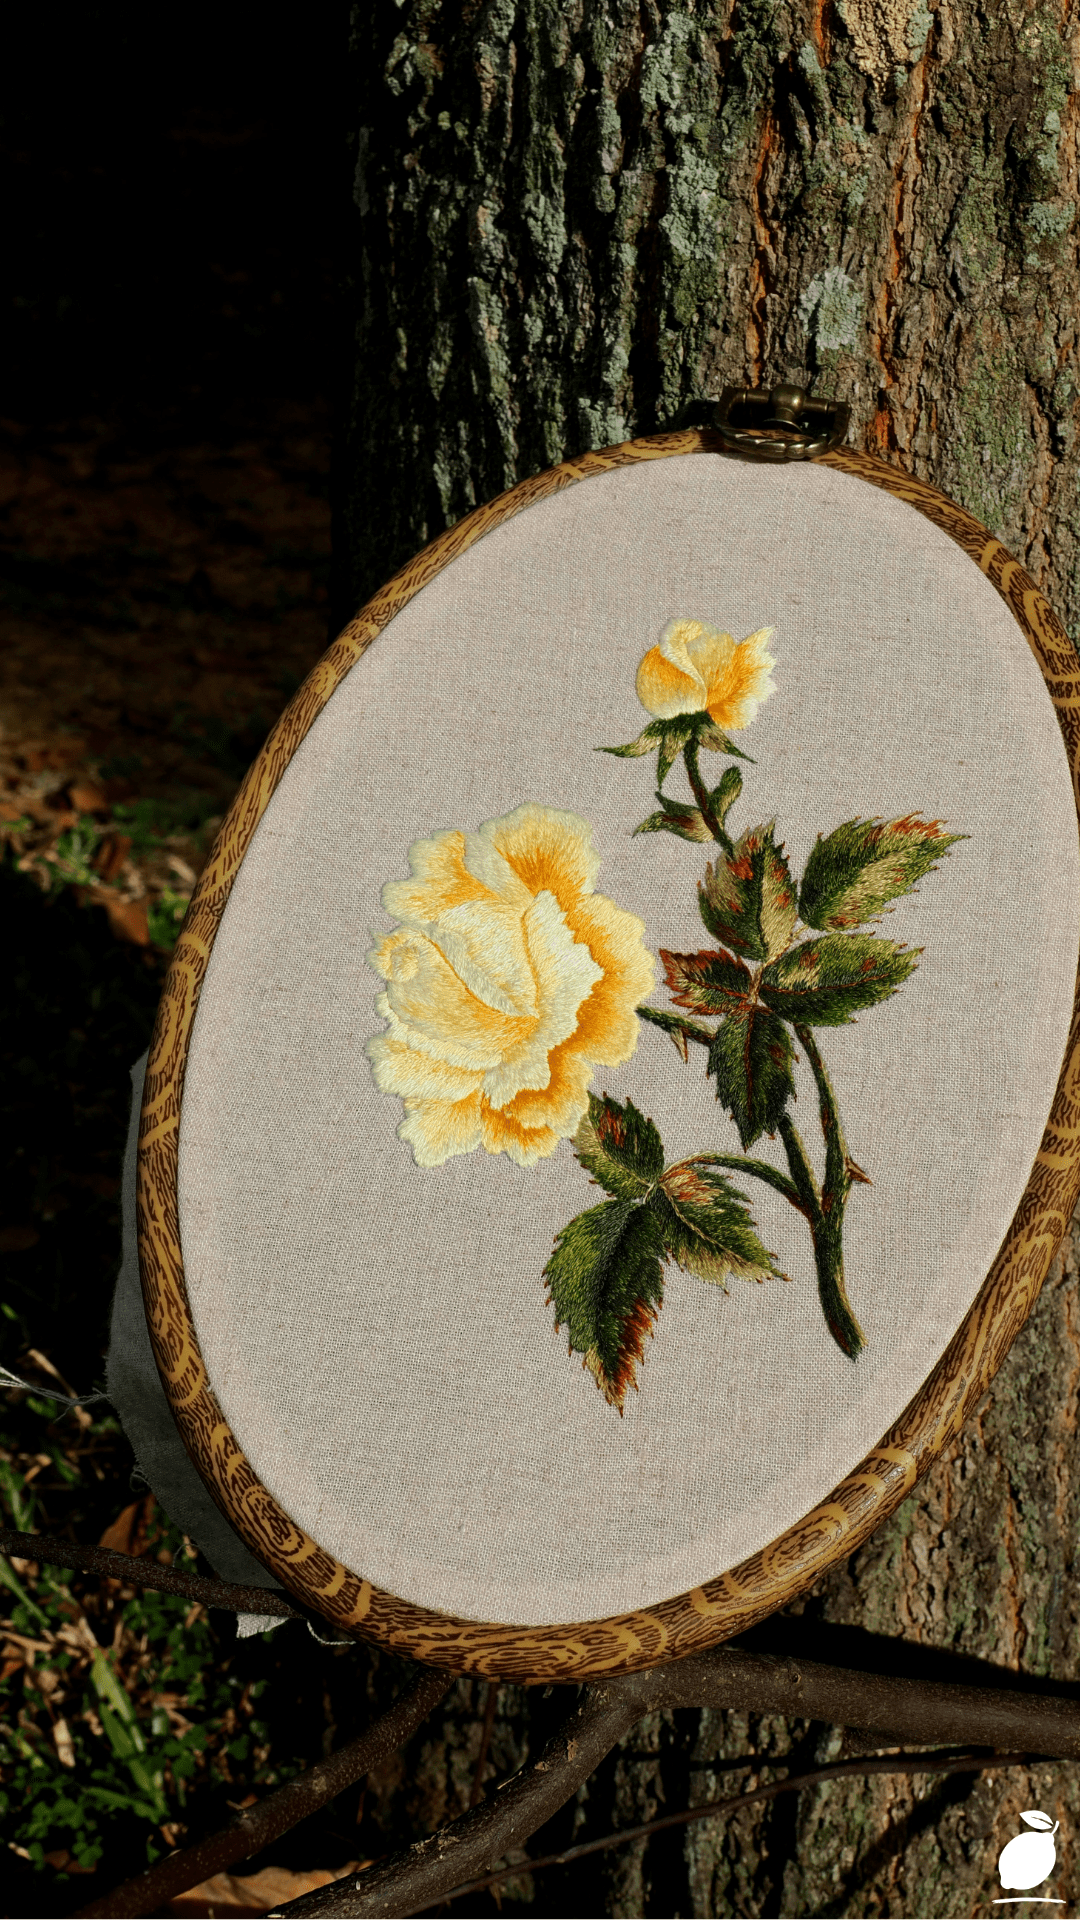
The embroidered rose in the image above tells the story of what a prepared, organized practice produces: a cream-petaled bloom with precise shading, mounted in a dark wooden hoop against linen so clean it looks like it was pressed this morning, four thread spools in harmonious yellow-orange gradients arranged below the work, red-handled scissors set deliberately to the side. Everything visible has a purpose. Nothing is incidental. That level of finish, in both the craft and the workspace, is the product of a system, not exceptional talent. This guide is for that system.
The Embroidered Setup

Step 1: Prep the Workspace
An embroidered piece begins before the first stitch with a workspace that has been prepared rather than inherited from whatever the day left behind. Three conditions must exist simultaneously: controlled lighting, a stable and uncluttered surface, and a material layout that puts every needed item within reach without creating visual noise.
For embroidered work specifically, lighting quality determines color accuracy. The yellow-to-orange thread gradient visible in the featured image DMC shades 783, 728, 3821, and 3822 is a closely related set of tones that read very differently under warm incandescent light versus daylight-spectrum illumination. Work in natural daylight where possible, positioned so the light falls across the fabric rather than directly overhead, which flattens texture and makes shading decisions harder. A daylight-rated LED craft lamp at a 45-degree angle to your working hand replicates this effect reliably when natural light is unavailable.
Surface preparation means the linen or fabric is already mounted and tensioned in the hoop before the session begins. Consistent hoop tension, even pressure across the entire fabric surface, neither loose enough to pucker nor so tight the weave distorts, is established at setup, not corrected mid-stitch. The embroidered pattern is transferred completely before threading begins: blue washable transfer lines are fully drawn, structural lines are confirmed as symmetrical, and any reference image is positioned where it can be seen without moving the working piece.
Materials for the session are laid out in the order they will be used. Thread spools or bobbins are arranged by the sequence in which their colors appear in the design. Needles in a magnetic holder at the hoop’s left edge. Scissors in a fixed position, in the same position every session, without variation. The principle is that the workspace should require zero decisions during a session. Every decision about where things are happens before the session starts.
Step 2: The Logic of the Craft
Embroidered botanical work has a structural logic that, followed correctly, produces the dimensional, layered quality visible in the featured rose. That logic operates across three axes: foundation before detail, dark before light, and stitch direction before stitch density.
Foundation before detail means the underlying structure of each embroidered element, the basic form, the stem lines, the leaf shapes drawn in blue transfer ink in the featured image, is honored as the scaffolding for everything that follows. Do not deviate from the transferred pattern to “improve” it mid-stitch. The pattern was drawn with the full design in mind; individual deviations that seem reasonable in isolation accumulate into asymmetry across the finished piece.
Dark before light applies directly to embroidered shading. In the cream and warm-toned rose above, the deeper shading at the petal bases and in the fold shadows is laid in first, then the mid-tones are built over and beside them, and the lightest highlights are placed last. This sequence mirrors how painters build oil glazes and produces the same dimensional effect in thread: depth first, luminosity last. Reversing the sequence, lightest tones first, makes subsequent shading harder to control and the final result flatter.
Stitch direction before stitch density means deciding which angle each row of stitches will run before considering how tightly to pack them. On a rose petal, stitches that run parallel to the petal’s natural curve produce a realistic, organic result. Stitches running at random angles across the same petal produce texture without form. Establish direction first on each new element. Fill with density second. This is the technical decision that most visibly separates embroidered work that reads as illustrative from embroidered work that reads as decorative.
Step 3: The Clean-Up System
The clean-up routine for an embroidered session is not the inverse of the setup; it is a parallel system of equal importance, and it takes approximately five minutes when performed at the end of every session rather than being deferred.
At session’s end: cut and secure any thread tails remaining on the reverse of the hoop. Tails left long catch on other threads during storage and create knots that require unpicking before the next session begins. Return each thread spool or bobbin to its numbered position in the organizer immediately, not after one more thing, immediately. This prevents the gradual drift of organization that begins with “I’ll put it back in a minute” and ends with fourteen spools in an undifferentiated pile by Thursday.
The embroidered piece in the hoop goes face-down on a clean surface or is covered with a square of white muslin. This protects the stitched surface from dust, pet hair, and the kind of accidental fabric contact that transfers lint onto cream-colored linen. Scissors return to their fixed position. The reference image or pattern goes back into its folder or sleeve.
Once a week, if the project is in active progress, check the hoop tension. Fabric relaxes over time, particularly in humid environments, and re-tensioning a slightly slack hoop takes thirty seconds and prevents the uneven surface tension that causes finished embroidered work to look puckered when removed from the frame.
The Secrets to Embroidered
Three Pro-Tips for a Professional Finish:
Grade your thread colors before you begin. Lay the full palette of thread colors for a project out in a line under a working light and physically sequence them from darkest to lightest. In an embroidered piece like the featured rose, moving from deep warm shadows through mid creams to pale highlights, identifying the precise tonal sequence before stitching begins prevents the mid-project realization that two shades are too similar to read as distinct layers. This two-minute step before the first stitch determines whether the finished embroidered piece has dimension or looks flat.
Use the waste knot method for clean thread starts. Rather than beginning with a knot on the reverse of the fabric, which creates a bump visible through fine linen, start each new thread with a waste knot placed on the front of the fabric several centimeters ahead of the stitching direction. As the embroidered line advances, it covers and anchors the thread tail on the reverse. The waste knot is then cut flush with the fabric surface. The result is a completely smooth reverse with no knot bulk distorting the front surface.
Finish one color section before moving to the next. The professional quality of the featured embroidered rose comes partly from the complete rendering of each tonal area before the adjacent one begins. Partial fills left open while another section is started create inconsistent tension across the embroidered area and make it harder to assess whether the shading reads correctly. Complete each section. Assess the result. Then move to the next color or area.
Three Mistakes That Ruin the Look:
Pulling the thread too tightly. Over-tensioned stitches distort the fabric weave, creating a gathered, puckered surface that no amount of final pressing can fully correct. Embroidered stitches should lie against the fabric with consistent, moderate tension, flat and flush, not pulled into the weave. Develop the habit of releasing each stitch to a consistent resistance rather than pulling to the thread’s full tension capacity.
Skipping the pattern transfer and freehanding directly. An embroidered botanical design that looks as symmetrical and clean as the featured rose was not freehand onto the fabric. The blue transfer lines visible in the lower portion of the image represent the complete structural plan of the design, established before a single embroidered stitch was placed. Freehanding invites asymmetry in designs where symmetry is the entire aesthetic. Transfer the pattern completely, every time.
Using the wrong fabric for the chosen design. An embroidered rose with fine shading and delicate petal rendering requires a fabric with a tight, smooth weave, natural linen, cotton, evenweave, or fine Aida that supports precise stitch placement. Loose-weave or textured fabrics distort fine stitches and make controlled shading technically difficult. Match fabric weight and weave to design complexity before purchasing materials, not after.
Why Creative Space Matters
Embroidered work occupies a specific and well-documented position in the landscape of restorative activities. The bilateral hand movement involved in needlework activates the same neurological calming response as other rhythmic bilateral activities, walking, swimming, and knitting, reducing activity in the amygdala and lowering the physiological markers of stress measurably within minutes of beginning. This is not anecdotal. Studies in occupational therapy have documented embroidered needlework specifically as an effective intervention for anxiety reduction, with repeated sessions producing cumulative benefit to baseline stress levels over time.
Easy Peasy Life Matters is built on the observation that how we structure the small environments of daily life determines, to a significant degree, how daily life feels. Your embroidered workspace is one of those environments, small in physical scale, large in psychological impact. The fifteen minutes spent preparing it properly before each session is one of the most direct investments you can make in your own mental clarity and creative wellbeing.
Frequently Asked Questions
How should I organize embroidery thread to keep it accessible and tangle-free?
Wind each thread color onto a labeled plastic or cardboard bobbin immediately after purchase, noting the brand name and color number on the bobbin label. Store bobbins in a compartmentalized organizer, a dedicated floss box, or a repurposed embroidery thread binder with clear sleeves, sorted by color family and then by shade number within each family.
What is the minimum tool set a beginner needs for embroidered botanical work?
The functional minimum for embroidered botanical work is deliberately concise: one dark wooden or metal embroidery hoop in a 20 to 25cm diameter, a size 7 or 8 crewel needle for standard six-strand floss work, a dedicated pair of fine-pointed embroidery scissors the red-handled scissors in our featured image are a classic choice for their precision a water-soluble transfer pen for pattern work, and a starter thread palette of eight to twelve colors chosen around a single color family.
How do I store an embroidered project safely between sessions without damaging the stitching?
Place the mounted hoop face down on a clean, flat surface. A folded piece of white cotton or muslin beneath it prevents the stitching from contact with table surfaces. Alternatively, cover the embroidered face with a square of muslin secured loosely around the hoop edges. Store the protected piece in a shallow box or dedicated project bag that prevents compression.