
The garage door goes up, you take one look, and immediately you consider that the car can live on the driveway for another season. It has been that way for longer than you care to admit. The bikes are wedged between a bag of old clothing destined for donation since spring, three boxes of things that did not make the last house move, a set of skis that have not seen a mountain in four years, and a rake you distinctly remember buying because you could not find the first one, which is in there too, somewhere at the back. The garage has become the room that the house cannot face. Everything that did not have a place found one here, by default, until the default became the norm.

What starts as a temporary overflow always compounds. A single weekend of deferred decisions becomes a year of accumulated avoidance, and then the garage stops being a space you manage and becomes a space you endure. The car stays outside. The tools you need for a Saturday project take thirty minutes to locate. The sporting equipment for a family trip is somewhere under something heavy, and locating it costs the easy morning energy that was supposed to make the trip enjoyable. The garage is not empty of function; it is full of friction. Every interaction with it extracts a small tax in time, frustration, and the background guilt of a space that clearly needs attention and keeps not getting it.
Planning a dedicated Garage Cleaning Day is the single most effective reset available to a household. The image of a garage wall where every item has been considered, ladders stored vertically and accessible, long-handled tools on a horizontal bar, sporting equipment mounted in sequence, shelving units with labeled containers holding the overflow, did not happen by accident. It happened because someone planned a day, worked through a sequence, and made intentional decisions about every single thing the garage contained. That result is replicable, repeatable, and closer than it looks. Here is the blueprint that makes it happen.
The Garage Cleaning Day Blueprint

A Garage Cleaning Day is a full-day project with a clear sequence. Treated as a single-focused event rather than an ongoing background task, it produces a complete, lasting result. These steps are ordered for a reason. Work through them in sequence, and the day pays dividends for every season that follows.
Step 1: Set the Date and Recruit the Team
The most important decision in planning a Garage Cleaning Day is committing to a specific date, not “soon,” not “next weekend,” but a calendar entry with a name and a time block. A full Garage Cleaning Day for a standard two-car garage realistically requires six to eight hours. Block the day. Arrange for children to be occupied or involved in age-appropriate tasks. Ask a partner or a friend to join a second person, making the heavy lifting manageable and the decision-making faster, because every item requires a judgment call, and judgment fatigue is real.
The night before, gather supplies: heavy-duty bin bags for disposal, cardboard boxes labeled “donate,” “sell,” and “relocate,” a broom, a mop, a bucket, surface cleaner, a pressure washer if available, and any storage hardware already planned for installation. Arriving at the Garage Cleaning Day without these means losing an hour of momentum to a supply run before anything useful has been done.
Step 2: Complete Empty-Out — Everything Out
The Garage Cleaning Day starts with a total empty-out. Every item leaves the garage before the organizing process begins. Pull everything onto the driveway, lawn, or both. Stack items loosely by category as they come out: tools together, sports equipment together, seasonal items together, boxes together, but do not organize at this stage. The goal of this step is visibility: seeing the full contents of the garage in daylight, simultaneously, for the first time in however long it has been accumulating.
The empty garage is then cleaned before anything returns. Sweep from back to front, removing debris, dust, and mouse droppings if applicable. Clean the walls if stained. Wash the concrete floor with a stiff brush and a degreasing cleaner, or run the pressure washer across the full floor surface. Allow time for the floor to dry completely before any storage hardware is installed or items are returned. A clean garage floor changes the character of the entire space. It is the surface everything else is built on, and treating it as a priority on Garage Cleaning Day pays immediate visual dividends.
Step 3: Sort with Honesty and Specificity
With everything out and visible, work through every category on the driveway with four designations: keep and return to the garage, donate, sell, and dispose. The discipline required at this stage is proportional to how long the garage has been accumulating without a Garage Cleaning Day. Items kept out of guilt, obligation, or vague future intention leave. Duplicate tools where only one is needed, the better one stays. Broken items without a specific, near-term repair plan go.
Be particularly systematic about boxes that have been sealed since the last move. If the contents have not been needed in the intervening years, the box can often be removed without opening. For boxes that do need opening, commit to a decision about every item inside returned to the house, donate, or dispose of it, rather than resealing the box and returning it to the garage because the decision feels hard on a busy day.
Step 4: Plan and Install the Wall Storage System
Before any item returns to the garage, the storage system that will hold it needs to be in place. A Garage Cleaning Day that ends with items stacked on the floor is a temporary improvement. The wall storage installed during this step is what makes the result last.
Map the garage walls into functional zones, matching the categories sorted on the driveway. A tool zone: a horizontal bar or pegboard wall for long-handled tools, brooms, rakes, and mops with hooks spaced to hold each handle vertically or angled outward. A ladder zone: vertical wall brackets that hold aluminum and extension ladders flat against the wall, stable and off the floor. A sports and recreation zone: horizontal wall-mounted racks for skis, snowboards, bikes, and seasonal equipment, with each category grouped and accessible without moving another. A shelving zone: floor-to-ceiling shelving units in labeled bins for overflow storage, seasonal items, and automotive supplies.
Install all hardware before items return. Use wall studs for every heavy-duty bracket and confirm load ratings for ladder and sports equipment mounts. A storage system installed correctly on Garage Cleaning Day lasts for years. One is installed quickly and inadequately fails within a season.
Step 5: Return Items to Zones and Label Everything
With wall storage in place, return items to the garage zone by zone. Long-handled tools go directly onto the bar. Ladders go into their vertical brackets. Sports equipment mounts in the designated zone. Containers go onto shelving units with labels applied before they are stored, not after, when the motivation to complete the system has dissipated.
Label every shelf section, every bin, every hook position where the item might be removed and not automatically returned. Labels are not organizational theater; they are the mechanism by which the Garage Cleaning Day result is maintained by everyone in the household, not just the person who installed the system. Without a label, the bin’s contents drift. With one, they do not.
Step 6: Establish the Maintenance System Before Closing the Door
The final step of Garage Cleaning Day is creating the routine that prevents the next Garage Cleaning Day from being as large a project as this one. Before closing the garage door, set two recurring calendar reminders: a fifteen-minute “garage reset” at the end of every month, and a two-hour “garage seasonal review” four times a year. The monthly reset returns drifted items to their zones and catches accumulation before it becomes entrenched. The seasonal review rotates seasonal equipment in and out of prime positions, restocks consumables, and checks that the system still matches the household’s actual needs.
Expert Secrets for Success

Pro-Tips for a Better Result
- Start the Garage Cleaning Day early. Begin at first light. A Garage Cleaning Day that starts at 7 a.m. has empty-out complete before mid-morning, floor dried before lunch, and wall storage installed with several hours of daylight remaining for the return and labeling phase. Starting at 10 a.m. or later compresses the back half of the day and forces decisions under time pressure which is exactly where items end up returned to the garage without a designated place.
- Rent a skip or book a bulky waste collection in advance. The single biggest failure mode of a Garage Cleaning Day is the removal of disposed items. A full skip or arranged bulky waste collection booked for the same day or the next morning removes the incentive to keep items because disposal is inconvenient. Without a clear removal route, disposed items sit on the driveway for weeks and gradually migrate back into the garage.
- Photograph the organized garage before using it. A reference photograph of the completed Garage Cleaning Day result taken from the door, showing all zones and wall storage is the standard to return the space to after any project disrupts it. Post the photograph inside the garage door or in a shared household notes app where every family member can reference it.
- Buy storage hardware before the day, not during it. A Garage Cleaning Day that pauses for a hardware store run loses two hours of momentum and returns with hardware chosen in a hurry rather than planned with care. Based on the inventory you know is in the garage, purchase wall brackets, tool holders, shelving units, and bins the week before. Arrive on Garage Cleaning Day with everything needed to complete the installation without leaving the property.
- Treat the car as a participant in the zone planning. The car, if it is returning to the garage, needs a measured, dedicated lane of access through every zone. Walk the car’s path on foot before finalizing any storage position. A system that requires a vehicle to be reversed past a mounted bike rack by six inches of clearance is a system that generates daily frustration and eventual damage to the storage hardware.
Common Mistakes to Avoid
- Organizing without emptying first. A Garage Cleaning Day that reorganizes around existing contents rather than removing them and starting fresh produces a tidier version of the original disorder. The empty-out is not optional. It is the step that creates the honest inventory that makes genuine organization possible.
- Keeping items that belong in the house. Garages accumulate domestic overflow furniture, clothing, appliances, and toys that belong in the house, at a charity shop, or in a bin rather than in a storage space designed for tools and outdoor equipment. Every item returned to the garage from the driveway driveway sort should have a specific reason to be there. “Nowhere else to put it” is not a reason. It is the diagnosis of a different problem that a Garage Cleaning Day cannot solve.
- Installing shelving before the wall zones are mapped. Shelving installed before the zone plan is finalized frequently ends up in positions that obstruct wall-mounted tool storage, block the door swing, or consume the wall space that should have held the ladder brackets. Map zones on paper before a single piece of hardware goes into the wall.
- Skipping the floor cleaning. A Garage Cleaning Day that produces excellent wall organization and a dirty, oil-stained floor is visually and functionally incomplete. The floor is the first surface seen when the door opens. A clean floor elevates the perception of everything mounted above it. It also makes sweeping during maintenance resets dramatically easier, a critical quality of a system that will actually be maintained.
- Declaring the system finished before the labels are applied. Labels feel like the administrative tail of a Garage Cleaning Day the last, slightly tedious step after the satisfying physical work is done. They are, in practice, the mechanism by which the system functions for everyone beyond the person who designed it. A garage organized without labels is personalized storage. A garage organized with labels is a household system. Only the latter survives the next three months intact.
Why Garage Cleaning Day Matters
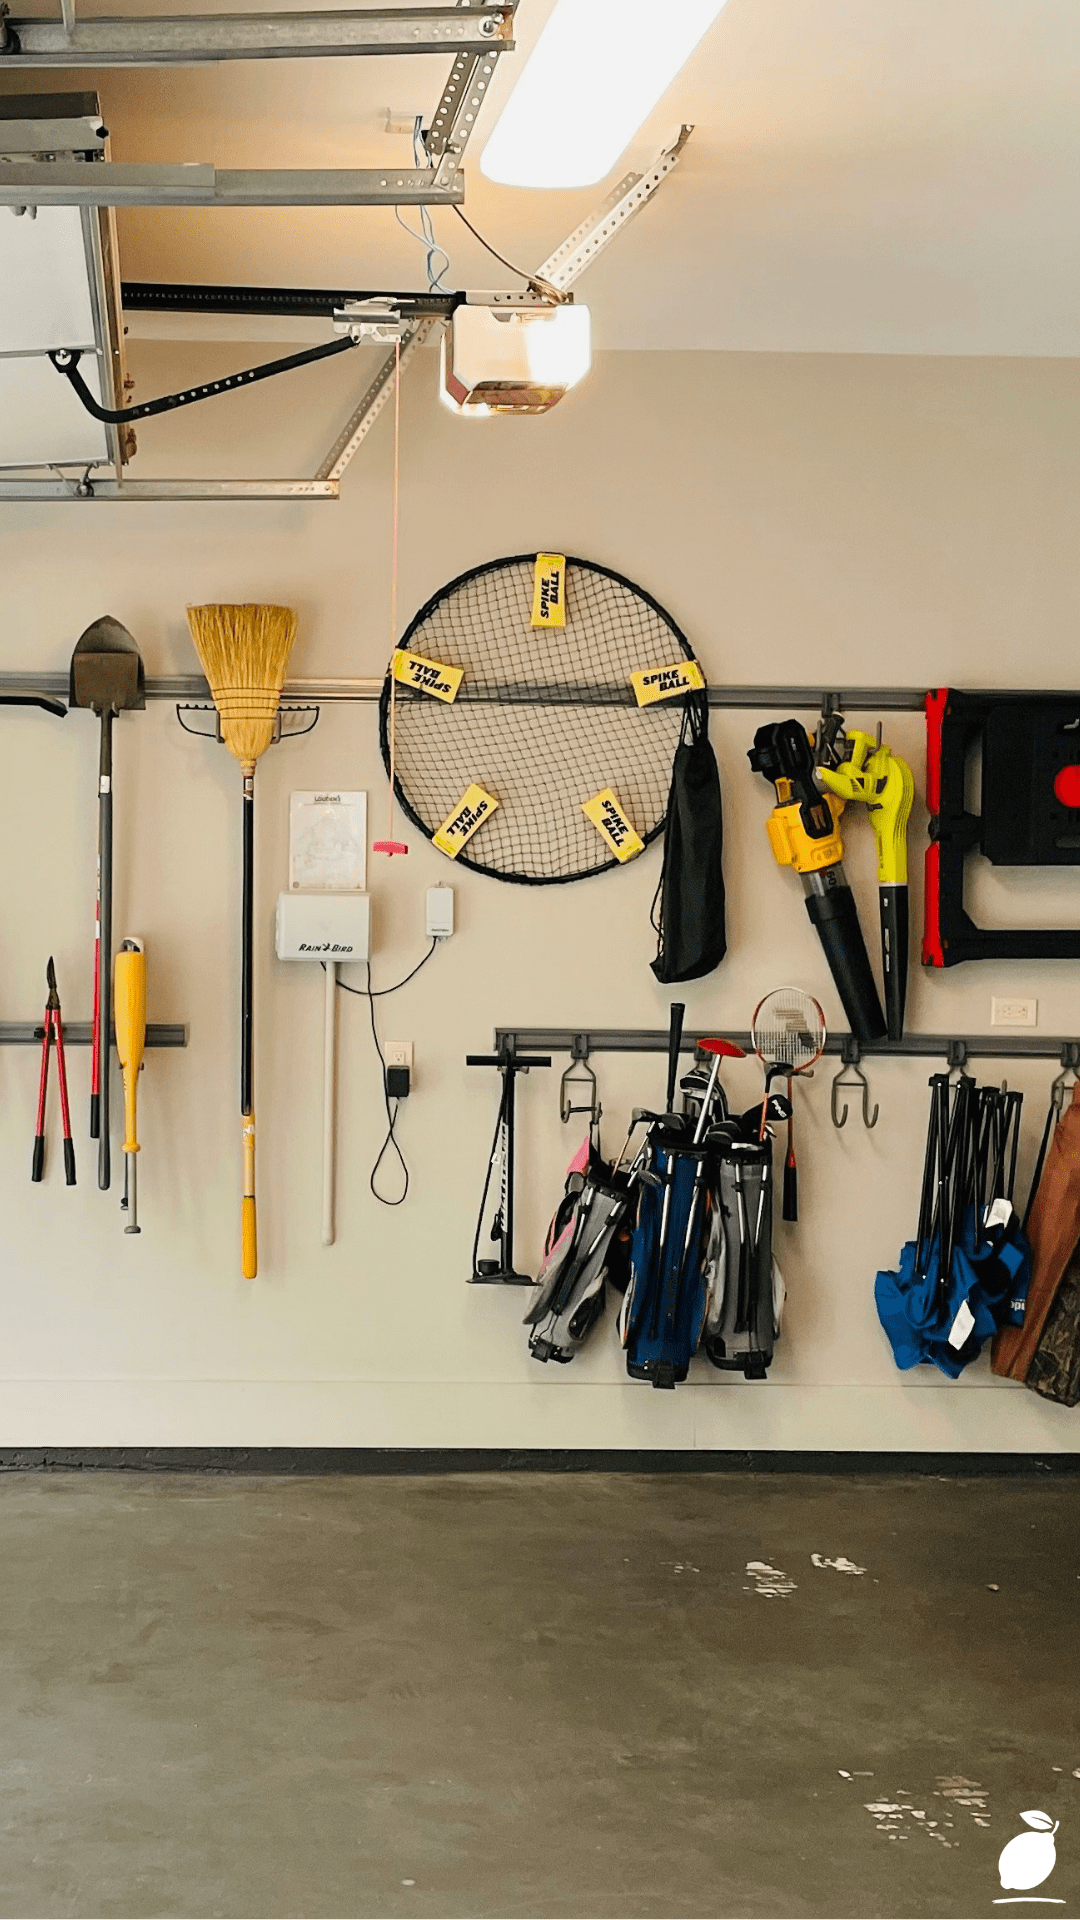
A completed Garage Cleaning Day produces a specific kind of satisfaction that is difficult to describe to someone who has not experienced it, the clean, particular pleasure of standing in a space that was recently impossible and is now entirely comprehensible. Every tool is visible. Every zone is clear. The car is back where it belongs. The floor is unobstructed. It is the domestic equivalent of a deep breath after a long time of shallow ones. The garage, once a source of background guilt and daily friction, becomes a functioning room of the house, and that shift in its character changes something in the broader experience of the home.
For families, a Garage Cleaning Day delivers returns that compound invisibly over months and seasons. The ski trip starts without a forty-minute equipment search. The garden weekend begins on the lawn rather than in the shed, trying to locate the rake. The small repair job happens on Saturday morning because the tools are mounted and visible, rather than not being attempted because finding them would consume the available time. These moments do not announce themselves as dividends of a well-planned Garage Cleaning Day; they are simply the texture of a household that runs more smoothly, more calmly, and with less friction than the one that existed before the day was planned and executed.
And for the individual who leads it, the Garage Cleaning Day is more than a home maintenance task. It is an act of agency over a space that has been, for however long, a locus of avoidance and mild shame. Reclaiming that space methodically, completely, with a system that holds is the kind of concrete, visible accomplishment that daily life rarely provides so clearly. The result is immediately measurable. The before and after are undeniable. That quality of unambiguous progress, applied to a space used every day, feeds the particular kind of quiet confidence that comes from knowing your environment is under your intentional control. The Garage Cleaning Day is one day. The benefit runs for every season that follows.
Frequently Asked Questions
How much time should I realistically set aside for a Garage Cleaning Day?
For a single-car garage with moderate accumulation, a Garage Cleaning Day takes four to six hours. A double garage or a space that has gone several years without a proper clear-out realistically needs eight hours or a full weekend, one day for the empty-out, sort, and floor clean, and a second day for storage installation and return. Underestimating the time required is the most common reason Garage Cleaning Days are abandoned mid-project, which leaves the garage in a worse state than before the day began.
What is the best wall storage system for a garage on a budget?
A horizontal tool bar, a length of steel conduit, or a timber dowel mounted between two wall brackets at a comfortable height is the most cost-effective wall storage solution for long-handled tools and costs under twenty dollars to install. For larger budgets, a slatwall panel system provides maximum flexibility: hooks, baskets, and brackets can be repositioned without drilling new holes as the garage’s needs change. Pegboard is the classic budget option for hand tools and small equipment. All three work significantly better than floor storage and are accessible to a DIY installation without specialist tools.
How do I keep the garage organized after Garage Cleaning Day?
The maintenance system installed on Garage Cleaning Day is what preserves the result. A monthly fifteen-minute reset, every item returned to its labeled zone, the floor swept, nothing left sitting on the floor that belongs on the wall prevents entropy from accumulating into the disorder the Garage Cleaning Day was designed to resolve. A seasonal two-hour review rotates equipment, restocks consumables, and updates the system as the household’s needs evolve. The Garage Cleaning Day creates the system. The maintenance rhythm is what makes it permanent.
What should I do with items I want to sell from the garage clear-out?
Photograph items before the Garage Cleaning Day ends and list them on a local selling platform, Facebook Marketplace, Craigslist, or a local neighborhood app the same evening while the motivation is present. Set a deadline: any item not sold within three weeks goes to donation or disposal. Items photographed but unlisted, or listed and unsold without a deadline, reliably return to the garage as “I’ll deal with it later” items, and the Garage Cleaning Day result is immediately compromised. The sell category only works with a defined exit timeline.







