
It’s 4:47 PM on a Tuesday, and the kitchen table looks like a craft store exploded on it. Glitter is embedded in the grout. Someone (you’re not naming names) used the good scissors to cut a paper turkey and left them, blades open, next to a bowl of half-dried glue. Your youngest is crying because her feather fell off. Your oldest has declared the whole project “boring” and wandered off to find a screen Thanksgiving craft. And somewhere under a pile of construction paper scraps is the Pinterest photo that started this entire afternoon the one that looked so simple, so charming, so doable forty-five minutes ago.
If this scene feels familiar, you are not alone, and you are not doing it wrong. Every parent who has ever attempted a holiday craft with kids under the age of ten has lived some version of this exact chaos. The gap between the pristine, styled photo and the sticky, chaotic reality of “let’s make something together” is where most family craft time quietly falls apart not because the idea was bad, but because nobody built in a system. No steps. No structure. Just vibes and glitter.
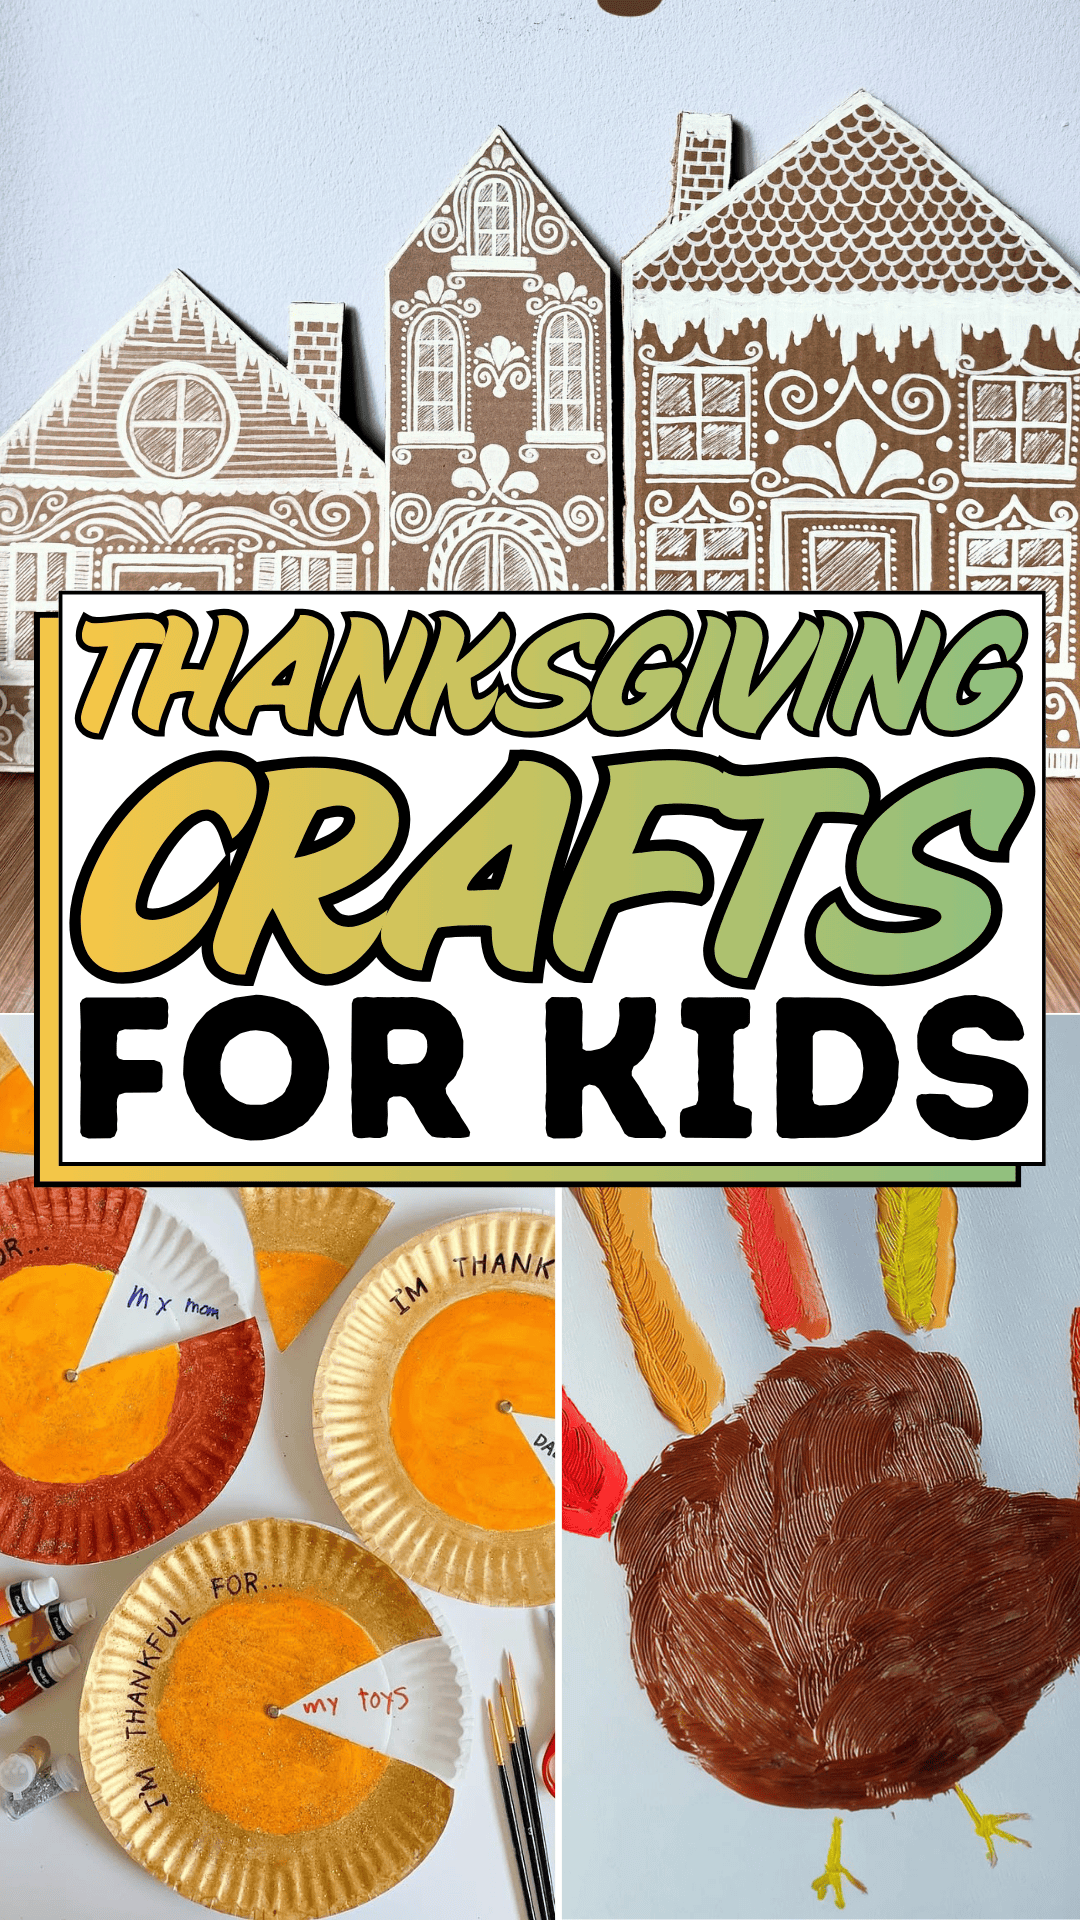
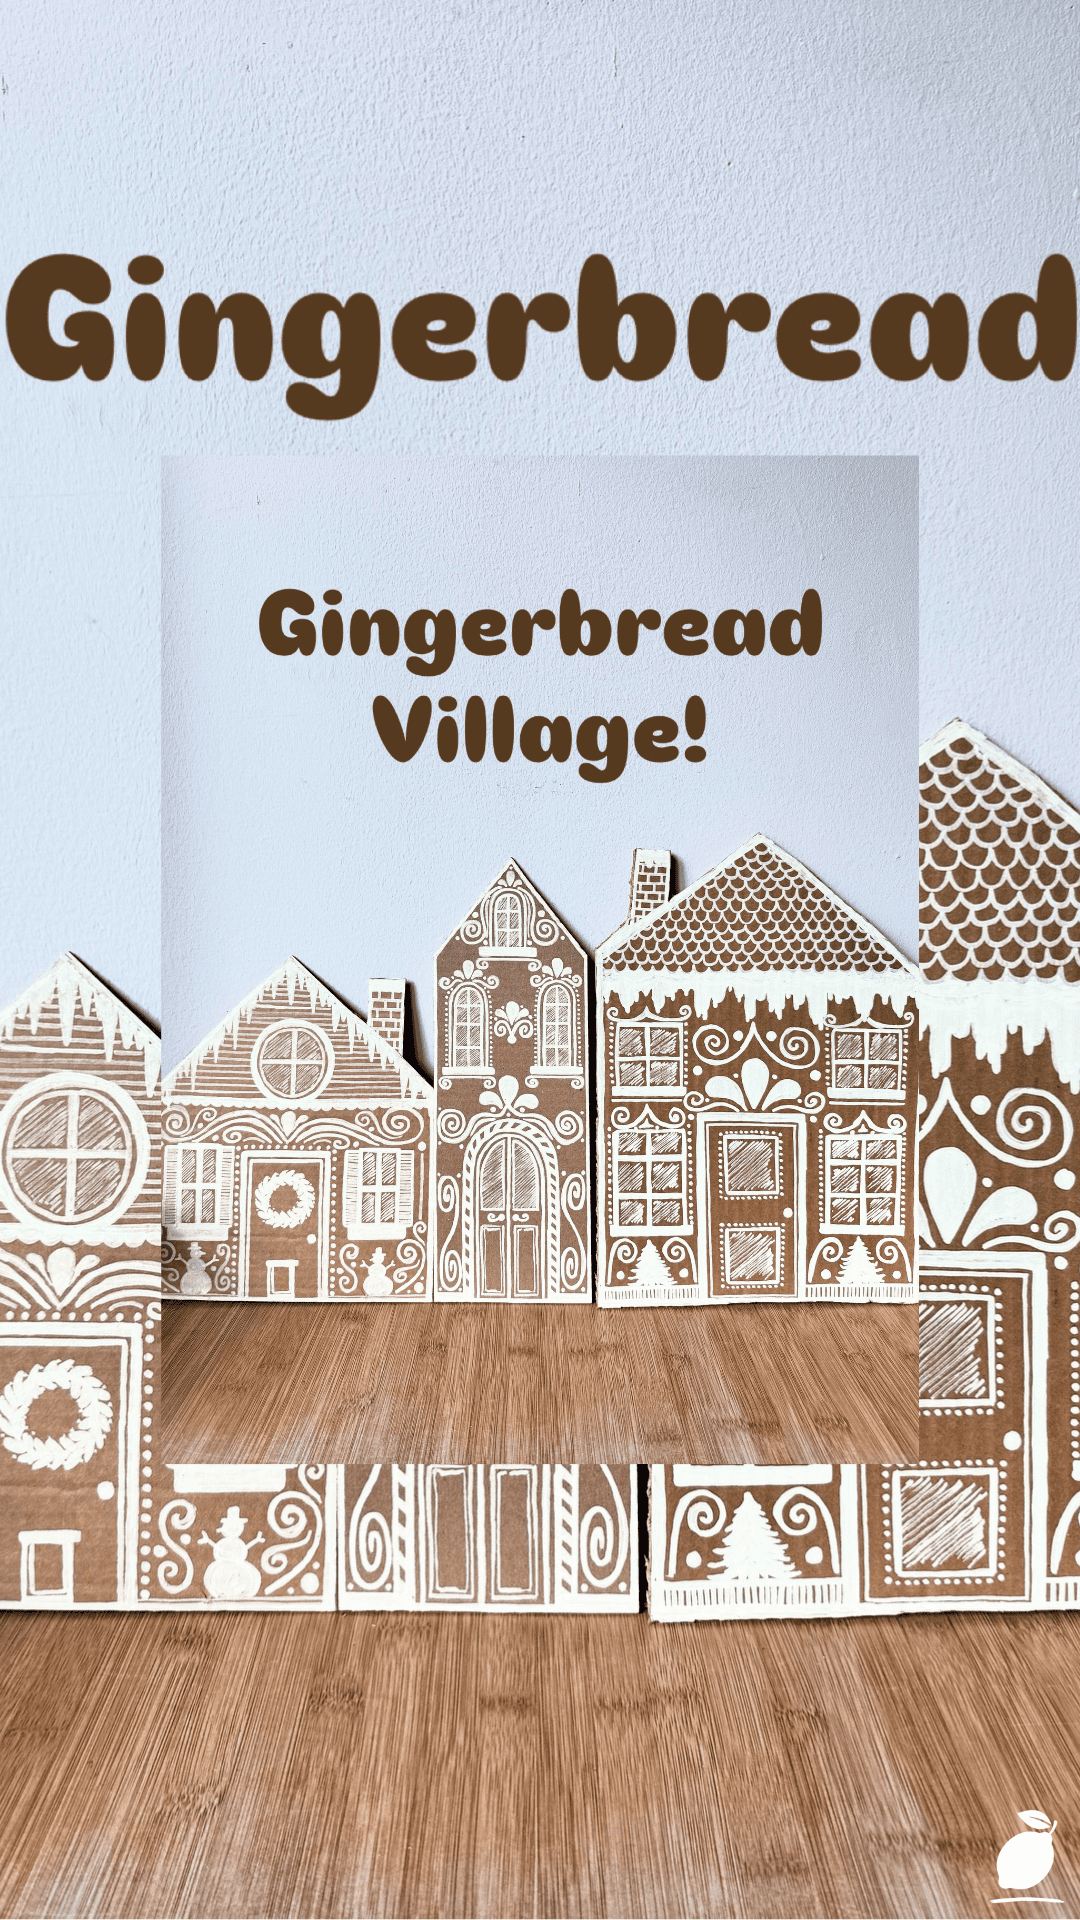
Now picture something different: three small paper houses lined up neatly on a warm wooden floor, each one iced with soft white swirls and dots, each one just a little different from the next one with a round window, one with an arched door, one with a scalloped roofline. No mess in the frame. No tears. Just quiet, intentional little structures that look like they took hours but were actually built step by step, in an order that made sense. That calm is not luck. It’s a blueprint. And today, we’re handing you that exact blueprint so your own Thanksgiving craft afternoon can look a lot more like that photo and a lot less like the table you’re staring at right now.
The Thanksgiving Craft Blueprint
This Thanksgiving craft project, a set of miniature decorative “harvest village” houses inspired by the cozy, cottage-style display above, is designed to scale with your child’s age and attention span. You can make one house in twenty minutes or build a whole tabletop village over a weekend. Below is the full sequence, broken into manageable stages so nobody (parent included) gets overwhelmed halfway through.
Step 1: Gather Your Materials
Before anyone sits down at the table, collect everything in one basket so kids aren’t waiting (and losing interest) while you hunt for supplies. You’ll need light cardboard or cereal-box cardstock, a pencil, scissors (kid-safe for younger crafters), white puffy paint or thick white craft glue, a hot glue gun (adult-only step), and small embellishments like buttons, sequins, or dried beans for texture. Having materials pre-sorted into small containers dramatically cuts down on the “spill and scatter” chaos that derails most sessions.
Step 2: Design the House Templates
On plain paper, sketch three simple house shapes; a square base topped with a triangle roof is the easiest starting silhouette. Vary each one slightly: give one a round window cut from a circle template, one an arched doorway, and one a scalloped roof edge made with a bottle cap traced in a repeating curve. Kids as young as five can trace pre-made templates; older kids can free-hand their own designs.
Step 3: Cut and Fold the Base Shapes
Transfer the templates onto cardboard and cut them out. Score the fold lines lightly with the back of a scissor blade or a butter knife so the cardboard bends cleanly rather than creasing unevenly. This is a great moment to let kids practice careful, controlled cutting a genuinely valuable fine-motor skill that this Thanksgiving craft builds naturally into the process.
Step 4: Assemble the Structure
Fold each house into shape and secure the seams with hot glue (adult step) or strong craft glue for older kids working independently. Let the structures dry flat on a protected surface for at least twenty minutes before decorating. Rushing this step is the number one reason houses collapse mid-craft.
Step 5: Add the “Icing” Details
This is the step kids love most. Using white puffy paint or thick glue in a squeeze bottle, let children pipe swirls, dots, and simple geometric lines across the roof and walls, mimicking real icing. Encourage imperfection here; uneven swirls actually make each house look more handmade and charming, not less.
Step 6: Personalize and Display
Once the “icing” dries fully (usually two to four hours), let each child choose small embellishments: a button for a doorknob, a sequin for a window, a dab of cinnamon-dusted glue for texture that smells like the season. Arrange the finished houses on a wooden tray, a runner down the center of the Thanksgiving table, or a windowsill for a simple, styled display that captures that same clean, minimalist charm as the reference photo.
Expert Secrets for Success
A little insider knowledge separates a Thanksgiving craft that turns into a stressful cleanup marathon from one that becomes a genuinely peaceful family memory. Here’s what experienced craft-leading parents know that most tutorials leave out.
Pro-Tips for a Better Result
Pre-cut for younger kids. If your children are under six, cut the base shapes yourself the night before and let kids focus entirely on decorating. This removes the biggest bottleneck and biggest mess-risk from the session.
Work in layers, not all at once. Split the project across two short sessions, building on day one, decorating on day two rather than trying to complete everything in a single sitting. Shorter sessions hold attention far better than one long marathon.
Protect the surface first. Lay down a vinyl tablecloth or a few sheets of parchment paper before you start. Puffy paint and glue wipe off plastic in seconds; they do not wipe off wood or fabric nearly as easily.
Let drying time be non-negotiable. Set a visible timer for drying stages. Kids respect a countdown far better than a vague “wait a bit,” and it prevents smudged, ruined details.
Keep a “practice piece.” Give each child a scrap of cardboard to test their icing technique before committing to the real house. This single trick eliminates most of the frustrated do-overs that come with piping paint or glue for the first time.
Common Mistakes to Avoid
Skipping the scoring step. Folding un-scored cardboard leads to cracked, uneven edges that make houses look sloppy and structurally weak.
Using glue that’s too thin. Watery glue soaks into cardboard and never builds the raised “icing” texture that makes this craft look so polished. Always opt for a thicker puffy paint or a heavy-bodied craft glue.
Rushing the dry time. Touching or moving a house before the base structure has set is the single most common reason projects collapse and the single most common reason for tears.
Overcrowding one house with details. More is not always better. A few well-placed swirls and one focal embellishment per house reads as intentional; twenty scattered decorations read as cluttered.
Forgetting to label pieces for group crafting. If multiple kids are building at once, a quick pencil initial on the underside of each base prevents the “that’s not mine!” meltdown at assembly time.
Why Thanksgiving Craft Matters
It would be easy to write this off as “just a craft.” But there’s something quietly powerful happening at that table beyond glue and paper. A Thanksgiving craft that follows a clear, calm sequence gather, build, dry, decorate, display teaches kids something they rarely get from screens: the satisfaction of a slow process that ends in something real they can hold, display, and be proud of.
For parents, there’s an equally important payoff. Home is often the space where mental load piles up fastest: school pickups, meal planning, holiday hosting, a never-ending list of small tasks. A structured craft project, one with a real beginning, middle, and end, gives you and your kids a shared pocket of time where the only goal is presence. No screens competing for attention. No rushing to the next errand. Just hands, materials, and a little bit of quiet focus.
That’s the deeper mission behind everything we do at Easy Peasy Life Matters: showing that a calmer home doesn’t require more time, more money, or more talent just a better system. A Thanksgiving craft, done with a blueprint instead of a guess, becomes more than a decoration. It becomes a small, repeatable ritual of family peace something your kids will remember long after the little cardboard houses have been packed away for next year.
FAQ
How long does this Thanksgiving craft take from start to finish?
Plan for roughly one to two hours of active crafting time, plus two to four hours of drying time for the icing details. Most families find it works best split across two shorter sessions rather than one long sitting, especially with younger children.
What age range is this Thanksgiving craft suitable for?
This project scales well from ages four through twelve. Younger children can focus on decorating pre-cut shapes, while kids eight and up can typically manage the full building process independently, with adult supervision for the hot glue step.
Can I substitute materials if I don’t have puffy paint on hand?
Yes. A thick mixture of white school glue with a small amount of cornstarch mimics the raised, textured look of puffy paint reasonably well and works fine for this Thanksgiving craft if you’re working with what’s already in your cupboard.
How do I store the finished houses after Thanksgiving?
Once fully dry, wrap each house individually in tissue paper and store them in a shallow box, stacked no more than two layers high to avoid crushing the icing details. Stored this way, they’ll hold up well for reuse as a display next year.
My child gets frustrated easily with crafts. How do I keep this from turning into a meltdown?
Break the project into the shorter stages outlined in the blueprint above, use a practice piece before the real decorating step, and keep expectations low on “perfect” symmetry. The goal of this Thanksgiving craft is connection and process, not a flawless final product, and naming that out loud to your child before you start can lower the pressure significantly.







