It’s a Sunday afternoon, and you’re standing in the middle of a garden center, completely overwhelmed. You’ve been scrolling Pinterest for weeks, dreaming of fresh tomatoes and vibrant herbs just outside your back door. But your “small patio veggie garden is roughly the size of a queen-sized bed, your budget is tight, and everyone around you seems to have acres of land to work with. You grab a cart, wander the aisles, and leave with three plants you can’t name and a vague sense of defeat. Sound familiar? You are absolutely not alone
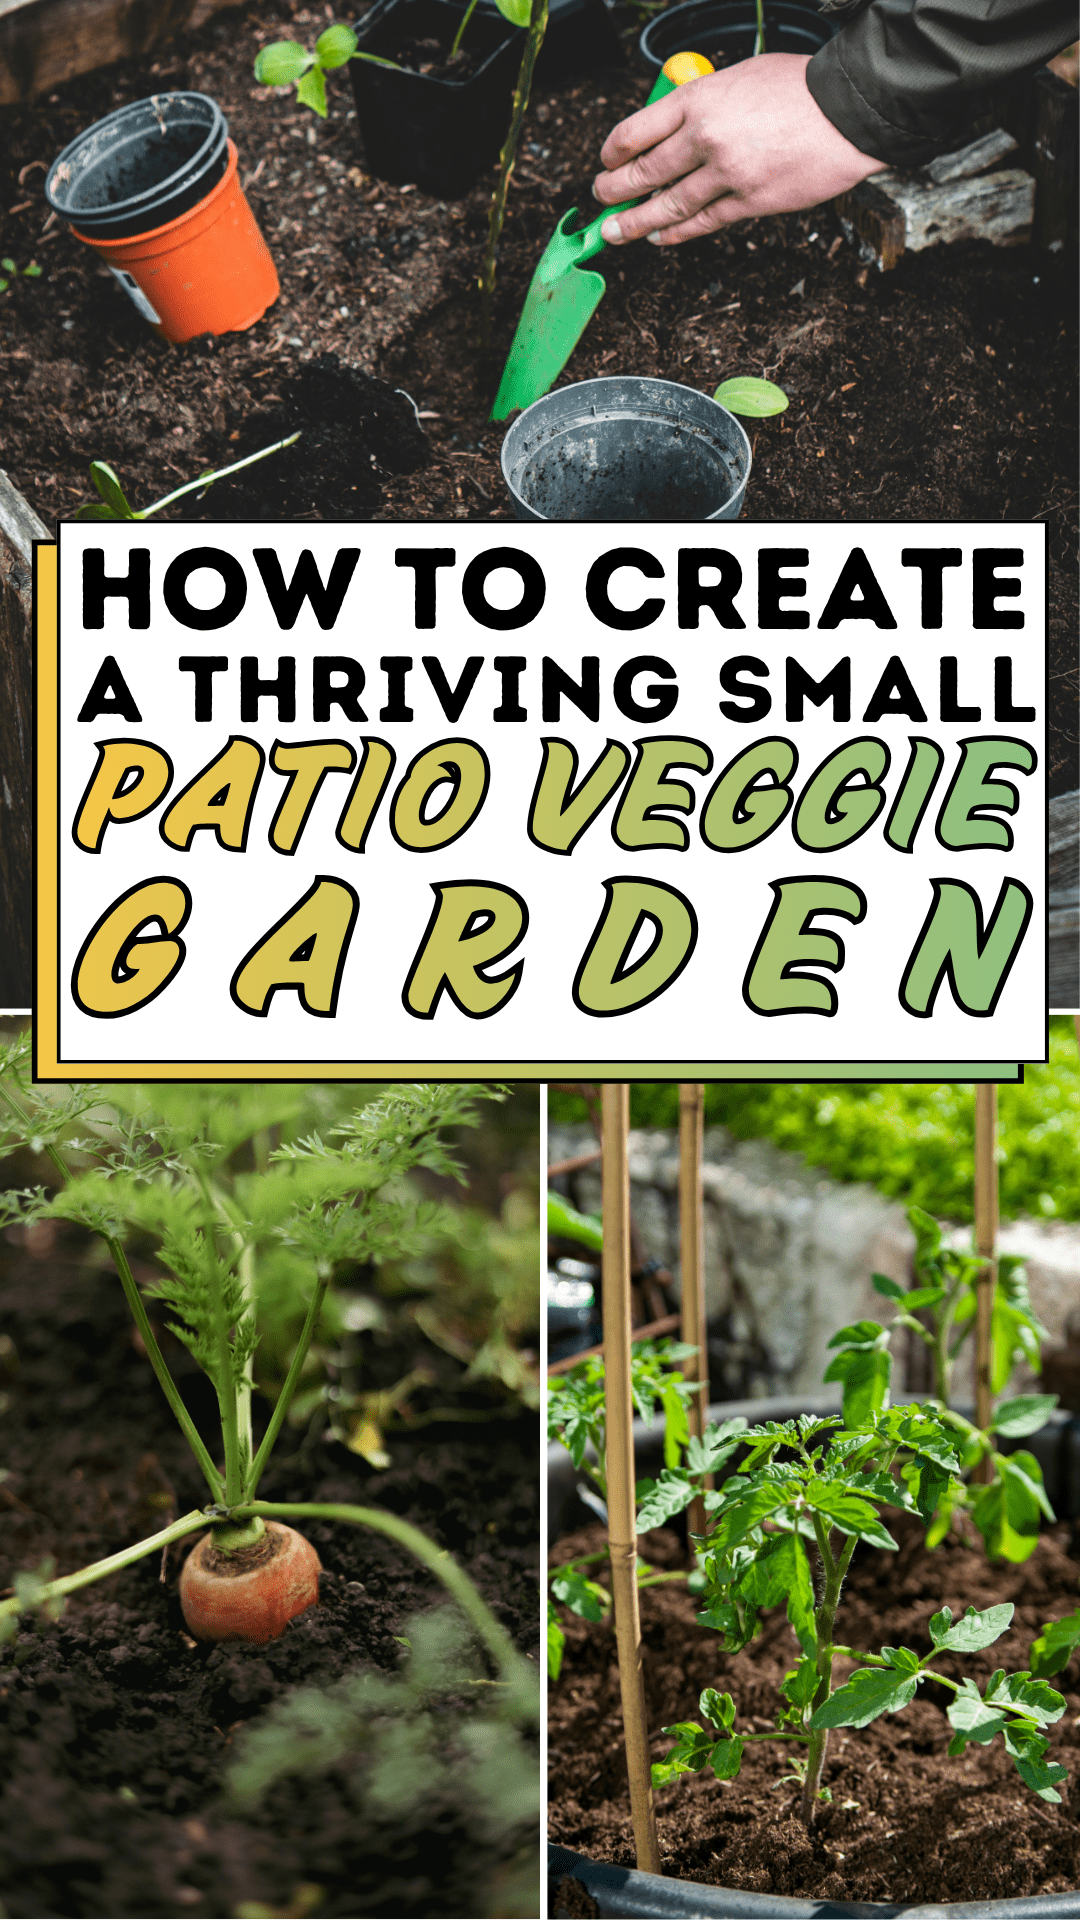
The truth is, most of us were never taught how to garden. We were handed this romanticized idea that a green thumb is something you’re born with, and if you’re not, well, stick to houseplants. But here’s what nobody tells you: some of the most productive, beautiful vegetable gardens in the world are tucked into tiny patios, balconies, and back porches. The secret isn’t space. It’s a strategy. That image of careful hands pressing seedlings into dark, rich soil in a weathered wooden raised bed? That’s not the result of expertise; it’s the result of a simple, repeatable plan that anyone can follow.
This guide exists because your dreams of homegrown food deserve a realistic roadmap. Whether you’ve got a 4×4 wooden raised bed, a cluster of containers, or just a sunny corner you’ve been ignoring, you are closer than you think to harvesting your own dinner. Let’s walk through exactly how to create a thriving small patio veggie garden step by step, no overwhelm, no guesswork.
How To Create A Thriving Small Patio Veggie Garden Blueprint
Step 1: Assess Your Patio’s Light and Space
Before you spend a single dollar on soil or seeds, spend three days observing your patio. Note how many hours of direct sunlight it receives. Most vegetables need a minimum of six hours. Sketch a rough layout of your space and identify where a raised bed or containers could sit without blocking foot traffic. Even a 4×2-foot raised bed can yield a surprising amount of food when planted intentionally. Don’t forget to note which direction your patio faces: south-facing is ideal, east-facing is workable, and north-facing means you’ll want to focus on shade-tolerant greens.
Step 2: Choose Your Growing Container
For small patios, a wooden raised garden bed is the gold standard. It warms up faster than the ground, drains well, and gives you full control over your soil quality. Weathered wood planks give that cozy, lived-in aesthetic you see in cottage gardens. Alternatively, large fabric grow bags (minimum 7 gallons) or deep terracotta and plastic pots work beautifully for individual plants. The key is depth: most vegetables need at least 10–12 inches of soil to develop healthy root systems. Whatever you choose, make sure drainage holes are present or possible.
Step 3: Build the Perfect Soil Foundation
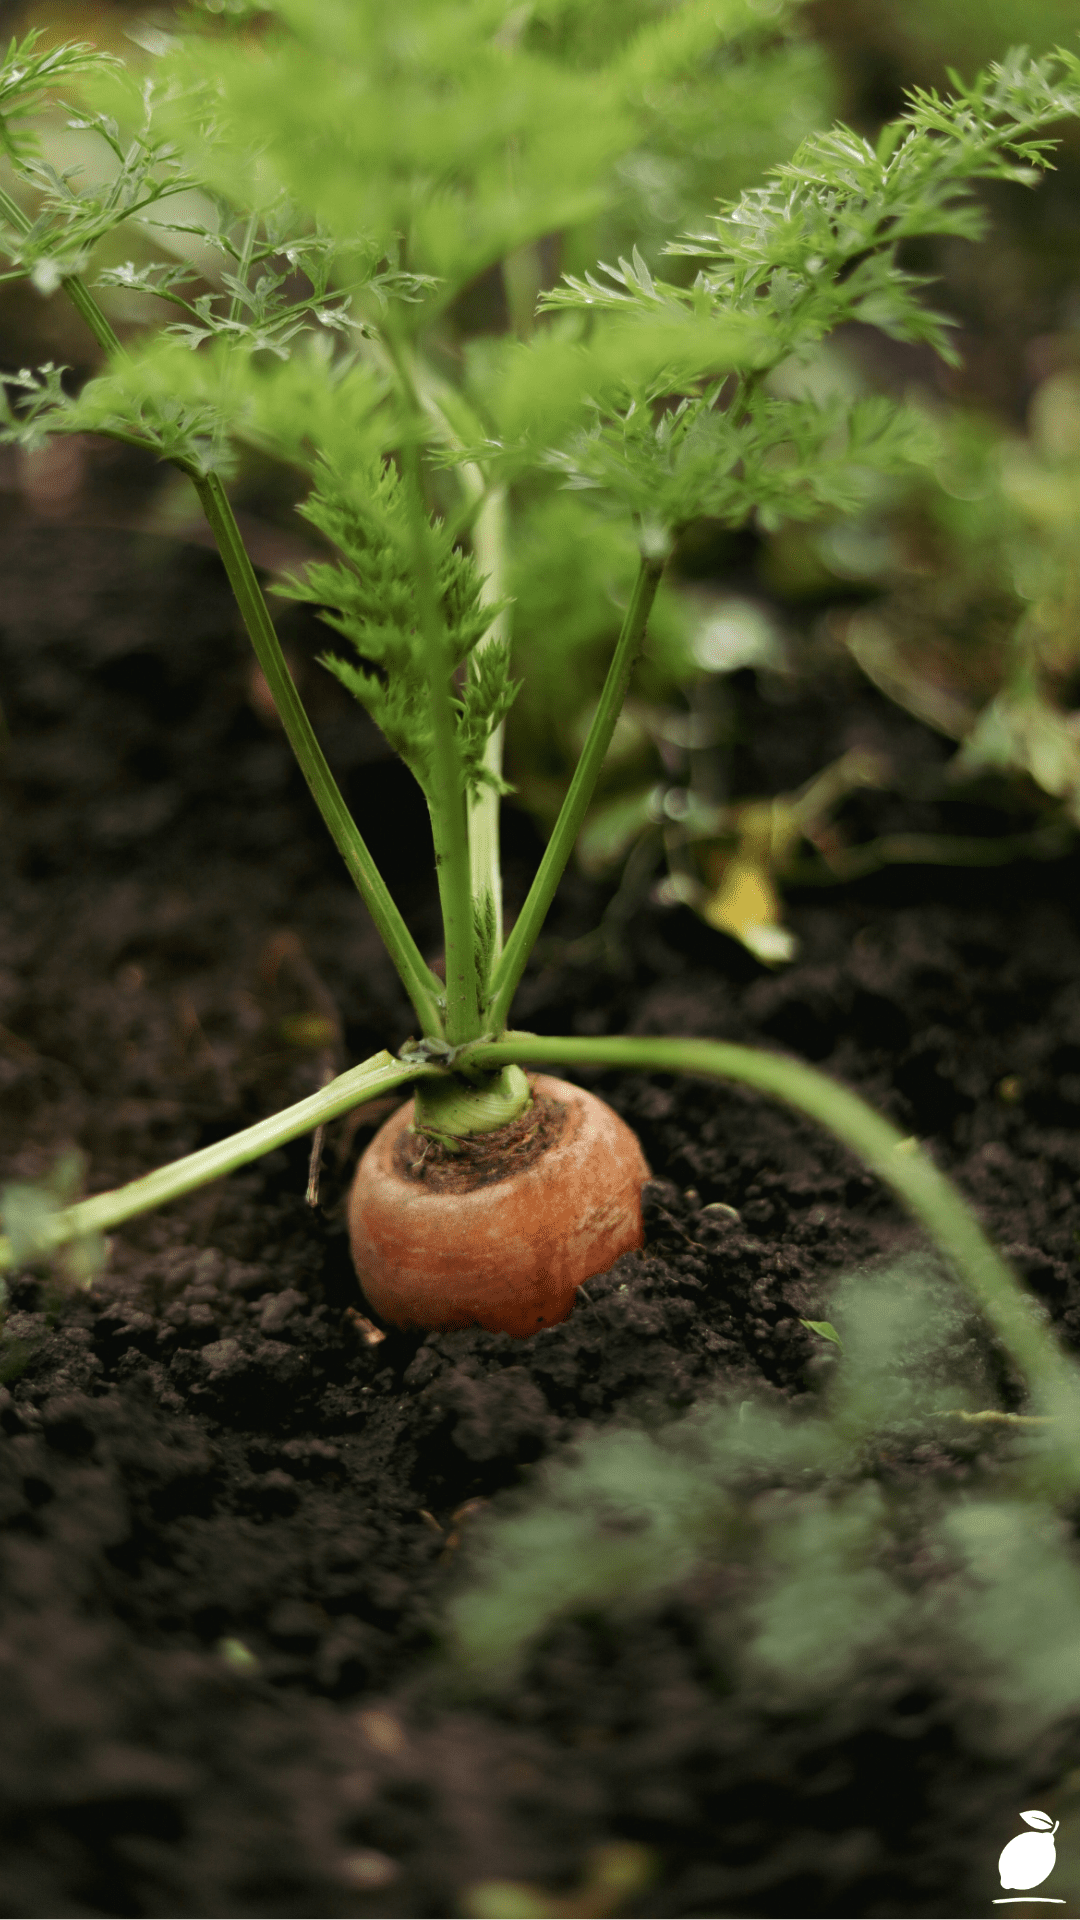
This is where most beginner gardeners go wrong: they fill raised beds with cheap topsoil and wonder why nothing thrives. The dark, rich soil you see in productive patio gardens is almost always a mix: roughly 60% high-quality topsoil or garden mix, 30% compost, and 10% perlite or coarse sand for drainage. This combination gives your seedlings the nutrients, moisture retention, and aeration they need to establish strong roots quickly. Refresh your compost layer at the start of each new season, and your soil will only get better with time.
Step 4: Select Your Veggie Dream Team
The best small patio gardens are planted with purpose. Choose vegetables that are compact, high-yielding, and suited to your light conditions. Top performers for small spaces include cherry tomatoes (especially patio or dwarf varieties), bush beans, lettuce and salad greens, radishes, spinach, dwarf kale, herbs like basil and parsley, and compact cucumbers. Avoid sprawling vines or large root vegetables like pumpkins or full-size watermelons; they’ll dominate and underperform in a tight space. Pair heavy feeders like tomatoes with light feeders like lettuce to make the most of your soil’s nutrients.
Step 5: Plant with Intention Spacing Matters
Using a small trowel, create planting holes just slightly larger than each seedling’s root ball. Gently remove seedlings from their pots, loosen the roots if they’re tightly wound, and settle them into the soil at the same depth they were growing in their container. Firm the soil around each plant to eliminate air pockets. Resist the urge to overcrowd it’s tempting in a small space, but overcrowding leads to poor airflow, disease, and competition for nutrients. Follow spacing guides on plant tags as a minimum, and consider vertical growing (trellises, cages) to maximize your footprint without sacrificing plant count.
Step 6: Water Wisely and Consistently
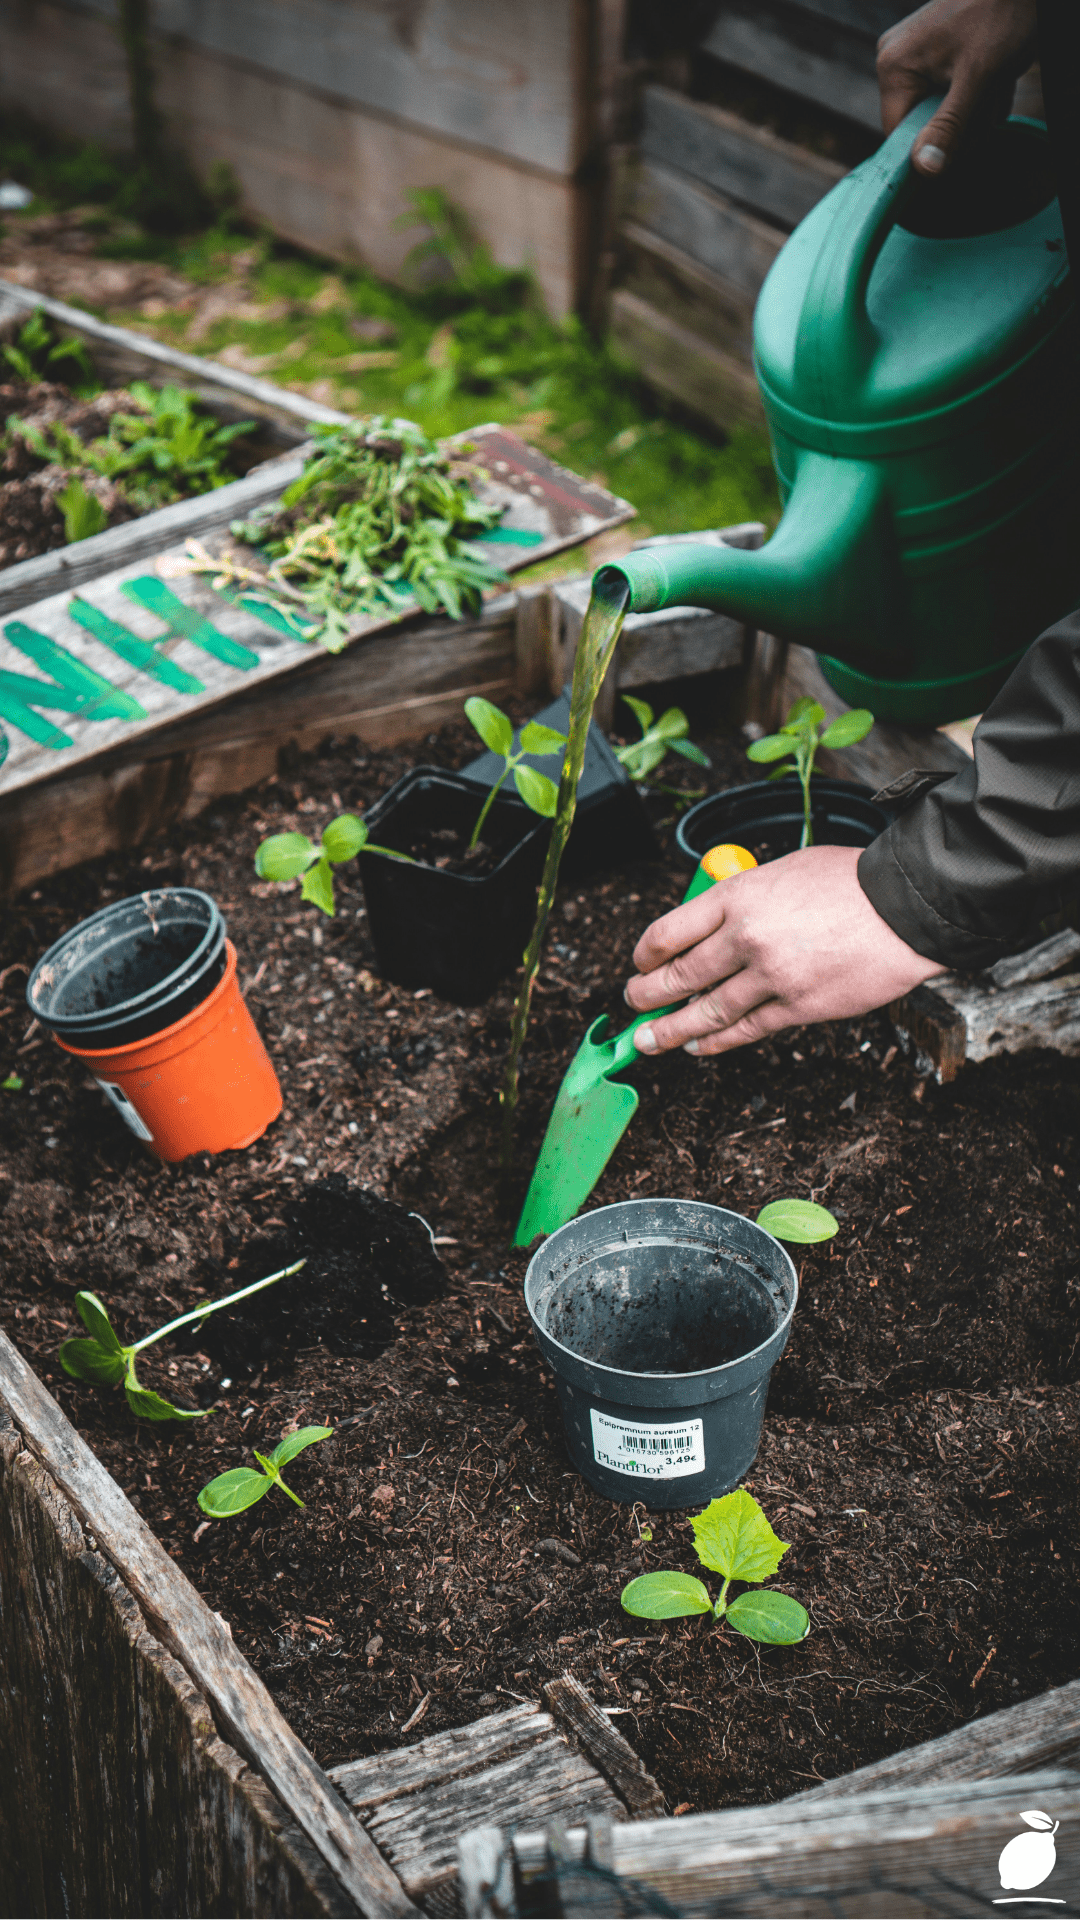
A green watering can at the ready is one of the most satisfying sights in a patio garden, and consistent watering is genuinely the single most impactful habit you can build. Small raised beds and containers dry out faster than in-ground gardens, especially in warm weather. Aim to water deeply in the morning, allowing moisture to reach roots rather than just wetting the surface. Check soil moisture by pressing a finger about an inch into the soil. When it feels dry at that depth. As your garden grows, consider a simple drip irrigation kit or self-watering inserts for containers to remove guesswork entirely.
Step 7: Feed, Observe, and Adjust
Once your seedlings are established (usually 1–2 weeks after planting), begin a gentle feeding routine. A balanced, slow-release granular fertilizer worked into the top inch of soil at planting, followed by liquid feeds every two weeks during the growing season, will keep your plants productive. Spend five minutes each morning observing your garden — look for yellowing leaves (often a nutrient or watering issue), pest damage, or plants that need support. Catching problems early means they’re almost always fixable with simple, natural solutions.
Expert Secrets for Success
Pro-Tips for Better Results
Succession plant your salad greens. Instead of planting an entire row of lettuce at once, sow a small section every two weeks. This gives you a continuous harvest instead of a glut followed by bare soil.
Use vertical space aggressively. A simple bamboo stake or small A-frame trellis can triple your growing capacity without adding a single square foot of footprint. Cucumbers, peas, and even cherry tomatoes love to climb.
Mulch the surface of your raised bed. A thin layer of straw or wood chip mulch on top of your soil dramatically reduces water evaporation, keeps roots cool in summer heat, and suppresses weeds, all with almost zero effort.
Group containers by water needs. Place thirsty plants (tomatoes, cucumbers) together so you can water them more frequently without over-watering your drought-tolerant herbs nearby.
Label everything from day one. Those seedlings all look identical when they’re tiny. A simple popsicle stick and a waterproof marker will save you a lot of confusion come harvest time.
Common Mistakes to Avoid
Planting too early in the season. Enthusiasm is wonderful, but cold soil and surprise frosts will kill tender seedlings overnight. Always check your last frost date and plant warm-season vegetables after it has safely passed.
Skipping the hardening-off process. If you’re starting seedlings indoors or buying from a greenhouse, they need 7–10 days of gradual outdoor exposure before permanent planting. Moving them straight outside causes transplant shock and setbacks that can cost you weeks.
Overwatering more than underwatering. Soggy soil is the number-one killer of container and raised-bed vegetables. Root rot is silent and swift. When in doubt, check before you water. Don’t water on a fixed schedule without assessing soil moisture first.
Choosing the wrong varieties for containers. “Indeterminate” tomato varieties, for example, will grow six feet tall and need serious staking. Always look for words like “patio,” “dwarf,” “bush,” or “compact” on seed packets and plant tags when gardening in small spaces.
Neglecting pollination. If your patio is enclosed or has limited bee activity, your flowering vegetables may set poor fruit. A gentle hand-pollination with a small paintbrush, or simply placing pollinator-friendly herbs like basil and borage nearby, makes a significant difference.
Why How To Create A Thriving Small Patio Veggie Garden Matters
There’s something quietly powerful that happens when you grow your own food, even just a little of it. It’s not really about the tomatoes. It’s about the moment you hand a child a cherry tomato they watched grow from a seedling, and they eat it without hesitation, with pure delight. It’s about the ten minutes you steal before the rest of the house wakes up, coffee in hand, checking on your plants in the early morning quiet. That ritual of tending something living, of responding to its needs, of slowing down enough to notice it does something to a stressed, overstimulated mind that no screen time or productivity hack can replicate.
Mental health professionals increasingly recognize gardening as a genuine, evidence-backed tool for reducing anxiety and depression. The combination of light physical activity, time in nature, sensory engagement with soil and plants, and the satisfaction of nurturing something to fruition activates parts of our nervous system that daily modern life rarely touches. When you create a thriving small patio veggie garden, you’re not just growing food, you’re building a space where your mind can exhale.
For families, a patio garden becomes common ground. Children who help plant and tend a garden are statistically more likely to eat vegetables without a battle at the dinner table. Partners who might otherwise be scrolling in separate rooms find a shared project and a shared language. And for anyone living alone, the simple accountability of caring for a living thing, of knowing your seedlings need you, is grounding in a way that’s difficult to fully articulate until you’ve experienced it. This is why it matters. Not just the harvest, but everything that grows around it.
Frequently Asked Questions
How much space do I actually need to start a patio veggie garden?
You need surprisingly little. A 4×2-foot raised bed, or four to six 5-gallon containers, is enough to grow a meaningful selection of vegetables. Even a single large pot with a cherry tomato plant, a basil plant, and a ring of lettuce around the edge will give you fresh produce from spring through fall. Start with what you have, and expand as your confidence grows.
What are the easiest vegetables to grow in a small patio garden?
Lettuce, radishes, green onions, cherry tomatoes, and fresh herbs like basil, parsley, and chives are consistently the most forgiving and rewarding choices for beginners. They grow relatively quickly, handle minor care inconsistencies, and produce abundantly in containers and raised beds alike.
How often do I need to water a raised patio veggie garden?
In warm, sunny weather, raised beds and containers may need watering every day or every other day. In cooler weather or after rain, you can go several days between waterings. The most reliable method is the finger test: press your finger an inch into the soil. If it feels dry, water thoroughly. If it still feels moist, wait and check the next day again.
Can I grow vegetables on a north-facing or shady patio?
Yes, with the right plant choices. Shade-tolerant vegetables include lettuce, spinach, arugula, kale, Swiss chard, and most herbs like mint, parsley, and cilantro. These plants actually prefer some protection from intense afternoon sun. You won’t be growing tomatoes or peppers without good light, but you can absolutely create a productive, beautiful leafy green garden in partial shade.
Do I need to replace the soil in my raised bed every year?
You don’t need to replace it entirely, but you should refresh it. At the start of each season, top-dress your raised bed with 2–3 inches of fresh compost and gently work it into the top layer of existing soil. Over time, healthy raised bed soil actually improves as it becomes richer in beneficial microorganisms and organic matter, especially if you’re composting your kitchen scraps.
What should I do at the end of the growing season?
Once your warm-season plants have finished producing, remove them and their roots, and add a thick layer of compost to restore nutrients. You can then plant cold-tolerant crops like kale, spinach, or garlic for a fall and winter harvest, or simply cover the bed with a layer of straw to protect the soil structure until spring. A productive patio garden is a year-round project if you want it to be.