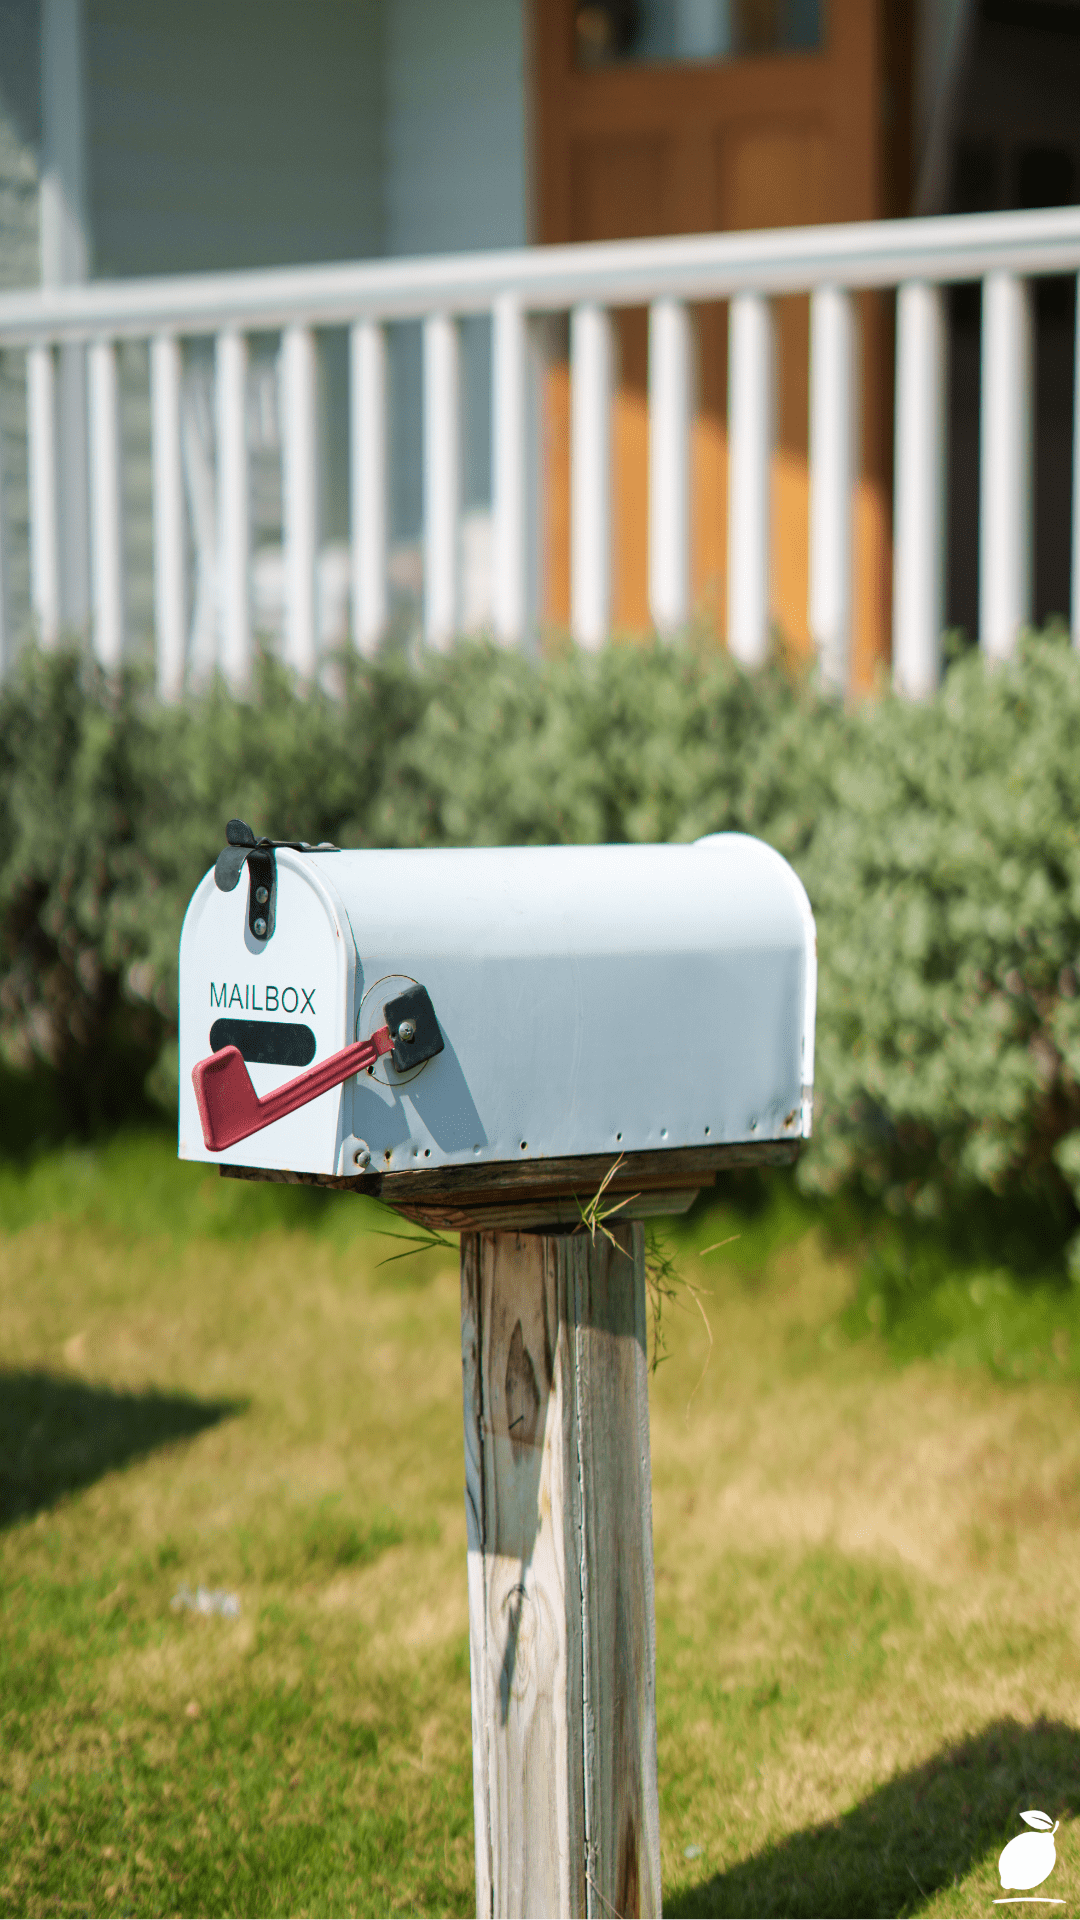
For a long time, the stretch of yard between our front door and the street was the part of the property I mentally skipped over. The mailbox was a plain post-and-box combination from a hardware store, planted in a patch of grass that was neither thriving nor dead, just existing, doing the bare minimum, collecting whatever the weather sent its way. Every spring, I’d notice neighbors whose yards looked like they belonged on the cover of a gardening magazine, with cascading daffodils and clouds of purple lavender framing their mailboxes like a welcome committee, and I’d feel that familiar mixture of admiration and quiet guilt. My front yard was saying something about our home to every person who drove past. I just hadn’t been paying attention to what it was saying.
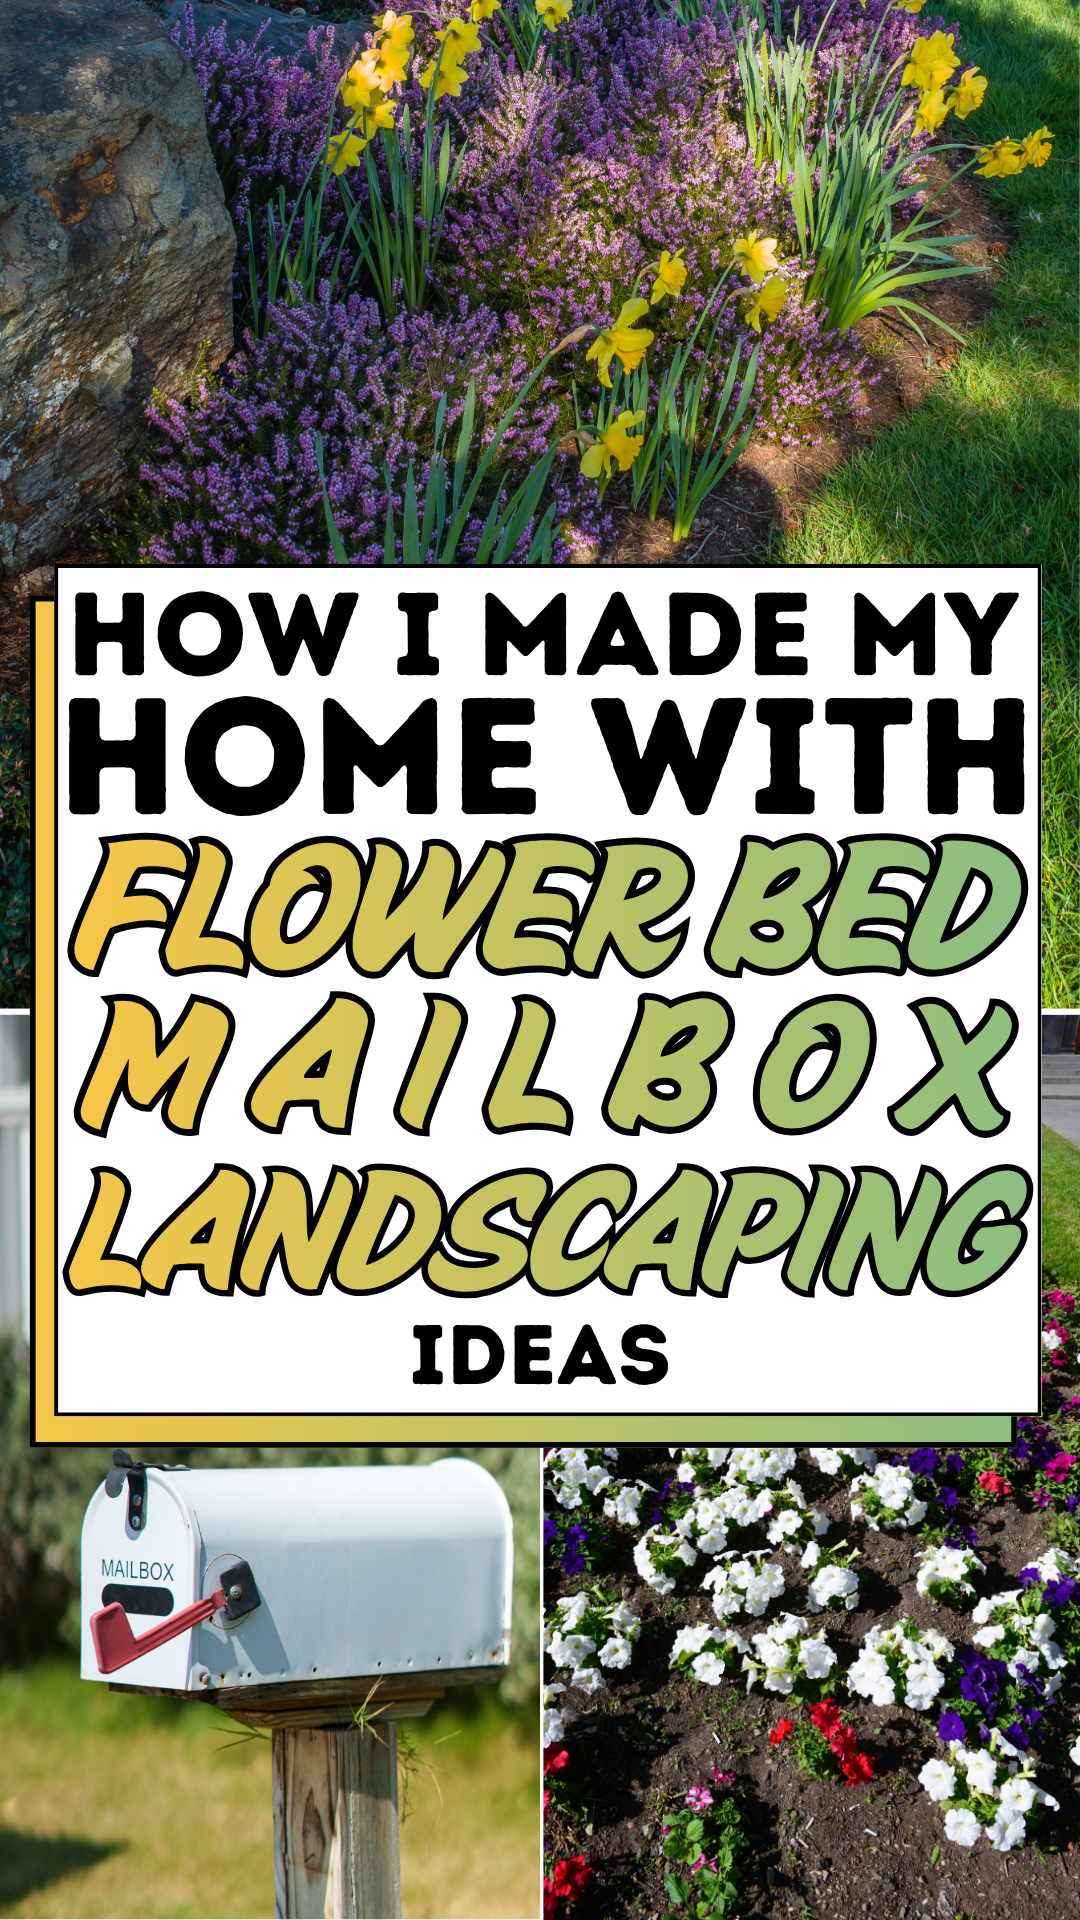
The breakthrough didn’t come from a landscaping company or an expensive renovation budget. It came from finally sitting down with the problem honestly and asking: What would it actually take to make this corner of the yard beautiful? The answer, once I stopped assuming it required professional help, turned out to be surprisingly manageable. Mailbox landscaping, the practice of creating an intentional flower bed around your mailbox post, is one of the most high-impact, low-footprint garden projects a homeowner can tackle. A well-designed mailbox flower bed takes up only a few square feet of ground, costs a fraction of any major landscaping project, and delivers a return in curb appeal that’s wildly disproportionate to the effort involved.
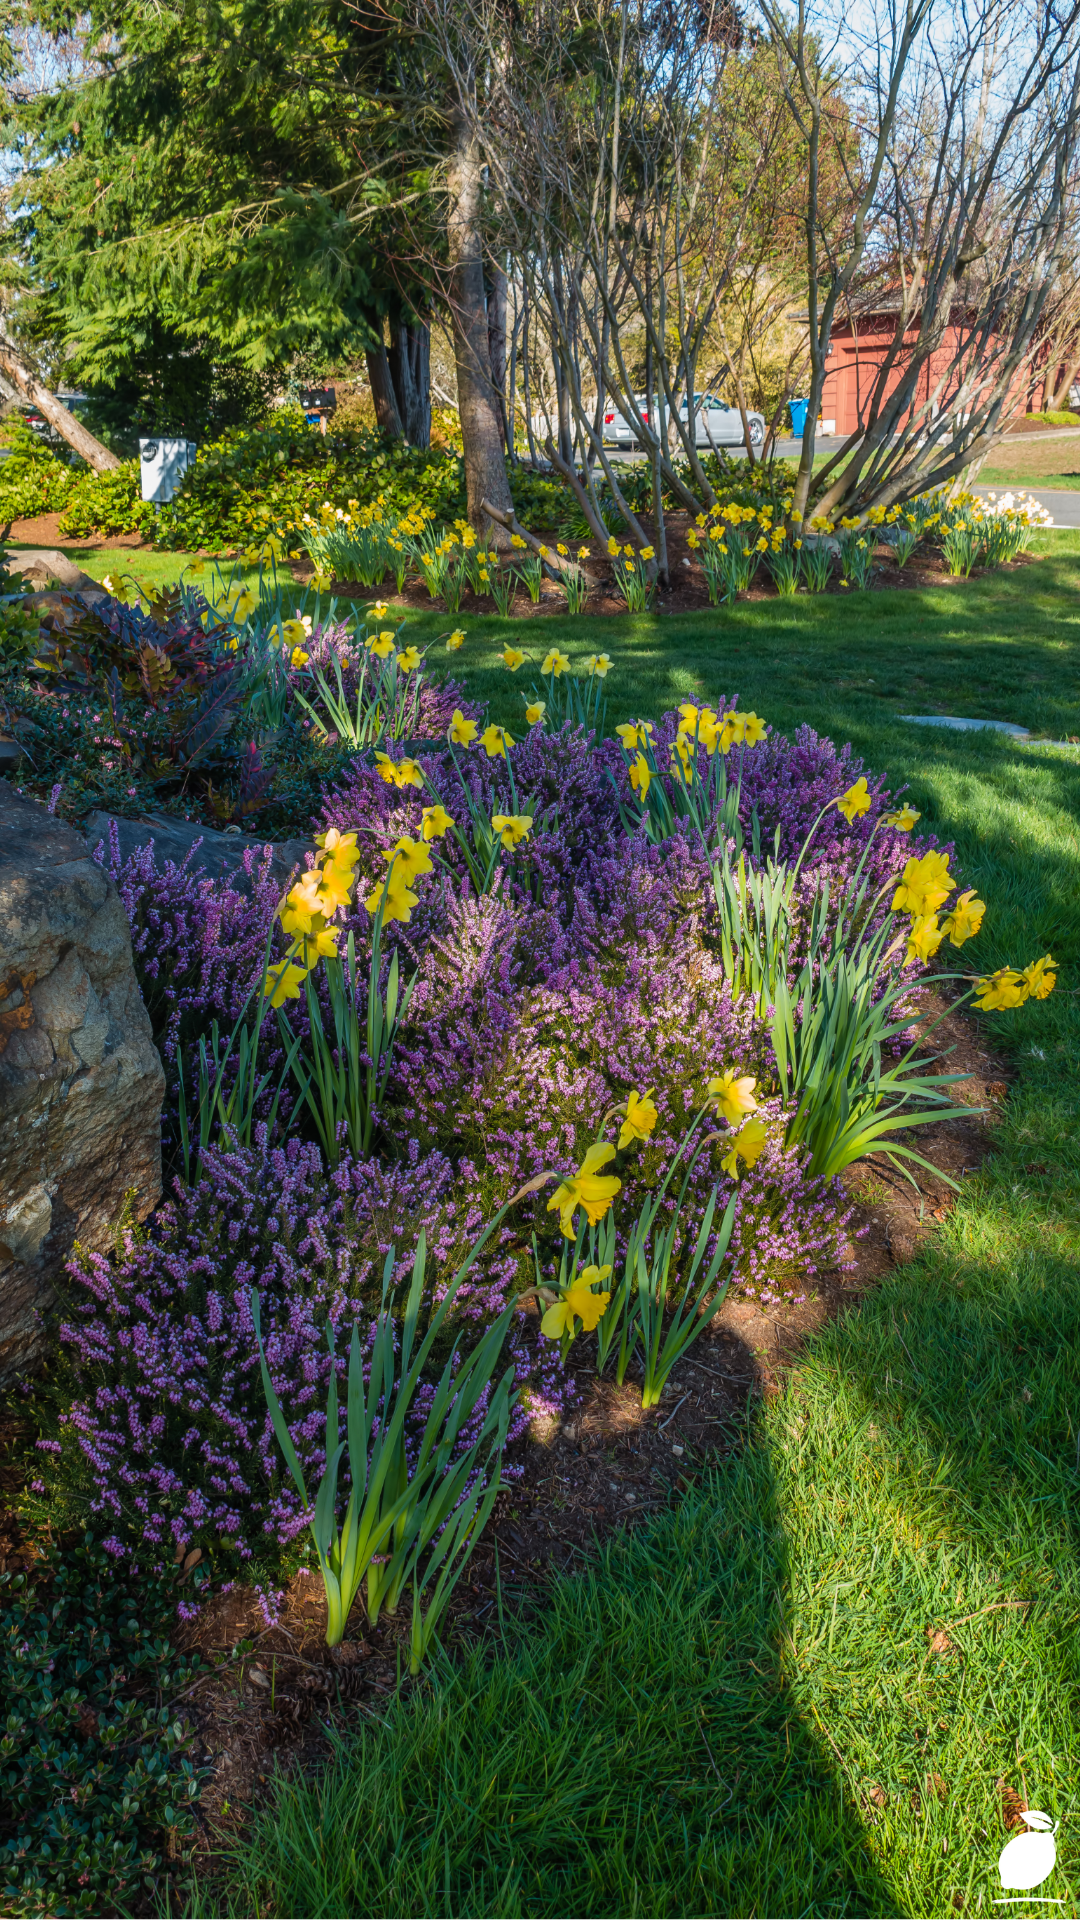
What you’ll read in this post is the exact process I followed from the first bag of compost to the last border stone set in place to create a mailbox landscaping display that gets more compliments than anything else we’ve done to the exterior of our home. The combination of bright yellow daffodils rising above a low cloud of purple lavender, edged with natural stone and set against dark, freshly tilled soil, is not a complicated arrangement. It’s an intentional one. And intentional, it turns out, is all it ever needed to be. Let’s walk through every step of the mailbox landscaping process together.
The Mailbox Landscaping Blueprint
Great mailbox landscaping doesn’t require professional training; it requires a clear sequence. Work through these steps in order, and your flower bed will look cohesive, well-planned, and genuinely beautiful from the very first season.
Step 1: Assess Your Mailbox’s Site Conditions
Before you purchase a single plant or bag of soil, spend a full day observing the area around your mailbox. How many hours of direct sunlight does it receive? Is the ground level, sloped, or uneven? Does the water pool there after rain, or does it drain quickly? Is the mailbox post set in grass, mulch, or bare dirt? These answers determine everything about which plants will thrive and which will struggle, and they prevent the most expensive mailbox landscaping mistake of all, which is buying beautiful plants that are wrong for the site and watching them fail within a season. Daffodils and lavender, for example, both require well-drained soil and full to partial sun. In a shaded or waterlogged site, they would need to be replaced with shade- and moisture-tolerant alternatives.
Step 2: Define the Shape and Size of Your Flower Bed
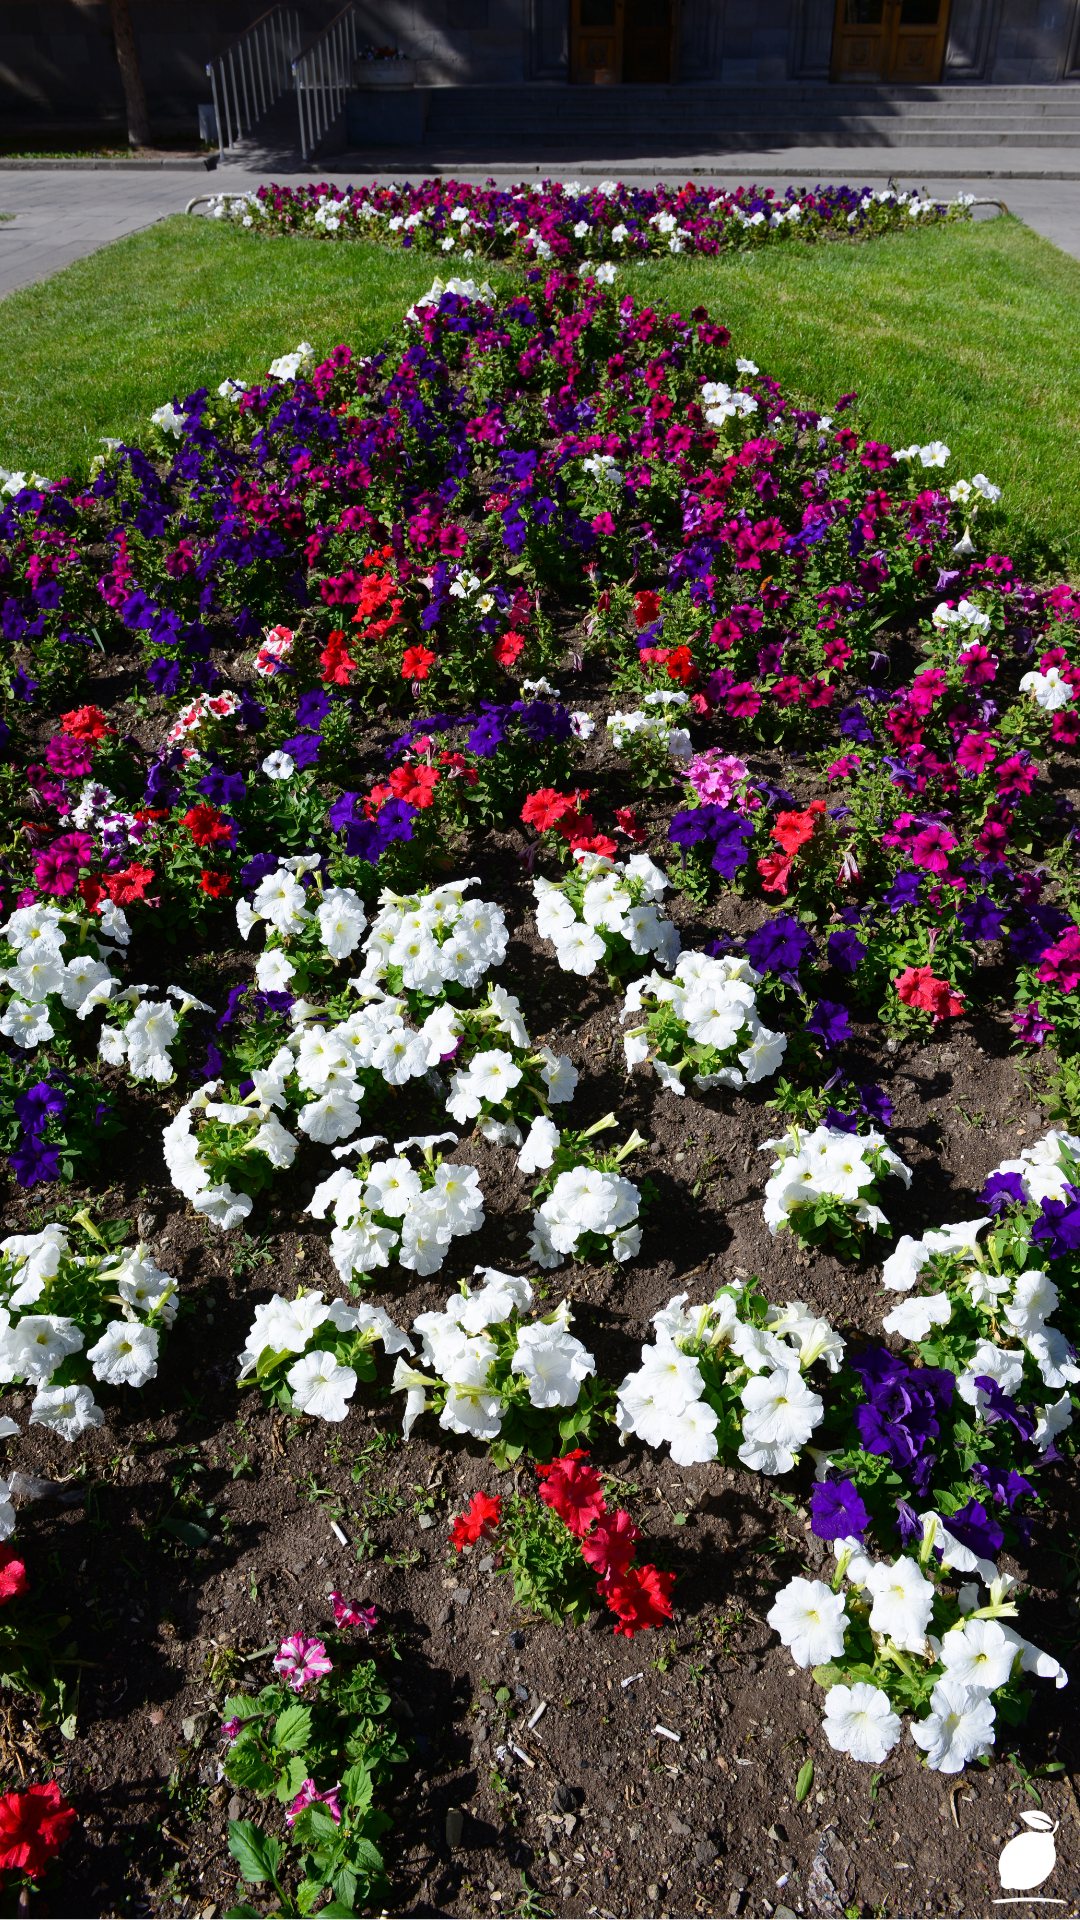
Mailbox landscaping flower beds come in two primary shapes: a symmetrical oval or teardrop centered on the post, or an asymmetrical naturalistic planting that extends along the driveway or path. The naturalistic approach, which mirrors the organic, layered arrangement visible in a well-planted garden border, tends to look more sophisticated and settled than a rigid oval. Use a garden hose or rope to lay out your chosen shape on the ground before cutting any edges, and step back to view it from the street. The bed should feel generous enough to anchor the mailbox visually but not so large that it overruns the surrounding lawn. A depth of 24 to 36 inches from the post outward and a total width of 4 to 6 feet is a strong starting point for most mailbox landscaping projects.
Step 3: Install Your Border Edging
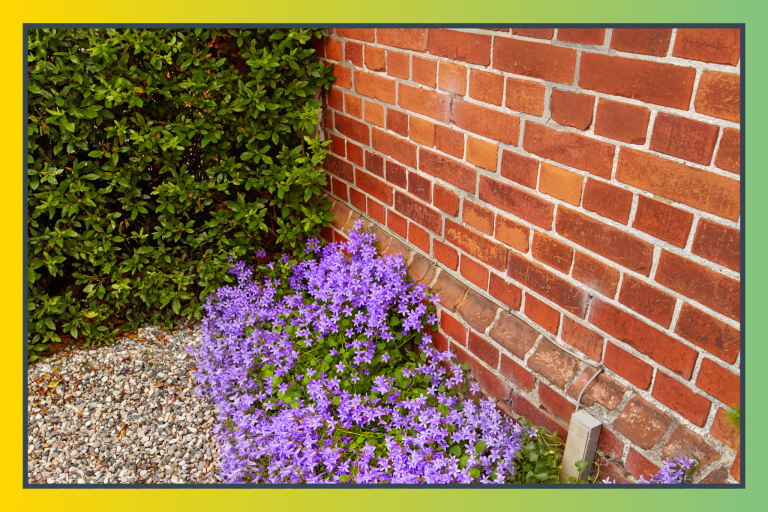
Edging is what separates a polished mailbox landscaping bed from a patch of flowers that looks like it migrated there by accident. Natural stone is the most visually compelling choice. Irregularly shaped flat stones or rounded river rocks set along the bed’s perimeter create an organic, permanent boundary that improves with age and weather. Set each stone firmly into the soil so that at least one-third of its height is buried, and check that the line of the border reads as intentional and fluid from street level. Landscape edging in steel, aluminum, or composite materials is a faster and more economical alternative that holds its line reliably through freeze-thaw cycles. Whatever material you choose, install the edging before you amend the soil. It defines the workspace and prevents soil from spilling onto the lawn during the digging phase.
Step 4: Prepare and Amend the Soil
The single most important investment in any mailbox landscaping project isn’t the plants, it’s the soil they grow in. Remove all existing grass, weeds, and roots within your defined bed area using a flat spade. Dig down approximately 10 to 12 inches to loosen compacted soil and improve drainage. Amend generously with a mixture of compost and coarse horticultural grit or perlite. This combination feeds the plants, improves drainage (critical for lavender, which will rot in waterlogged conditions), and creates the dark, rich, freshly tilled soil texture that makes a new flower bed look professionally prepared from day one. Rake the amended soil to a smooth, even surface and allow it to settle for 24 to 48 hours before planting if your schedule allows.
Step 5: Design Your Planting Scheme With Height Layers
The visual impact of great mailbox landscaping comes from layering plant heights so the composition reads as naturalistic and full rather than flat. Work in three tiers: tall background plants positioned closest to the mailbox post and the back of the bed, mid-height feature plants in the center zone, and low-growing or spreading plants at the front edge. For a spring-blooming mailbox landscaping bed, daffodils (18 to 24 inches tall) make a stunning tall layer that rises boldly behind a lower skirt of lavender (12 to 18 inches). Add a spreading ground cover like creeping thyme or ajuga at the very front edge to soften the border line and fill in as the season progresses. Plan your planting scheme on paper before you put a single plant in the ground. It takes five minutes and saves hours of rearranging.
Step 6: Plant, Mulch, and Water In
Plant bulbs (daffodils and other spring-blooming bulbs) in autumn at a depth of three times their diameter, pointed end up. Plant lavender and other perennials in spring after the last frost date for your region, spacing them according to their mature spread rather than their current pot size. Lavender needs 18 to 24 inches between plants at maturity. Once everything is in the ground, apply a 2 to 3 inch layer of organic mulch (shredded bark or wood chip) across the entire bed surface, keeping it pulled back slightly from plant stems and the mailbox post itself. Mulch suppresses weeds, retains moisture, regulates soil temperature, and gives the bed a finished, professional appearance from the moment you put your tools away. Water thoroughly after planting and maintain consistent moisture through the first growing season until plants are established.
Step 7: Maintain the Bed Through the Seasons
Mailbox landscaping is an investment that grows more beautiful each year, but only with basic seasonal maintenance. Deadhead spent daffodil flowers, but allow the foliage to die back naturally (it feeds the bulb for next year’s bloom). Trim lavender by one-third immediately after flowering to keep it compact and encourage a second flush of blooms. Refresh the mulch layer each spring. Pull weeds promptly while they’re small. In late autumn, divide and replant overcrowded daffodil clumps to prevent bloom quality from declining. A well-maintained mailbox landscaping bed takes less than 30 minutes of attention per week during the growing season and rewards that minimal investment with an ever-improving display.
Expert Secrets for Success
Pro-Tips for a Better Result
- Plant daffodil bulbs in groups of seven or more for maximum visual impact. Single bulbs or pairs look sparse and accidental in a mailbox landscaping bed. Planting bulbs in generous clusters of seven, nine, or twelve together creates the bold, naturalistic sweeps of color that make spring flower beds look genuinely spectacular. The odd numbers create a more organic, less formal arrangement than even-numbered groupings.
- Choose lavender varieties suited to your climate zone. English lavender (Lavandula angustifolia) is the hardiest variety and the best choice for mailbox landscaping in Zones 5 through 8. In warmer zones (9 and above), Spanish or French lavender varieties perform better. Using the wrong lavender for your zone is the single most common reason lavender fails to overwinter. Check your hardiness zone before purchasing.
- Add a retaining stone border on sloped sites before planting. If your mailbox sits on a sloped verge or the ground grades away from the post, a natural stone retaining wall along the downhill edge of the bed will hold the soil in place, prevent erosion during heavy rain, and add immediate structural beauty. Stack flat stones without mortar for a naturalistic dry-stone look; even a single course of stones 4 to 6 inches high is enough to retain a small slope effectively.
- Use a slow-release granular fertilizer at planting time. Working a slow-release bulb and perennial fertilizer into the soil at planting gives both daffodils and lavender a steady nutrient supply through their first growing season without the risk of burning young roots. A single application at planting and one top-dressing in early spring the following year is all most mailbox landscaping beds require.
- Photograph your bed from the street, not the garden. The way a mailbox landscaping bed looks from street level, the angle from which every passing neighbor and visitor actually sees it is often very different from how it looks when you’re standing over it in the garden. Take photos from the curb regularly throughout the season. They’ll reveal gaps in coverage, lopsided height distribution, and color imbalances that are invisible from ground level, and they’ll guide your planting decisions for the following seasons.
Common Mistakes to Avoid
- Planting too close to the mailbox post base. Many new mailbox landscaping projects crowd plants directly against the post, which restricts airflow, promotes rot in wooden posts, and makes mail delivery awkward for the carrier. Leave at least 6 to 8 inches of clear space around the base of the post for access and air circulation. The planting should frame the mailbox, not engulf it.
- Mixing plants with incompatible water needs. Daffodils prefer to dry out after blooming; lavender needs excellent drainage and actively dislikes wet conditions, but many popular mailbox plants (impatiens, hydrangeas) require consistently moist soil. Mixing drought-tolerant and moisture-loving plants in the same small bed means one group will always be stressed. Research water needs before combining species, or use a drip irrigation system with zone control.
- Skipping the edging installation. A mailbox landscaping bed without defined edging looks unfinished, regardless of how beautiful the plants are. Grass and weeds will encroach from the lawn within weeks of planting, blurring the line between bed and turf and requiring constant re-edging by hand. Install a permanent edging material at the very beginning; the few hours it takes will save you far more maintenance time over the life of the bed.
- Choosing plants for their peak bloom only. A mailbox landscaping bed that looks spectacular for three weeks in May and bare and brown for the remaining nine months is a missed opportunity. Choose plants with staggered bloom times: spring bulbs (daffodils), early-summer perennials (lavender, salvia), and late-summer bloomers (coneflower, black-eyed Susan) so the bed offers color and interest from early spring through first frost. Evergreen groundcovers provide structure even in winter.
- Failing to check local mailbox regulations before planting. The United States Postal Service and many local municipalities have specific regulations about clear access zones around residential mailboxes, including minimum clearance heights and distances. Before installing any tall plants or structural edging, verify that your mailbox landscaping design complies with USPS clear-zone requirements (typically 15 inches on each side of the box opening) and any local ordinances that apply to front yard plantings near the road.
Why Mailbox Landscaping Matters
There is a particular kind of satisfaction that comes from standing at the end of your own driveway and genuinely liking what you see. It’s not about impressing the neighbors or increasing the appraisal value of your home, though mailbox landscaping reliably does both of those things. It’s about the quiet daily experience of leaving and returning to a space that feels cared for, that communicates something true and intentional about the people who live there. A well-planted mailbox flower bed is often the first thing a visitor sees before they even reach your front door, and it sets the tone for everything that follows: this is a home where attention is paid, where small things are done with care, where beauty is considered a worthwhile investment of time and energy.
That investment carries inward, too. There is growing evidence in environmental psychology that tending to the visible, ordered beauty of our immediate surroundings, even in small, contained ways, reduces stress, improves mood, and creates a stronger sense of connection to place. When you plant a mailbox landscaping bed and watch it establish and bloom and fill in over successive seasons, you are building a relationship with a living system that rewards consistency and attention. That experience of nurturing something that grows, of making a small corner of the world more beautiful than you found it, is one of the quietest and most genuine forms of mental restoration available to anyone with a patch of ground and an hour on a Saturday morning. It matters more than it looks like it should. And it looks pretty extraordinary.
Frequently Asked Questions
What are the best plants for mailbox landscaping in full sun?
Daffodils, lavender, black-eyed Susan, coneflower (echinacea), salvia, catmint, and ornamental grasses are all excellent choices for mailbox landscaping in full sun. For continuous color from spring through autumn, combine spring-blooming bulbs (daffodils, tulips) with summer perennials (lavender, salvia, coneflower) and late-season bloomers (sedum, asters). All of these are low-maintenance once established and return each year reliably without replanting.
How do I keep weeds out of my mailbox landscaping bed?
A 2 to 3-inch layer of organic mulch applied each spring is the most effective and lowest-maintenance weed suppression strategy for mailbox landscaping beds. Mulch blocks light from reaching weed seeds in the soil, dramatically reducing germination. Pull any weeds that do emerge promptly while they’re small and before they set seed. Landscape fabric beneath the mulch layer adds additional suppression but can complicate plant division and bed renovation in later years.
When is the best time to start a mailbox landscaping project?
The best time to begin a mailbox landscaping project depends on what you’re planting. Spring-blooming bulbs (daffodils, tulips, alliums) must be planted in autumn, typically September through November, depending on your zone, to bloom the following spring. Perennials like lavender, salvia, and coneflower are best planted in spring after your last frost date. Starting the bed preparation and edging installation in late summer allows you to plant both bulbs and perennials in the same season for a full, layered display from the very first spring.
How large should a mailbox landscaping flower bed be?
For most residential mailboxes, a bed that extends 24 to 36 inches outward from the post in all directions and runs 4 to 6 feet wide creates a generous, proportionate display. Beds smaller than 18 inches deep tend to look undersized relative to the mailbox post and the surrounding lawn. If space allows, extending the bed along the driveway edge in a naturalistic ribbon planting significantly increases the visual impact and gives you more room for plant variety and layered height.
Can I do mailbox landscaping in a rental property?
Yes, with your landlord’s permission and a few strategic choices. Container-based mailbox landscaping (using large pots or half-barrels grouped around the post) is fully portable and leaves no permanent changes to the property. Choose containers large enough to accommodate deep-rooted plants and ensure they have adequate drainage. Planted containers can be moved with you when your lease ends. If in-ground planting is permitted, focus on perennials and bulbs that will continue to benefit the property long-term. This can actually work in your favor when negotiating lease renewals.