The idea of turning a creative hobby into extra income always sounds straightforward until you’re standing in the garage surrounded by half-finished projects. These three different stain colors turned out nothing like the sample chips, a jigsaw that keeps binding on curves, and the dawning realization that the farmers’ market booth you signed up for is three weeks away. Fall crafts have a specific appeal in this context because the season’s demand is real and consistent customers actively seek autumn décor in a way they don’t seek generic home accessories, but the gap between a beautiful fall craft idea and a sellable, consistently produced, profitably priced fall craft product is wider than most beginners expect. The craft table gets messier before it gets productive.
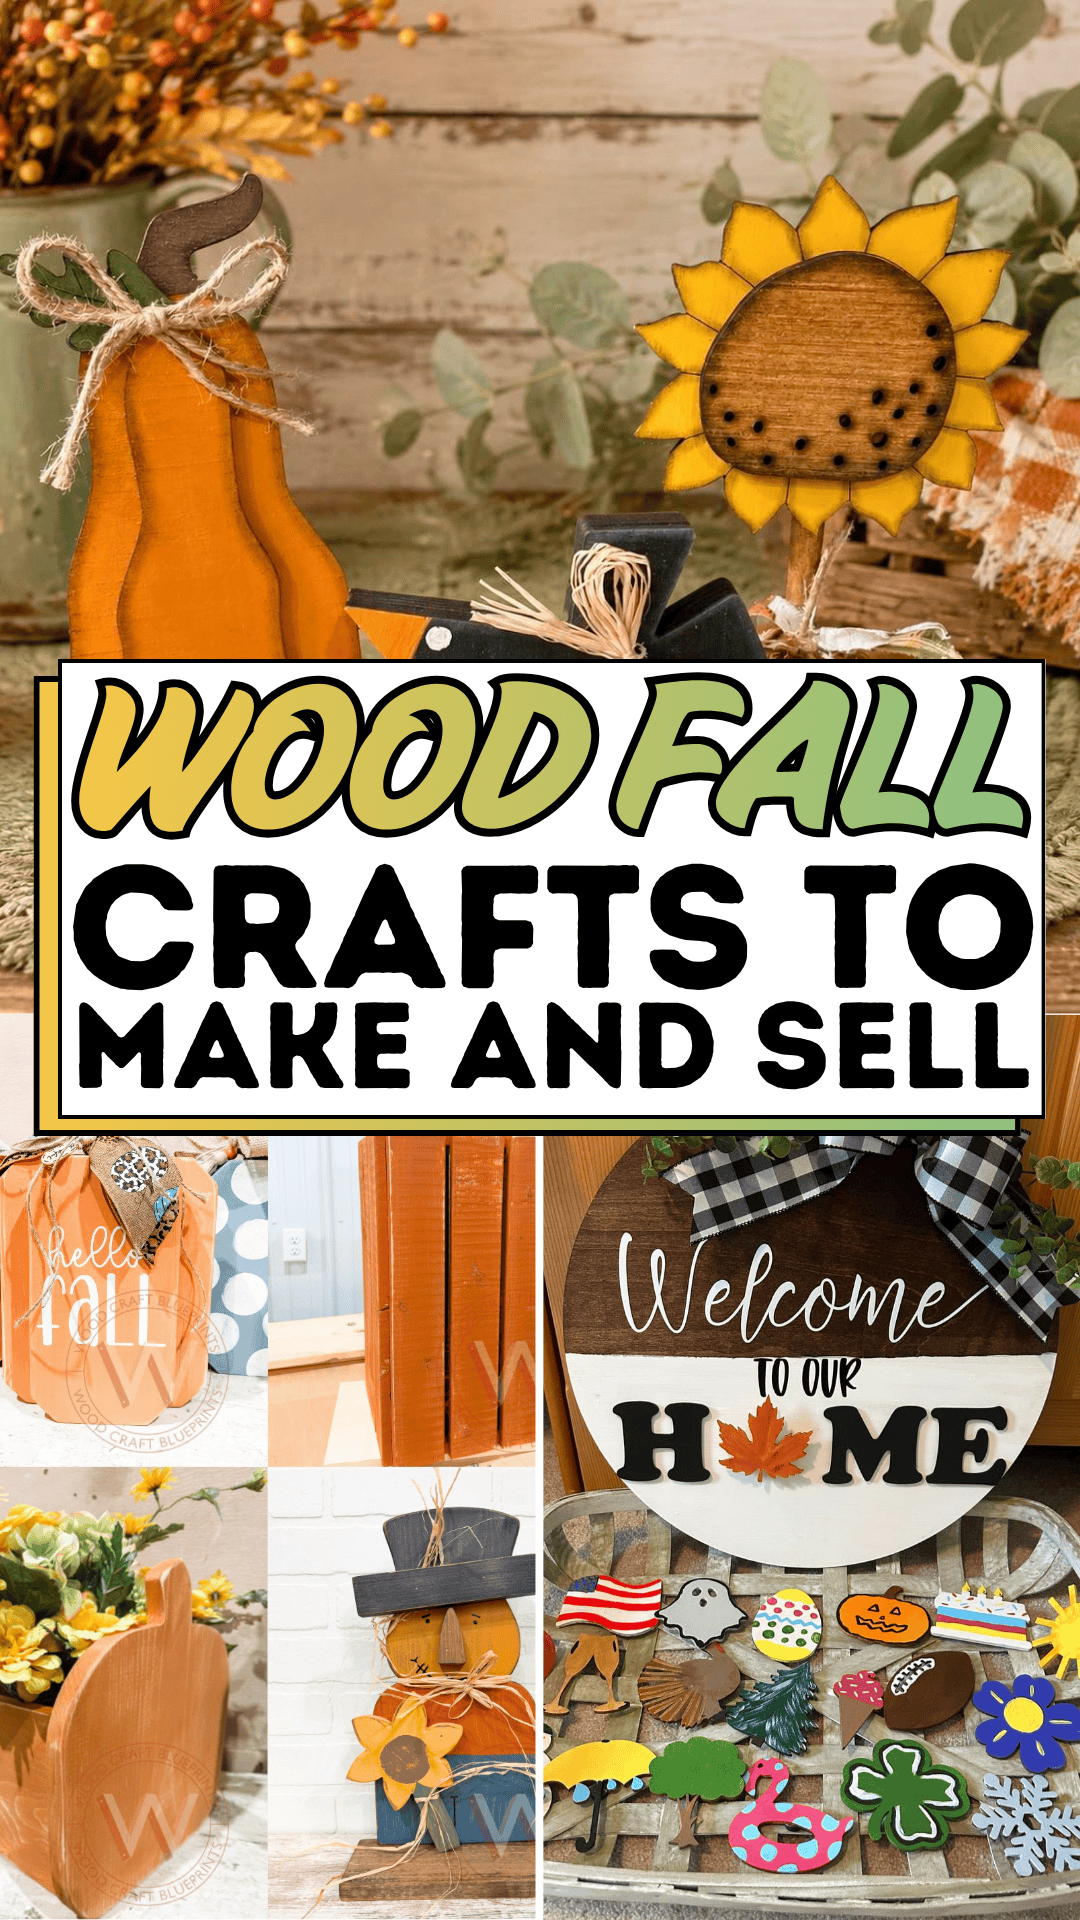
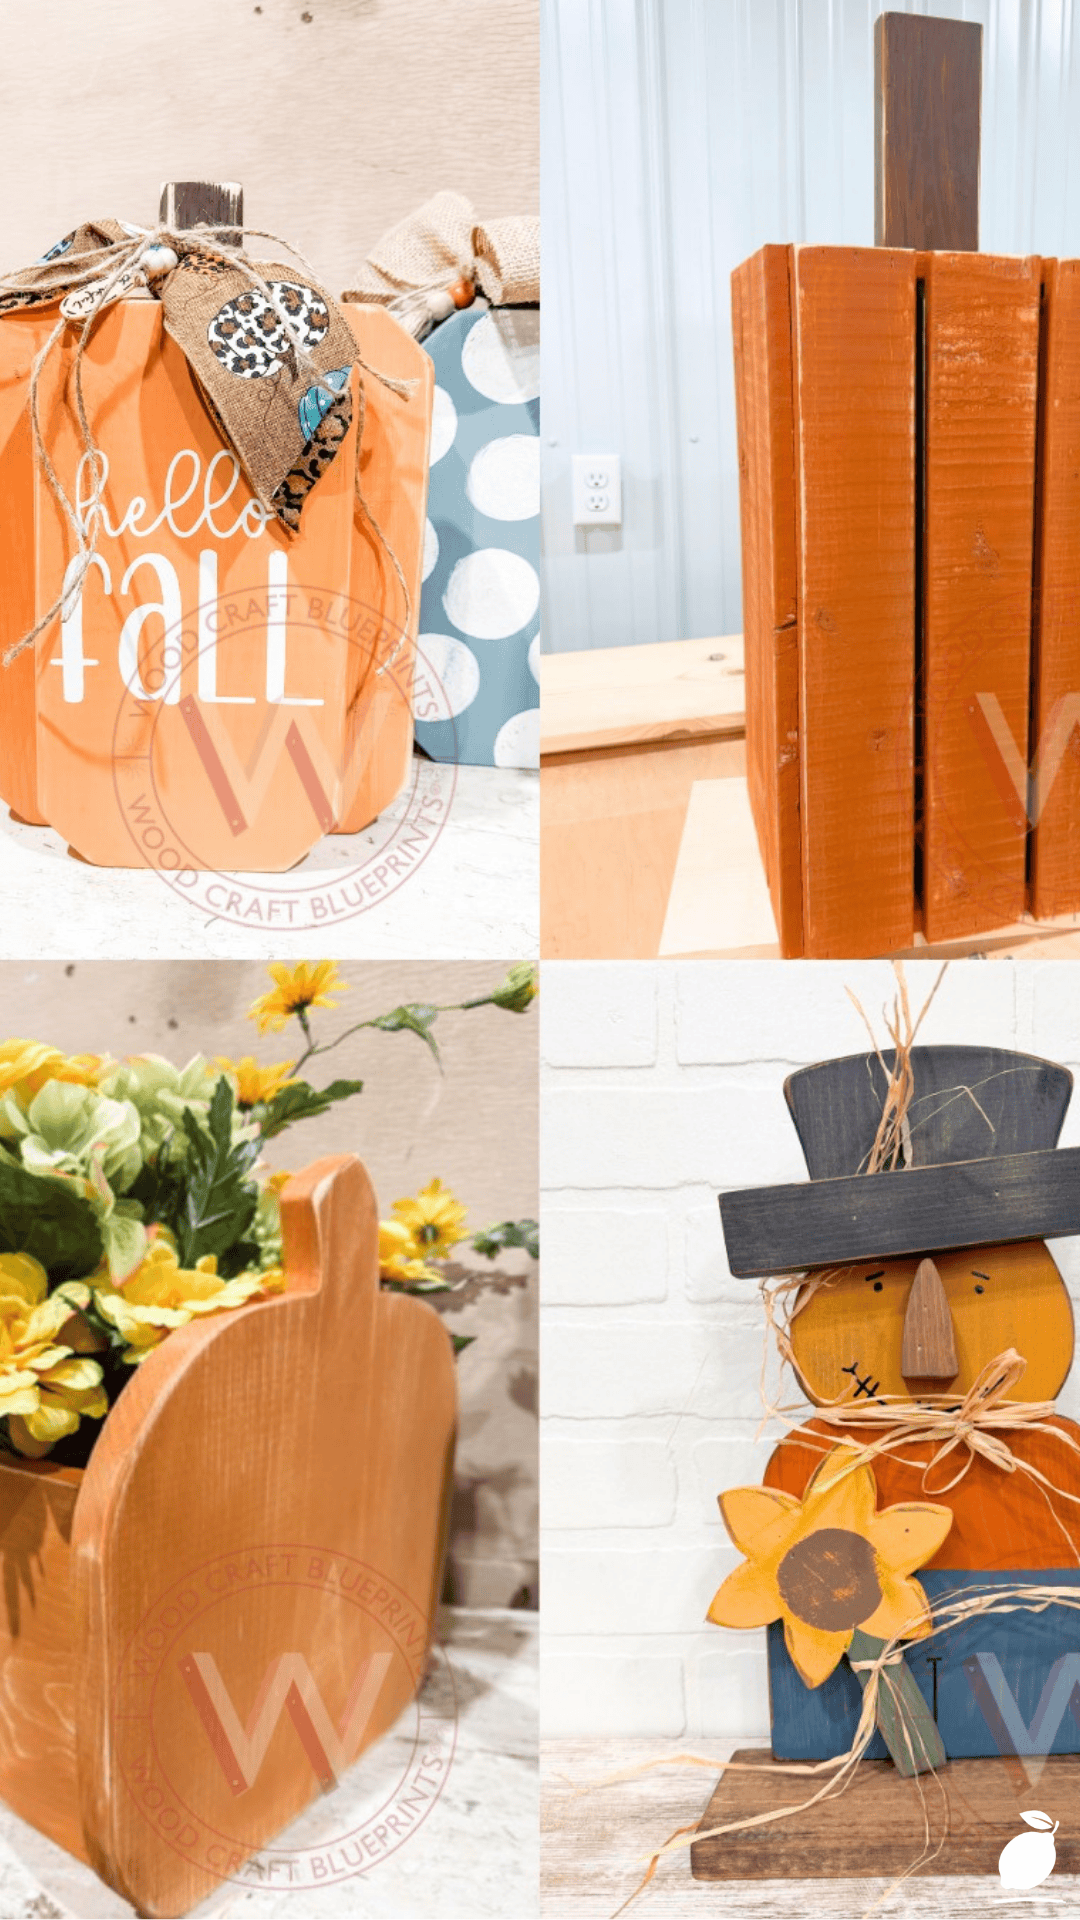
What changes the equation is making wood fall crafts specifically rather than fabric, paper, or mixed media seasonal décor. Wood is the craft material that most consistently bridges the gap between handmade and perceived-as-quality in the consumer market. A painted wooden pumpkin reads as a considered purchase in a way that a foam alternative does not, and a stained wooden planter box commands a price point that a plastic equivalent cannot approach. The four wood fall crafts in the image above painted pumpkin signs, a three-plank standing pumpkin, a planter box with curved top edge, and a wooden scarecrow figure on a base represent the complete range of sellable wood fall crafts: small gift-price items, medium statement pieces, functional décor, and seasonal character pieces. Each has a distinct customer, a distinct production approach, and a distinct price point in the fall craft market.
The difference between wood fall crafts that sell consistently and those that accumulate on the booth table unsold is not primarily about design; it is about production quality, finish consistency, and the specific understanding of what the fall craft customer is actually buying. They are buying the season. They are buying the warmth of orange and rust and forest green on natural wood. They are buying a piece that makes their front porch or their kitchen counter feel like autumn arrived intentionally. This guide gives you the complete system for making wood fall crafts that meet that standard reliably enough to build a sellable, repeatable craft product line.
The Fall Crafts Blueprint
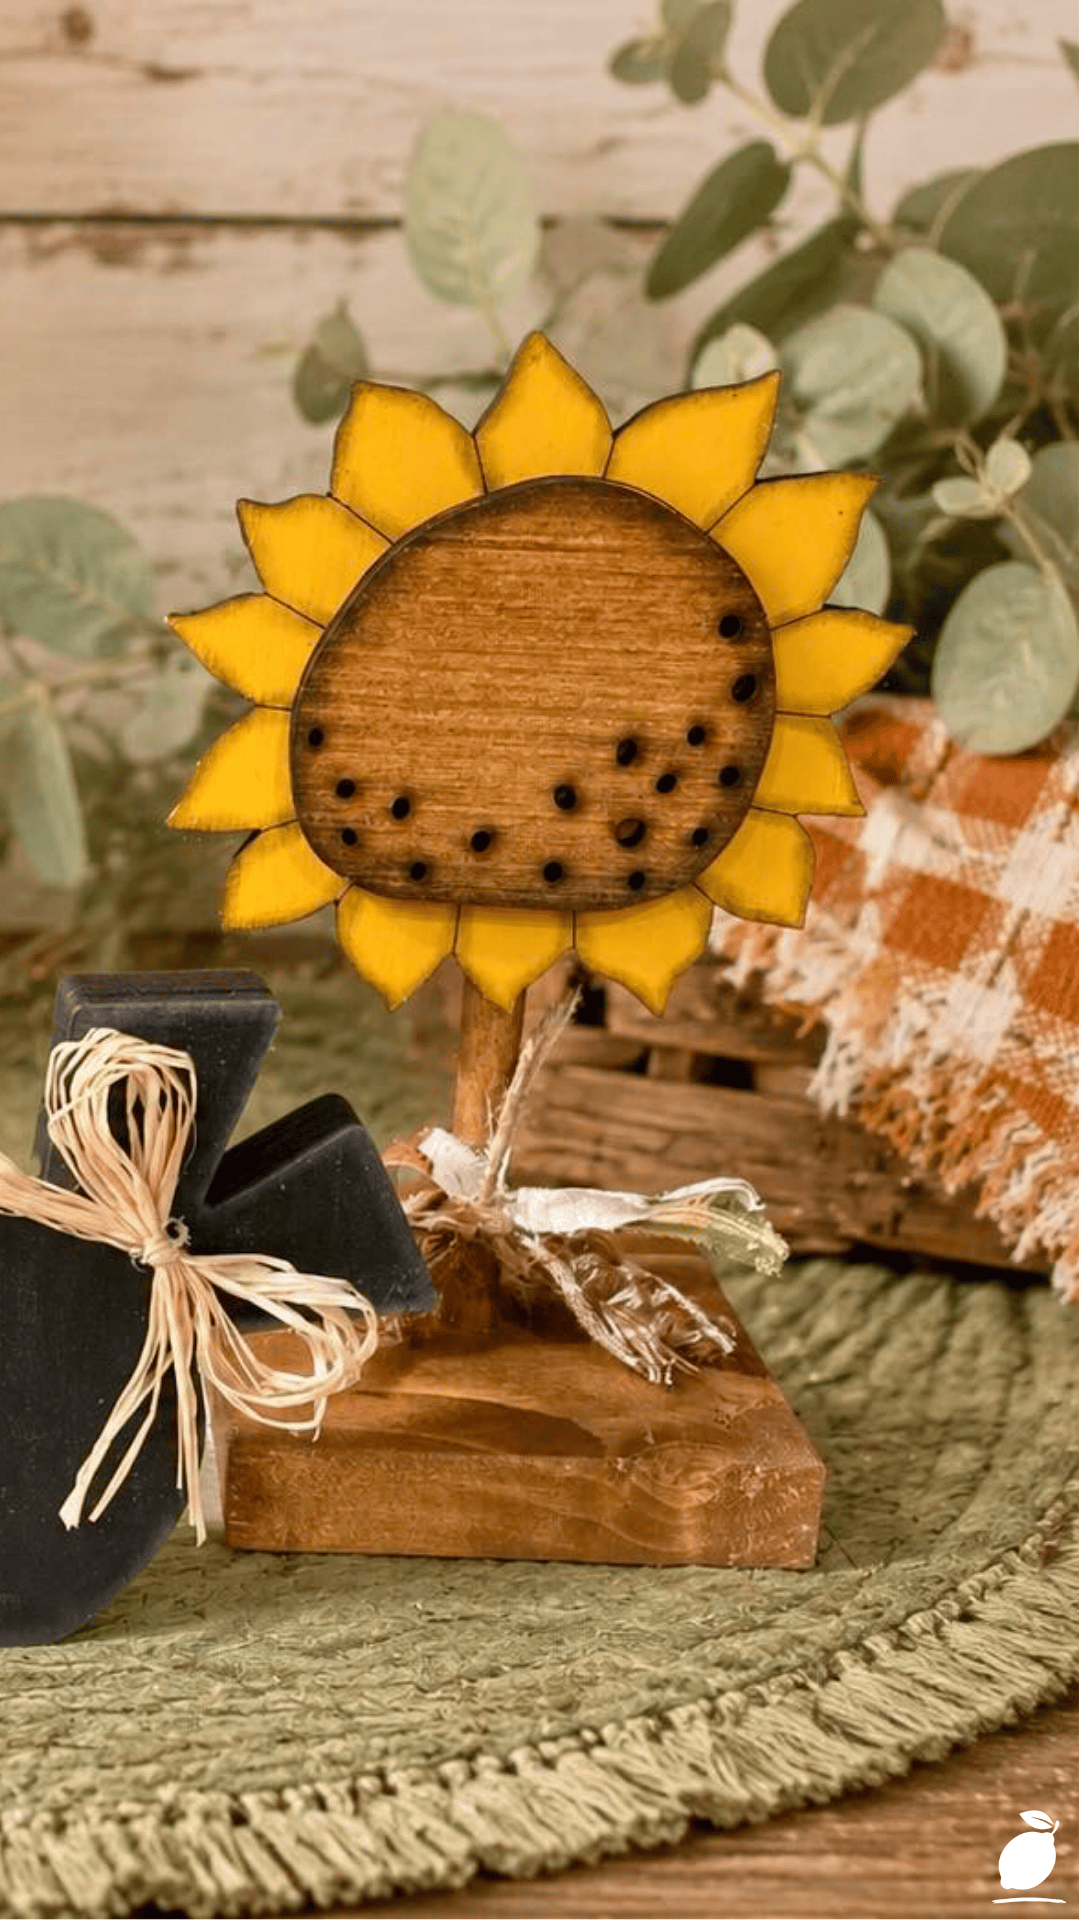
Step 1: Set Up a Dedicated Wood Fall Crafts Workspace
Wood fall crafts production, particularly at the volume required to make selling viable, requires a workspace configured for both individual craft quality and batch production efficiency. A kitchen table that gets cleared and reclaimed for every production session creates the specific frustration that turns a creative hobby into a chore: the setup and breakdown cost accumulates until the session itself is shorter than the time spent preparing for it.
Dedicate a permanent workspace to wood fall crafts production if the living situation allows: a garage corner, a basement table, a shed with electrical access. At minimum, the workspace needs a flat, stable cutting surface large enough to accommodate the longest piece of wood being cut, a drill and fastener station where assembly work happens, and a separate painting and finishing station where stain and paint are applied and pieces dry without contact with the cutting and assembly area.
Organize the wood fall crafts workspace by production phase rather than by material: raw materials together, cut and prepared blanks together, primed and ready-to-finish pieces together, finished and drying pieces in a protected zone. This production-line organization means each session can advance pieces through one phase without requiring the full process to be completed in a single sitting the model that makes batch production possible and that keeps the workspace manageable between sessions.
Ventilation is non-negotiable for a wood fall crafts workspace that uses stains, oil-based paints, or spray sealants. Ensure adequate airflow with a window fan positioned to exhaust fumes outward, or a dedicated exhaust fan for any finishing session. Fume accumulation from multiple coats of stain in an enclosed space is both a health hazard and a fire risk from the solvent content of oil-based finishing products.
Step 2: Source and Prepare the Right Wood for Fall Crafts
Wood selection is the fall crafts decision that most directly determines the finished quality of the product and the efficiency of the production process. The best wood for fall crafts use materials that are available in consistent supply, are priced appropriately for the intended retail price of the finished piece, and accept paint and stain in a way that produces the warm, rich autumn tones that fall craft customers expect.
Common pine in standard dimensional lumber sizes (1×3, 1×4, 1×6, 1×8, 1×10, and 1×12 boards) is the most widely available and most cost-effective material for wood fall crafts. It accepts paint and stain readily, cuts cleanly on a table saw or circular saw, and is available at every home improvement center in consistent quality. The three-plank standing pumpkin in the featured image’s top right photograph is built from standard dimensional pine boards cut to varying heights and assembled side by side a construction approach that requires no specialist lumber and produces a professional-looking fall craft with basic woodworking skills.
Select lumber carefully at the point of purchase: look for boards with straight grain, minimal knots in the areas that will be visible in the finished fall craft, and no warping or cupping that would prevent the piece from sitting flat or assembling squarely. Knots are not always a defect in fall crafts; the rustic, organic quality of a visible knot can add character to a wooden pumpkin or scarecrow base, but large, loose knots that may pop out during handling are a quality issue in any sellable product.
Pre-sand all lumber before cutting to finished dimensions, starting with 120-grit and finishing with 220-grit. Pre-sanding is more efficient than sanding after cutting and assembly because the full board surface can be machine-sanded in a single pass before the cuts introduce angles and edges that require hand sanding to reach. A well-sanded surface accepts paint and stain more evenly than a rough-milled surface, producing the smooth, consistent finish that distinguishes professional wood fall crafts from amateur ones.
Step 3: Design Your Wood Fall Crafts Product Line
A sellable wood fall crafts product line requires deliberate design before any cutting begins; specifically, a defined range of products at multiple price points that share a consistent visual identity and that can be produced efficiently in batches rather than as one-off individual pieces.
Design around three price tiers for the fall craft market. The entry tier ($10 to $25 retail) includes small signs, mini pumpkin figures, ornaments, and hanging decoration pieces that require less than one board of lumber and less than thirty minutes of production time, including finishing. The mid tier ($30 to $65 retail) includes standing pumpkin figures, decorative planter boxes, small shelf sitters, and painted sign boards, pieces requiring one to two boards and sixty to ninety minutes of production time. The premium tier ($70 to $150 retail) includes large standing pumpkins, scarecrow character pieces, full-size door or porch decorations, and personalized or custom pieces.
Plan the product line so that all pieces within it share: a consistent paint and stain palette (the same orange, the same rust, the same dark green, the same antiquing technique applied consistently), a consistent finish quality (same sealant, same sheen level), and a consistent visual language (same bow style if bows are used, same lettering style if text is painted). This consistency allows customers to purchase across the product line a small pumpkin sign alongside a larger standing pumpkin and have the pieces work together in their home, which is the most reliable driver of multiple-item purchases at a single fall craft booth.
Step 4: Build a Batch Production System for Wood Fall Crafts
The economic viability of selling wood fall crafts depends on batch production: cutting, assembling, and finishing multiple pieces of the same design in a single production run rather than completing one piece at a time. Batch production reduces the per-piece time investment through setup efficiency: the saw is set to the right cut angle once for an entire batch, the paint is mixed once and applied to twenty pieces in sequence, the drying time is shared across the full batch.
Build production batches around a minimum of six to ten pieces of the same design. For the three-plank standing pumpkin: cut all boards for the full batch before beginning any assembly; assemble all frames before beginning any painting; paint all frames in the base coat before beginning the detail work. Each phase switch from cutting to assembly, from assembly to priming, from priming to painting involves a setup investment that is amortized across the full batch.
Track production time per piece for each fall craft design in the product line. The accurate per-piece time, including setup and cleanup, proportionally allocated, is the foundation of correct pricing. Wood fall crafts priced without accurate time tracking are almost always underpriced, because the maker’s instinct is to price against materials only and to discount their own labor unconsciously. Time tracking produces the data required for pricing that is both competitive in the market and sustainable for the maker.
Step 5: Apply a Professional Finish to Wood Fall Crafts
Finish quality is the single most visible quality differentiator between wood fall crafts that sell at professional price points and those that struggle to sell at any price. The finish communicates quality to a customer who can’t assess the structural integrity of the piece or the care taken in its construction; it is the observable surface that the purchase decision is based on.
The finishing sequence for painted wood fall crafts: prime with a quality water-based primer, apply the base paint color in two coats (allowing full drying between coats), apply any detail painting or stenciled lettering, apply a distressing technique if the rustic-farmhouse aesthetic is the design direction, and seal with two coats of a water-based satin or matte topcoat. The topcoat is non-negotiable for wood fall crafts intended for outdoor use or for pieces that will be handled regularly by customers examining them at a booth; unprotected painted surfaces scuff and scratch in ways that undermine perceived quality immediately.
For stained wood fall crafts, the natural wood plank pumpkin in the featured image, the sequence is: pre-stain conditioner on pine (which prevents the blotchy absorption that pine is prone to), gel stain or oil-based stain in the chosen autumn color, two coats of exterior-grade clear topcoat in a satin finish. The exterior-grade topcoat allows the piece to be used as outdoor porch décor, which significantly expands the customer base compared to indoor-only finishes.
Step 6: Price and Present Wood Fall Crafts for Maximum Sales
Pricing wood fall crafts correctly is the business skill that separates a profitable craft operation from one that generates craft supply revenue without generating personal income. The pricing formula that accounts for all cost components: (Material cost + Overhead allocation) x 2 (for wholesale margin) x 2 (for retail margin) + Labor at your target hourly rate. The result is the correct retail price; if the result feels too high for the market, the challenge is reducing production time or material cost, not reducing the target hourly rate.
Present wood fall crafts at a booth with height variation: tall pieces at the back, medium pieces in the middle, small pieces at the front and on table-level surfaces. Group pieces by size and price rather than by design; customers navigate by budget first, then by design preference. Use natural-material booth fixtures, burlap table coverings, wicker baskets, and wooden crates that reference the same autumn warmth as the fall crafts themselves and create the atmospheric selling environment that increases customer dwell time and purchase rate.
Expert Secrets for Success
Pro-Tips for a Better Result
Make a production jig for your most popular wood fall craft designs. A jig is a simple guide that allows the same cut or the same assembly to be repeated accurately and quickly without measuring each time. For the three-plank pumpkin, a jig that holds the boards at the correct spacing while the glue dries eliminates the measurement step from every unit after the first. The initial time investment in building a jig for a popular fall craft design is recovered within the first batch of six to ten pieces.
Use gel stain rather than liquid stain for the warmest autumn orange tones. Liquid stain on pine produces inconsistent color coverage because pine’s grain absorbs at different rates across the board surface. Gel stain sits on the surface longer before penetrating, producing more even, more controllable color that reads as the rich, warm orange of pumpkins and autumn leaves without the blotchy result that liquid stain on pine frequently produces. Apply gel stain with a clean cloth rather than a brush for the most even application.
Photograph every fall craft design in natural outdoor light before the selling season. Product photography taken in natural outdoor light against a simple background, such as a white board fence, a neutral wall, or clean gravel, captures the true warmth and color quality of wood fall crafts better than indoor photography under artificial light. These photographs are the fall crafts’ digital presence on Etsy, Facebook Marketplace, and Instagram, the first point of contact with customers who aren’t at the physical booth, and their quality directly affects click-through and purchase rate.
Offer personalization on a subset of the product line. Personalized wood fall crafts family name signs, house number displays in autumn styling, and custom welcome signs command a 30 to 50% premium over equivalent non-personalized pieces and generate repeat customers who return season after season for new personalized additions to their décor. Offer personalization on two or three designs rather than the full line, to keep the personalization process manageable at volume.
Common Mistakes to Avoid
Don’t undercoat wood fall crafts with interior primer when outdoor use is likely. Interior primer under exterior-facing wood fall crafts allows moisture to penetrate the paint film in outdoor conditions, producing bubbling and peeling within a single season. Use exterior-rated primer for any wood fall craft that a customer might use as porch décor, door decoration, or outdoor display; even if the piece isn’t explicitly marketed as outdoor décor, customers will use seasonal fall crafts outdoors. Protect the investment of your labor with the appropriate base coat.
Don’t produce fall crafts in single quantities until you’ve confirmed the design sells. Single-unit production of every design idea produces a range that is too broad for efficient selling and too scattered for visual identity. Produce two prototype pieces of each new design, photograph and list them in your digital selling channels, and take them to one booth before committing to a batch run. The designs that sell at prototype stage become the batch production investments; those that don’t sell at prototype stage are discontinued without the sunk cost of a full production run.
Don’t use craft paint from dollar stores for fall crafts intended to sell. Dollar-store craft paint has low pigment density, poor adhesion to wood surfaces, and limited durability under a topcoat; it produces a flat, chalky appearance that reads as low quality regardless of how carefully the fall craft design was executed. Use mid-range craft acrylic paints (Folk Art, DecoArt Americana, Apple Barrel from hobby chains) as a minimum quality standard, and premium acrylic paints for pieces at the higher price tiers where finish quality is the primary justification for the price point.
Don’t price fall crafts based on what competitors are charging without understanding their cost structure. Setting prices by reference to what other sellers charge on Etsy or at local markets assumes that those sellers are pricing correctly and profitably, an assumption that is frequently wrong. Many craft sellers significantly underprice, generating activity without generating income, and matching their prices produces the same result. Price from your own cost structure and your own labor valuation, then assess whether the resulting price is competitive rather than starting from the competition and working backward.
Why Fall Crafts Matter
There is something specific about making wood fall crafts that doesn’t apply to most other creative activities: the season creates the urgency, but the craft is what the season becomes. Every piece of orange-painted pine that leaves a booth in October and ends up on someone’s front porch or kitchen counter is now part of how that family experiences autumn. The way the light hits the stained plank pumpkin on a late afternoon in November, the way the scarecrow’s painted face catches the eye as someone comes through the front door these are small sensory moments that accumulate into the specific quality of a season well-inhabited. Fall crafts made with care and skill contribute to that quality in homes you’ll never visit, for people you’ll never meet.
For the maker, wood fall crafts represent one of the more complete creative satisfactions available in a seasonal small business: the combination of physical making, design thinking, business acumen, and the specific pleasure of a product that is visible in the world rather than remaining abstract. The garage that was a source of project chaos becomes the source of a sellable product line. The hobby that was a personal pleasure becomes a small income, and the small income becomes the evidence that the creative work has value beyond the maker’s own enjoyment of it. That evidence matters not primarily for the income, though the income matters too, but for the shift in how the maker understands their own creative competence.
Easy Peasy Life Matters is built on the conviction that creative hobbies done with intentional craft become something more than hobbies; they become a genuine expression of skill, care, and the specific satisfaction of making something worth making. Wood fall crafts sit at the intersection of that conviction with the practical reality of seasonal demand and the real potential of a small creative business. The booth table that was a source of anxiety becomes a source of pride, and the production system that felt like chaos becomes the system that makes the craft sustainable. This guide is how you build that system.
Frequently Asked Questions
What wood fall crafts sell best at farmers’ markets and craft fairs?
The best-selling wood fall crafts at physical markets consistently combine visual impact with accessible price points. Standing pumpkin figures in the $25 to $45 range, large enough to be visible from across a booth, simple enough to produce in quantity, are the most reliable volume sellers. Personalized welcome signs in an autumn palette sell at higher price points ($55 to $85) and generate the most direct customer engagement, as buyers invest time in specifying personalization. Mini pumpkin shelf sitters in the $10 to $20 range serve as impulse purchases that increase the average transaction value when a customer is already buying a larger piece. A booth with all three tiers represented typically outperforms a booth focused on a single price point.
What tools do I need to start making wood fall crafts to sell?
The minimum effective toolkit for producing sellable wood fall crafts includes: a circular saw or miter saw for straight cuts, a jigsaw for curved profiles (the pumpkin’s rounded top, the scarecrow’s body outline), a drill with driver bits for assembly, a random orbital sander for surface preparation, a set of quality paintbrushes in flat (for base coats) and detail (for lettering and embellishment) sizes, a palette for mixing paint colors, and a spray sealer or quality brush-on topcoat for finishing. The circular saw and jigsaw are the highest-priority tool investments; most other steps can be done with inexpensive tools without significant quality impact, but cutting accuracy directly affects the professionalism of the assembled piece.
How do I make wood fall crafts waterproof enough for outdoor use?
Wood fall crafts for outdoor use require a weatherproof finishing system: exterior-rated primer as the base coat, exterior-rated acrylic craft paint or exterior latex paint for the color coats, and two to three coats of exterior-rated clear topcoat (water-based polyurethane or exterior varnish in a satin or semi-gloss finish) as the protective seal. This finishing system withstands normal autumn outdoor conditions rain, frost, UV exposure for a full season without significant deterioration. Avoid water-based indoor topcoats on outdoor fall crafts; they soften and cloud when consistently exposed to moisture. For pieces that will remain outdoors through winter, a UV-resistant exterior varnish provides additional protection against the color fading that UV exposure causes in painted fall crafts over multiple seasons.
How do I price wood fall crafts to make a profit?
Profitable fall crafts pricing requires accurate tracking of three cost components. Material cost: add the cost of all materials used in one piece (lumber, paint, stain, hardware, embellishments, packaging), typically $3 to $15 per piece depending on size. Labor cost: track actual production time per piece (including setup and cleanup pro-rated across the batch) and multiply by your target hourly rate. $15 to $25 per hour is a reasonable starting point for fall crafts production. Overhead: include a proportional share of tool depreciation, booth fees, online selling fees, and workspace costs. The sum of these three components is the minimum viable price; multiply by 1.5 to 2.5 to establish the retail price that accounts for profit margin and market positioning. A well-made medium-size wood fall craft with $8 in materials and 45 minutes of labor at $20 per hour has a minimum viable price of $23 and a reasonable retail price of $35 to $45.