
The hot tub had been sitting on the back patio for two years, fully functional and almost entirely unused. Not because it wasn’t a good hot tub, it was, but because the experience of getting into it felt so exposed and so unfinished that the effort rarely felt worth it. No overhead cover, no privacy, no sense of being in a place rather than simply standing in the backyard next to a piece of equipment. Hot tub pergola ideas had been on my radar since the first winter we owned the tub, but every time I looked into them seriously, the project seemed to fork in too many directions at once: how big, what wood, attached to the house or freestanding, how to handle the posts in wet ground near the tub. I kept deferring it.

The image above is what happens when you stop deferring and start building. A man mid-installation on a wooden pergola against a light beige house exterior, pine beams and rafters creating a geometric slatted roof, support posts set in concrete on a gravel base, a lattice trellis panel going in on the side wall for privacy. It’s not finished in the photograph, but you can already see exactly what it will be: a structure that turns a hot tub into a destination. Shade overhead. Privacy on the sides. A roof that filters light without blocking it entirely. Hot tub pergola ideas at their most functional, not decorative, but genuinely transformative of how an outdoor space gets used.
This guide is the complete build sequence for a hot tub pergola that provides real shelter, real privacy, and the specific sense of enclosure that makes a hot tub feel like a retreat rather than an appliance. These hot tub pergola ideas follow the construction logic visible in the image posts in concrete, beams on posts, rafters across beams, trellis panels for side privacy, adapted for a DIY weekend build that doesn’t require a contractor or specialized skills beyond basic carpentry.
The Hot Tub Pergola Ideas Blueprint
Step 1: Plan the Hot Tub Pergola Footprint and Clearance
Every successful hot tub pergola ideas project begins with accurate dimensions, specifically the hot tub’s full footprint plus the operational clearance needed around it on all four sides. Most hot tubs require a minimum of 90cm of clear access on at least two sides for maintenance panel access and safe entry and exit. The pergola’s interior footprint should provide this clearance on all sides rather than building the structure tightly around the tub’s edge.
Measure the hot tub’s full width and depth and add a minimum of 90cm on each side. For a standard 200cm × 200cm hot tub, this produces a minimum interior pergola footprint of 380cm × 380cm and most hot tub pergola ideas that look generous in photographs are built at 400cm × 400cm or larger. Mark the planned footprint with stakes and string before purchasing any materials, and check that the structure’s position allows adequate gravel or drainage underneath and around the posts without interfering with utility lines.
For the image’s pergola style attached to the house on one side, check local building codes for setback requirements and whether a house-attached pergola triggers permit requirements in your jurisdiction. A freestanding hot tub pergola ideas structure avoids most permit triggers and can be repositioned if needed; a house-attached structure is more stable but involves attaching a ledger board to the house exterior, which requires careful flashing and waterproofing.
Step 2: Select the Lumber for the Hot Tub Pergola
The natural pine finish visible in the image’s pergola beams is the most widely available and most cost-effective lumber option for hot tub pergola ideas. Pressure-treated pine resists rot and insect damage in the high-humidity environment around a hot tub, which makes it the default specification for any outdoor structure within the splash and steam radius of running water.
For hot tub pergola ideas, standard lumber dimensions are: 15cm × 15cm posts for vertical support (set in concrete as in the image), 5cm × 20cm beams running horizontally between posts, and 5cm × 10cm rafters running perpendicular to the beams at 40cm to 60cm spacing. This structural specification produces the geometric slatted roof pattern visible in the image’s overhead framing while providing adequate load-bearing capacity for a shade sail, polycarbonate roofing panels, or climbing plant weight if any of those additions are planned.
Cedar is the premium hot tub pergola ideas lumber choice at $4 to $8 per linear foot, naturally rot-resistant without chemical treatment, visually warmer in color than pressure-treated pine, and lighter in weight. For a hot tub pergola ideas structure that will be adjacent to a spa environment where chemical-treated lumber near bare skin is a concern, cedar is the more comfortable specification choice. Western red cedar or Douglas fir in the same dimensional sizes as the pressure-treated pine specification above will produce a structurally equivalent result.
Step 3: Set the Hot Tub Pergola Posts in Concrete
The support posts installed in concrete, visible in the image’s foreground, are the hot tub pergola’s structural foundation, the connection between the pergola’s overhead framing and the ground that determines the structure’s resistance to wind load and lateral movement. Posts set in concrete without adequate depth will rock in high winds and can pull free over time; posts set to the correct depth in properly cured concrete will outlast the lumber above them.
For hot tub pergola ideas post installation, dig post holes to a depth of 60cm minimum in temperate climates or 30cm below the frost line in freeze-thaw climates, whichever is deeper. Use a power auger (available for rent at most tool rental outlets) for consistent, clean holes. Hand digging post holes produces irregular walls that reduce the concrete’s bearing surface. The image’s posts are set in a gravel base, which provides drainage around the concrete footing and reduces frost heave risk.
Mix and pour concrete (Quikrete Fast-Setting Concrete or equivalent) around each post, bracing the post plumb in both directions with temporary 2×4 braces before the concrete sets. Check plumb with a level on two adjacent faces, not just one. Allow concrete to cure for a minimum of 24 to 48 hours before attaching any beams or applying any load to the post structure. Premature loading is the most common cause of hot tub pergola ideas post-installation failure.
Step 4: Install the Hot Tub Pergola Beams and Rafters
With posts cured and set, the beam and rafter installation is the hot tub pergola ideas phase that most directly produces the visual character visible in the image, the geometric overhead lattice of timber that provides partial shade, and the specific feeling of being under a structure without being enclosed by one.
Attach the primary beams to the top of each post using post cap hardware (galvanized steel post caps) rather than toe-screwing the beam directly to the post. Post cap hardware provides significantly stronger lateral resistance than toe-screwed connections and is the hot tub pergola ideas connection method used in any code-compliant outdoor structure. Run beams parallel to the house on each side, spanning between posts.
Install the rafters perpendicular to the beams at 40cm to 60cm spacing, using rafter ties or hurricane ties at each beam connection. The rafter ends can be left square (utilitarian) or cut to a decorative profile (beveled or curved). The image shows squared rafter ends consistent with a clean, contemporary pergola aesthetic that suits most modern house styles. Secure all connections with exterior-rated structural screws or bolts throughout.
Step 5: Add Privacy Panels to the Hot Tub Pergola
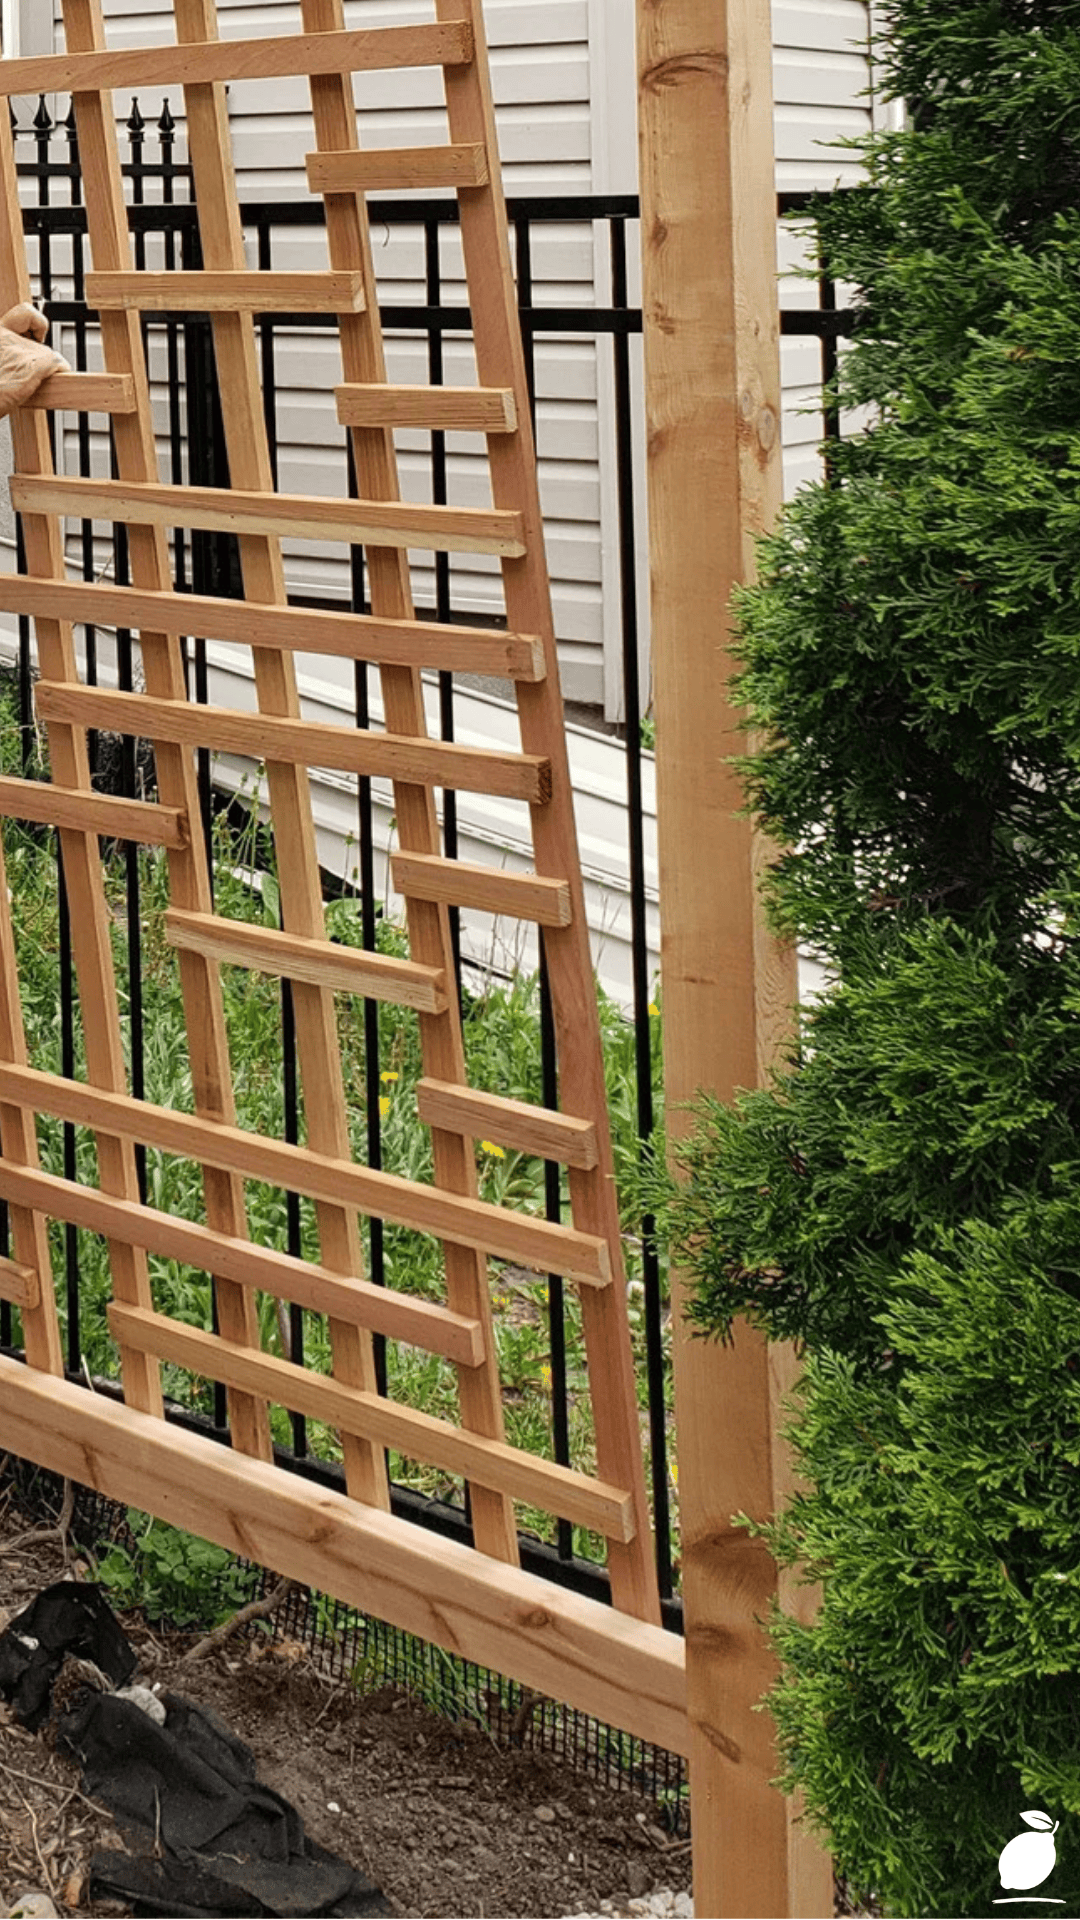
The lattice trellis panel being installed in the image is the hot tub pergola ideas element that completes the structure’s function as a retreat rather than simply a shade structure, providing a side panel that provides visual privacy from neighbors, wind protection from prevailing weather, and a vertical surface for climbing plants if that aesthetic direction is desired.
For hot tub pergola ideas, privacy solutions, the image’s lattice trellis is the most accessible option. Pre-made wood or vinyl lattice panels in standard dimensions (120cm × 240cm) are available at most home improvement retailers for $25 to $60 per panel and attach to the pergola’s post framing with simple blocking and screws. Lattice privacy provides partial screening without completely blocking airflow important in the hot tub environment where ventilation prevents humidity buildup under the pergola roof.
Alternative hot tub pergola ideas for privacy solutions include: horizontal board-and-gap fencing panels (more solid than lattice, more private, heavier); outdoor sheer curtains on tension rods between posts (maximum airflow, aesthetic softness, requires UV-rated outdoor fabric); and planted trellis panels with fast-growing evergreen climbers (seasonal build-up, eventually the most natural and most private solution). Choose the privacy solution that matches the level of screening needed and the aesthetic direction of the overall hot tub pergola ideas design.
Step 6: Finish and Seal the Hot Tub Pergola Structure
The hot tub pergola structure visible in the image is in mid-construction the lumber is unfinished natural pine. Once construction is complete, applying a quality exterior wood sealant or penetrating deck oil to all exposed lumber is the finishing step of the hot tub pergola idea that protects the structure from the accelerated weathering that occurs near a hot tub’s steam, chemical splash, and moisture exposure.
Use a penetrating oil-based exterior wood sealant rather than a film-forming paint or solid stain. The oil penetrates the wood fiber without forming a surface layer that will eventually peel or crack as the lumber expands and contracts seasonally. Apply within the first 30 to 60 days of construction, after the pressure-treated lumber has dried but before the first season of full moisture exposure. Reapply every 18 to 24 months as part of routine hot tub pergola maintenance.
Expert Secrets for Success
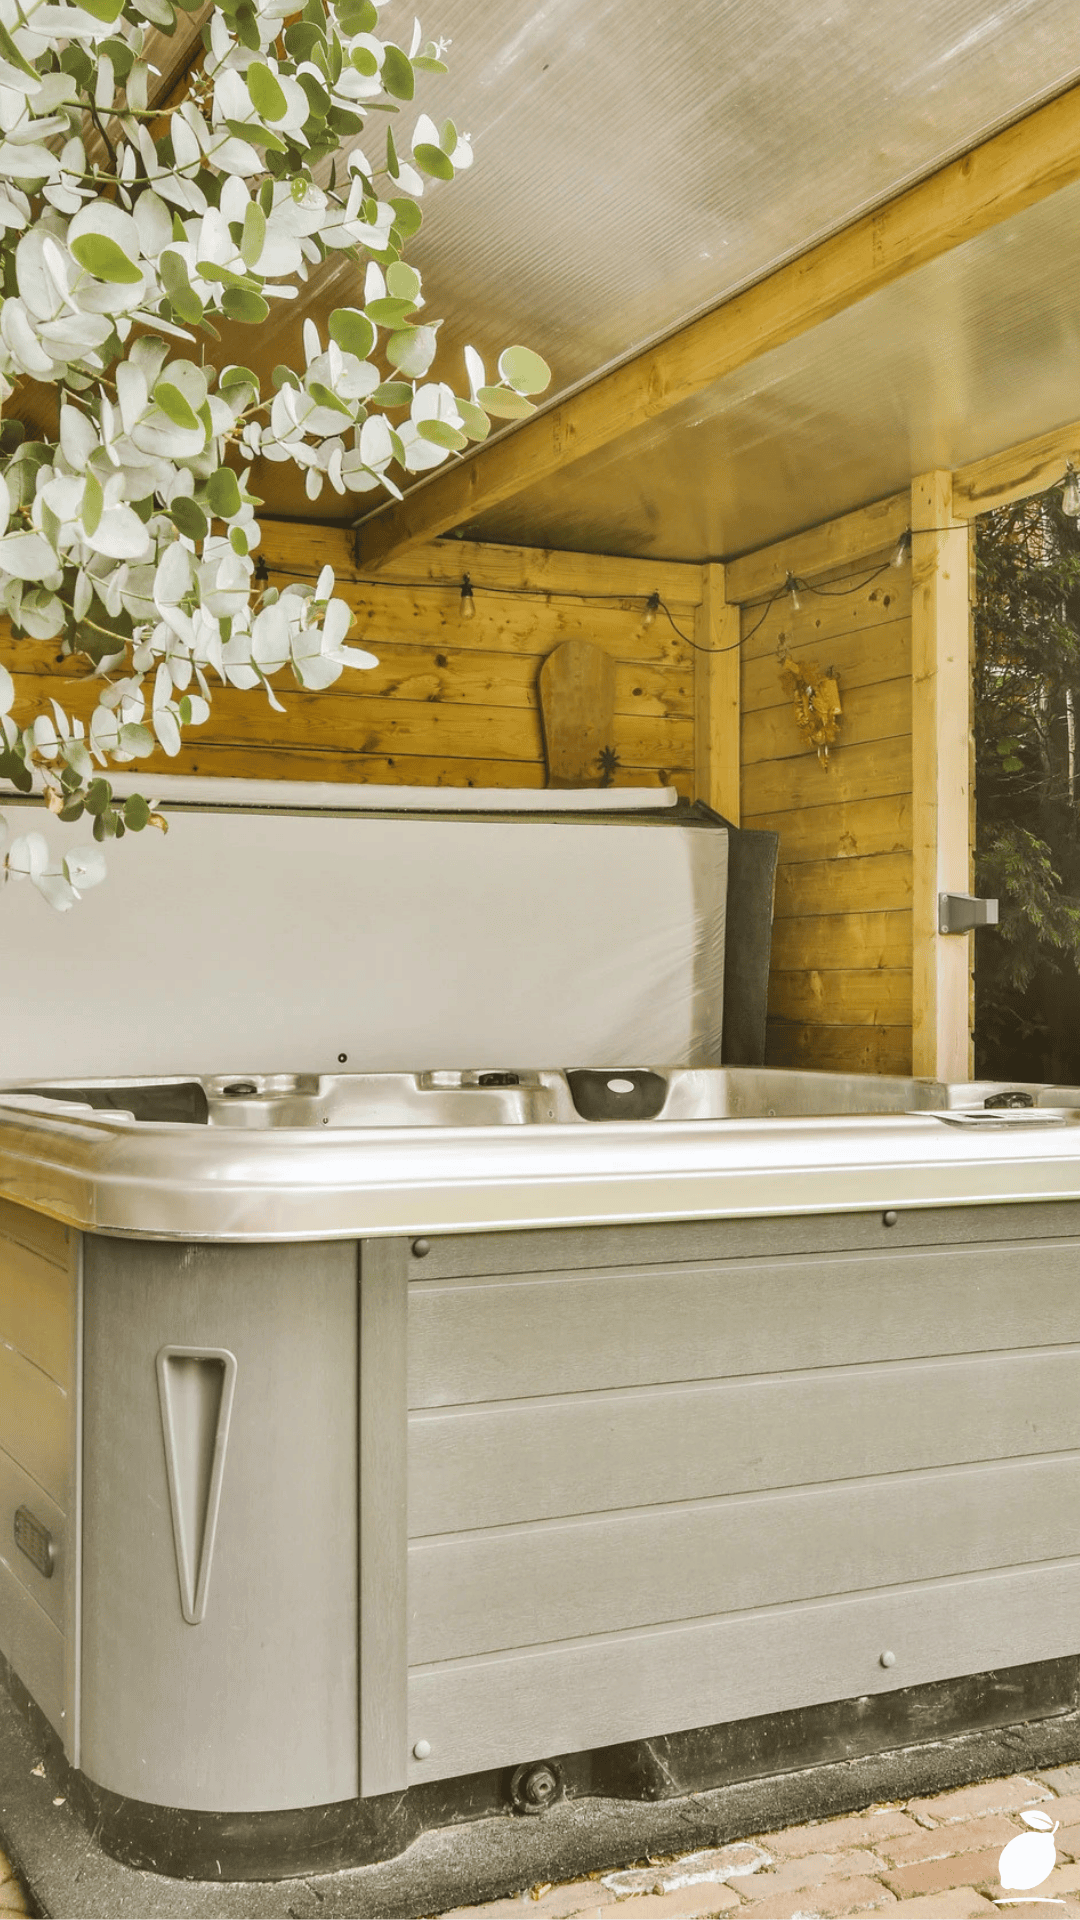
Pro-Tips for a Better Result
Size the hot tub pergola ideas’ footprint generously. The pergolas that feel right from the first use are almost always the ones that were built one foot larger in each direction than the minimum calculated footprint. The cost difference between a 360cm and a 420cm pergola is 15 to 20 percent in lumber; the experiential difference in how spacious the finished space feels is dramatic.
Use post-base hardware rather than direct burial where possible. Post base hardware anchors the post above the concrete surface rather than embedding the wood directly in the concrete. This keeps the post end dry, dramatically extending the post’s rot-resistant lifespan. Some municipalities also prefer or require above-grade post connections in hot tub pergola structures.
Install the ledger board before the free-standing posts for an attached design. For house-attached hot tub pergola ideas, attach the ledger board to the house structure first, then use it as the reference height for all post and beam installations. This sequence ensures the pergola roof aligns with the house attachment point without requiring height adjustments to already-set posts.
Plan electrical and lighting before the roof structure is completed. Running conduit or exterior cable for hot tub pergola lighting (string lights, wall sconces, or dedicated outdoor outlets) is significantly easier before the rafters are fully installed. Include a waterproof outdoor outlet on a GFCI circuit within the pergola structure. Hot tubs require a dedicated GFCI circuit anyway, and a convenient exterior outlet for phone charging and speakers is a hot tub pergola idea’s finishing touch that costs almost nothing when planned from the start.
Common Mistakes to Avoid
Don’t undersize the post-concrete footings. Hot tub pergola ideas: posts set in shallow concrete are the number one cause of pergola failure in high-wind events. The post hole depth should be one-third of the total post length, minimum, and the concrete diameter should be at least three times the post width. A 15cm × 15cm post requires a minimum 45cm diameter concrete footing.
Don’t attach a ledger board to vinyl or aluminum siding without proper flashing. House-attached hot tub pergola ideas that bolt a ledger through siding without flashing the connection create a water infiltration point directly into the house wall framing. Use purpose-made ledger flashing and follow the manufacturer’s installation sequence before attaching any structural hardware.
Don’t use standard interior-grade hardware in a hot tub pergola. Hot tub environments are exceptionally corrosive; the combination of steam, chlorine or bromine vapor, and UV exposure degrades standard zinc-plated hardware within two seasons. Use stainless steel, hot-dipped galvanized, or specifically rated exterior structural hardware throughout all hot tub pergola ideas connections.
Don’t skip the temporary bracing during post-setting. Posts that are set without temporary cross-bracing holding them plumb in both directions during concrete curing consistently cure slightly out of plumb, which makes every subsequent beam and rafter installation compound the alignment error. Brace in both directions, check with a level, and leave the braces in place for the full 48-hour cure window.
Why Hot Tub Pergola Ideas Matter
Hot tub pergola ideas matter because the hot tub without a pergola is a product; the hot tub with a pergola is an experience. That distinction explains why so many hot tubs go underused: the hardware works, but the environment hasn’t been built. A well-executed hot tub pergola creates the sensory conditions that make regular use feel intentional rather than effortful: overhead shelter that signals you’re in a place, side panels that create privacy without isolation, filtered light that changes the quality of the experience from functional to genuinely restorative.
Research on the health benefits of regular hot tub use, including cardiovascular benefits, sleep quality improvement, and stress hormone reduction, consistently notes that regular use is the key variable. Hot tub owners who use their tub three or more times per week experience significantly greater health benefits than those who use it occasionally. Hot tub pergola ideas that make the tub feel like a room worth visiting comfortable, private, finished — are the single most effective intervention for converting occasional use into regular use. The structure is the habit infrastructure.
Easy Peasy Life Matters is built on the belief that outdoor living spaces, built well and used consistently, return more daily wellbeing per dollar than almost any other home investment. A hot tub pergola project completed over two weekends of focused work produces a backyard space that the household uses differently for years. The man in the image is mid-installation, but he’s already building something more than a structure. He’s building the version of his backyard that gets used.
Frequently Asked Questions
Do I need a permit for a hot tub pergola?
Permit requirements depend on your local jurisdiction and whether the pergola is attached to the house or freestanding. Most jurisdictions do not require a permit for a freestanding pergola under a certain height and square footage, typically under 14 square meters and under 3.6m tall. A house-attached pergola almost always requires a permit because it involves structural attachment to the house. The hot tub itself may also require a separate permit for the electrical connection. Check with your local building department before beginning any hot tub pergola construction.
What is the best wood for a hot tub pergola in a humid environment?
Cedar is the best natural wood choice for hot tub pergola ideas in high-humidity environments. It is naturally rot-resistant, dimensionally stable, and does not require chemical treatment that could off-gas in the warm steam environment around a hot tub. Pressure-treated pine is an acceptable alternative at lower cost, but specify ground-contact-rated lumber for all posts and beams closest to the tub surface. For maximum longevity with minimum maintenance, composite lumber or vinyl pergola systems are available and will never rot, crack, or require staining.
How much does a hot tub pergola cost to build?
A DIY hot tub pergola built from pressure-treated pine at a 400cm × 400cm footprint typically costs $800 to $2,000 in materials, including posts, beams, rafters, concrete, hardware, and privacy lattice panels. Cedar construction at the same scale costs $1,500 to $3,500. Professional installation adds $2,000 to $5,000 in labor, depending on regional rates and structural complexity. A hot tub pergola with polycarbonate roofing panels rather than open rafters adds $400 to $800 to the material budget.
How do I protect a hot tub pergola from the chemicals in hot tub water?
Use stainless steel or hot-dipped galvanized hardware throughout, as chlorine and bromine vapor accelerate standard zinc-plated fastener corrosion to the point of failure within two to three seasons. Apply a penetrating wood sealant to all lumber surfaces before first use and reapply annually. Rinse the pergola structure with fresh water periodically during hot tub drain-and-refill cycles. Position the pergola’s drainage gradient so that splash water runs away from the post bases rather than pooling around them.
Can I add a roof to my hot tub pergola for full weather protection?
Yes, twin-wall polycarbonate panels are the most common hot tub pergola roofing addition for full weather protection. They transmit approximately 80 percent of natural light, are impact-resistant, UV-stabilized, and available in clear or lightly tinted versions. Install at a minimum 5-degree pitch for water runoff with flashing at the house wall connection. A metal roof on a more substantial timber frame is the most durable full-enclosure option, though it requires more substantial post and beam sizing to carry the additional load.







