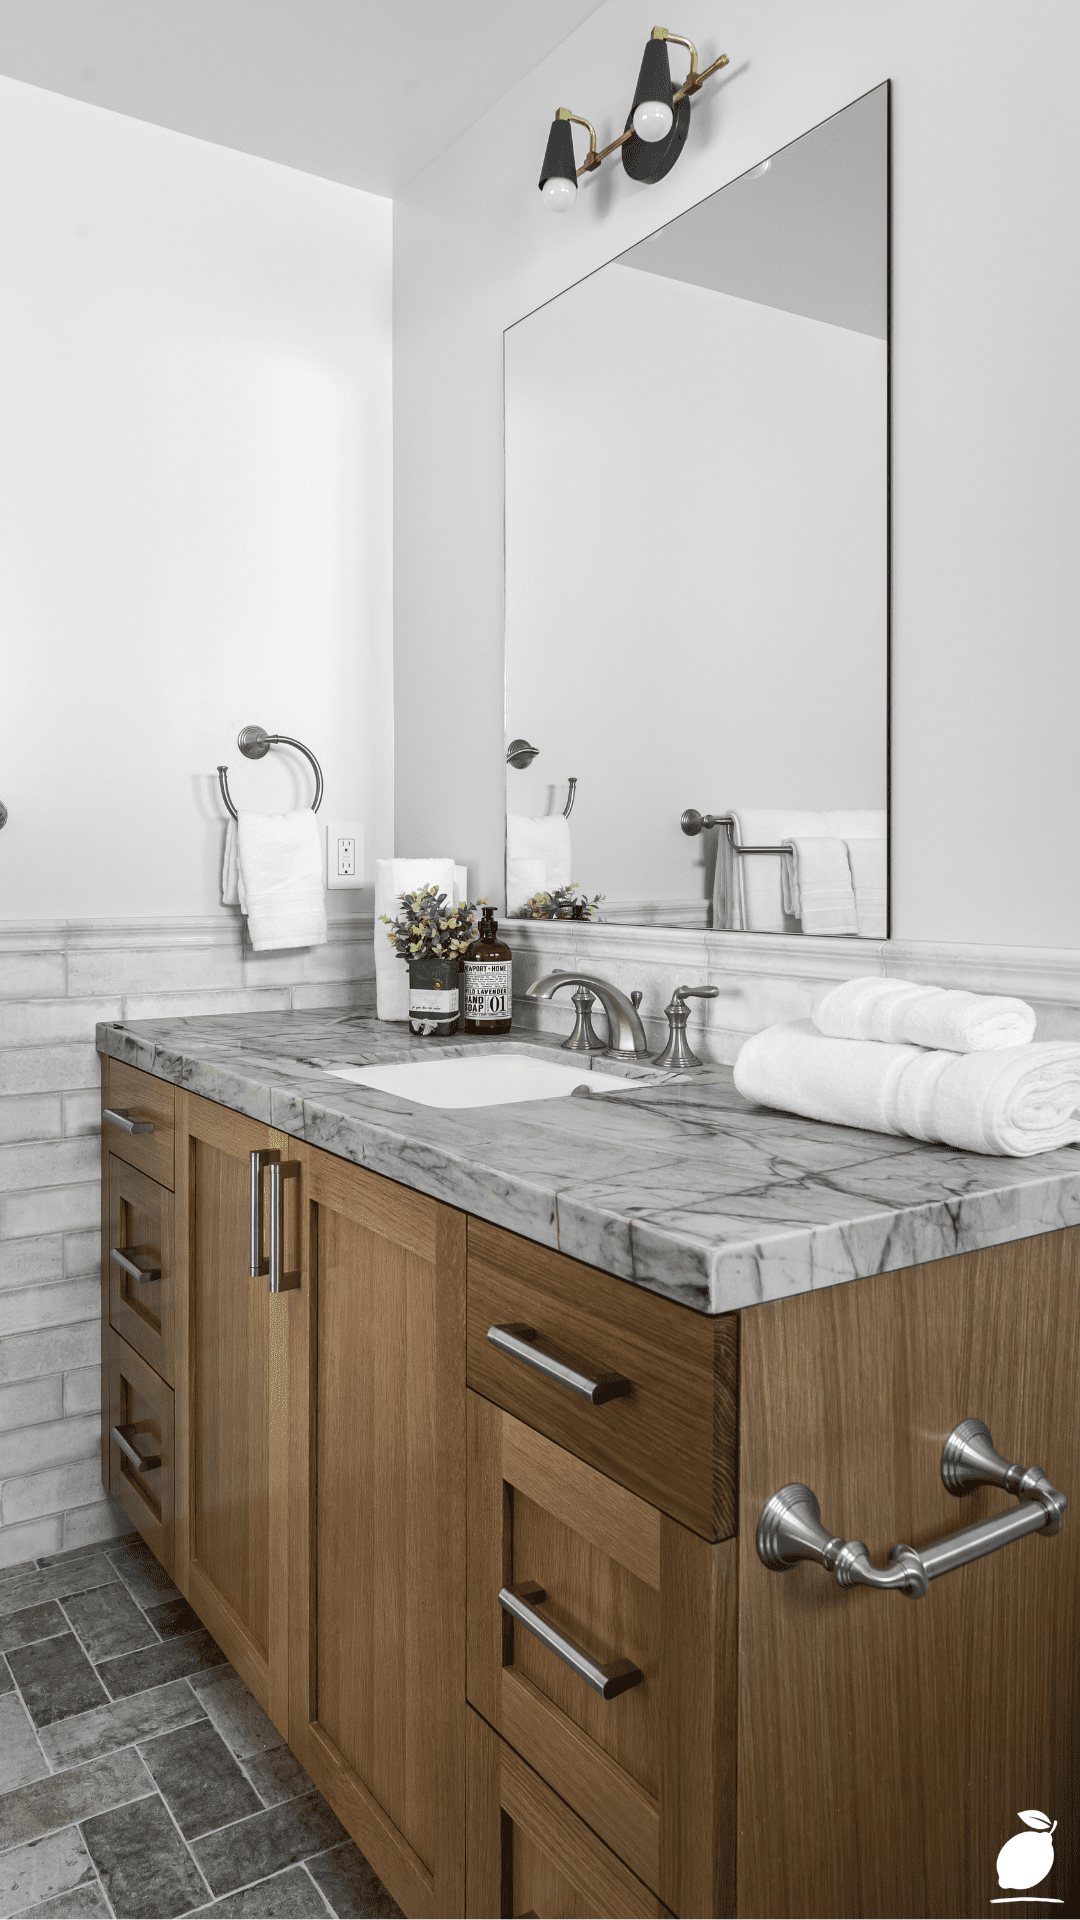
The bathroom cabinets were fine when you moved in. Honey oak, or medium cherry, or that particular shade of early-2000s espresso that came standard in builder bathrooms for a decade, whichever version is in your bathroom, you have lived with it long enough that you stopped seeing it as a color choice and started seeing it as a fixed condition of the room, like the ceiling height or the window position. Then you repainted the walls, or replaced the mirror, or put in new light fixtures, and suddenly the cabinets became visible again in the worst possible way: as the one element in the bathroom that communicates clearly, in a language everyone who enters the room can read, that no decision was made here. The cabinet color was never selected. It was inherited. And now it is the thing that prevents every other improvement you have made from adding up to a bathroom that looks finished.
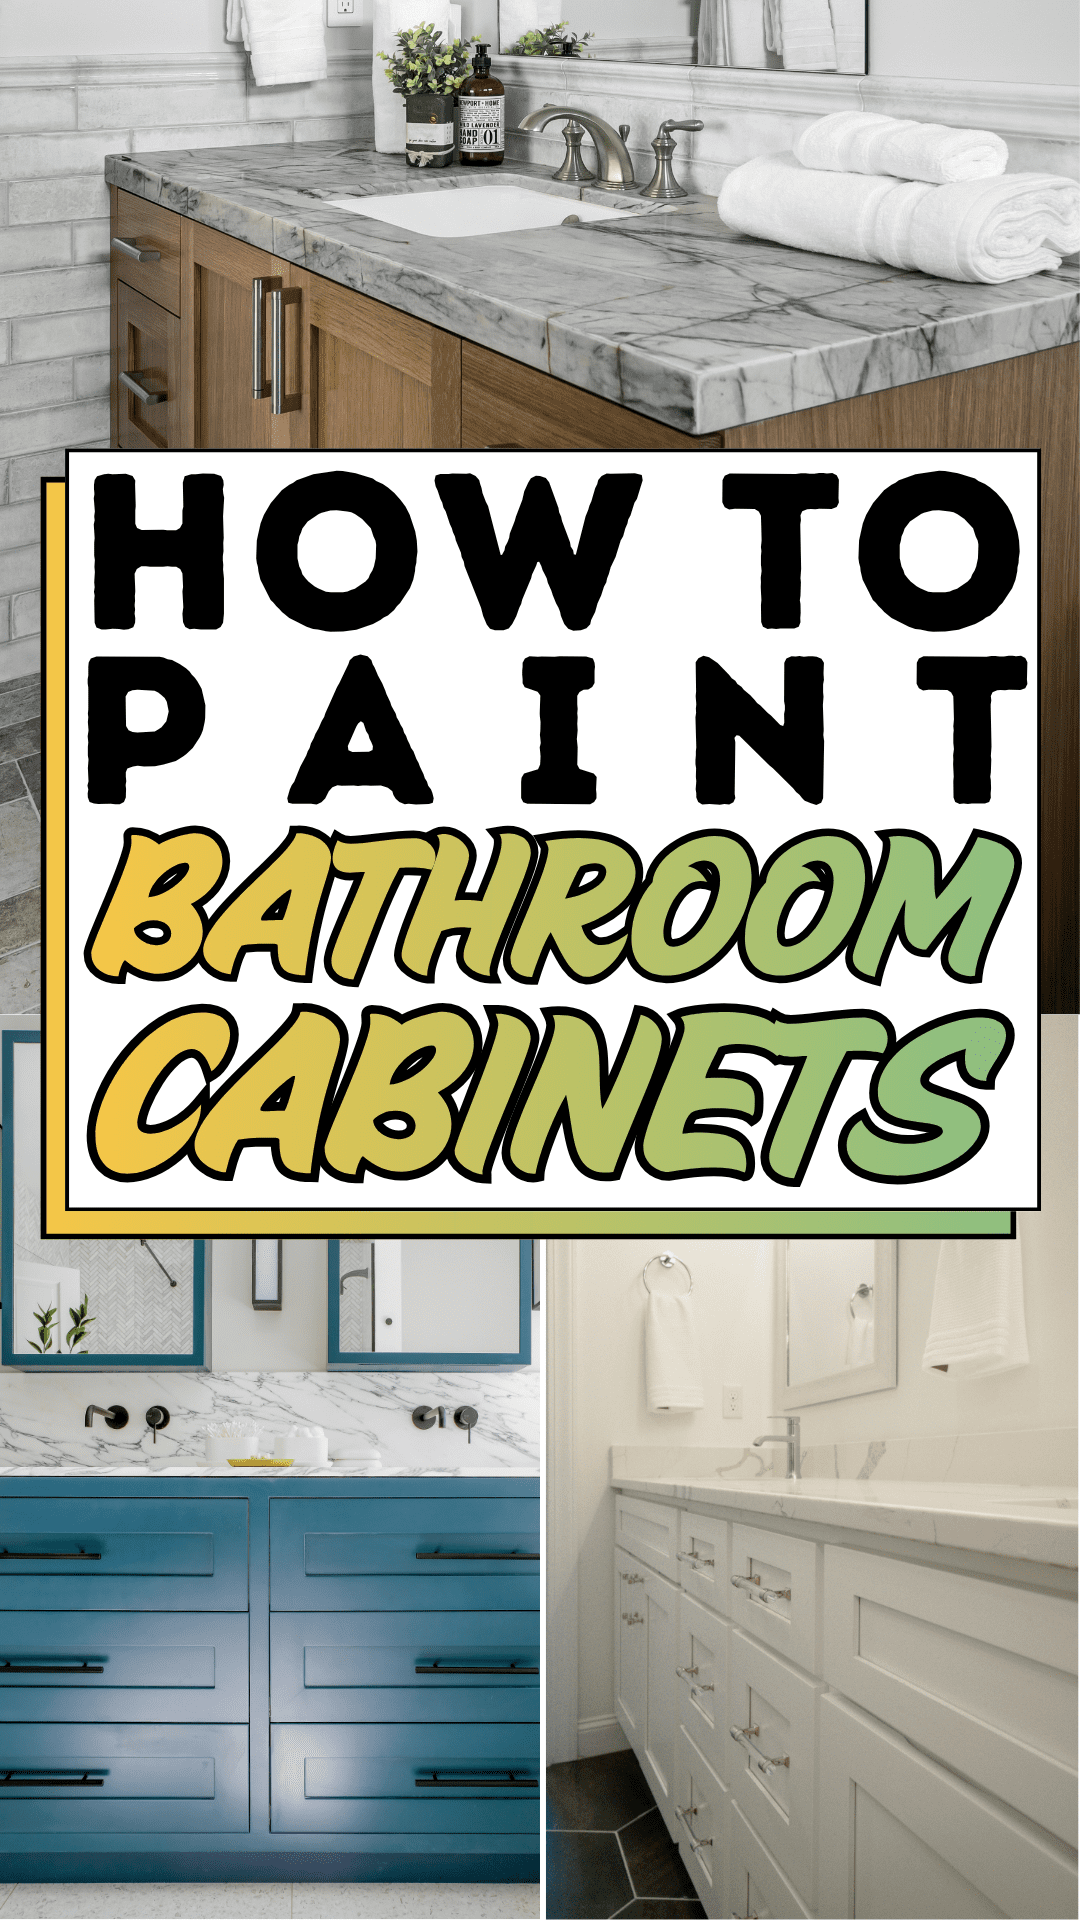
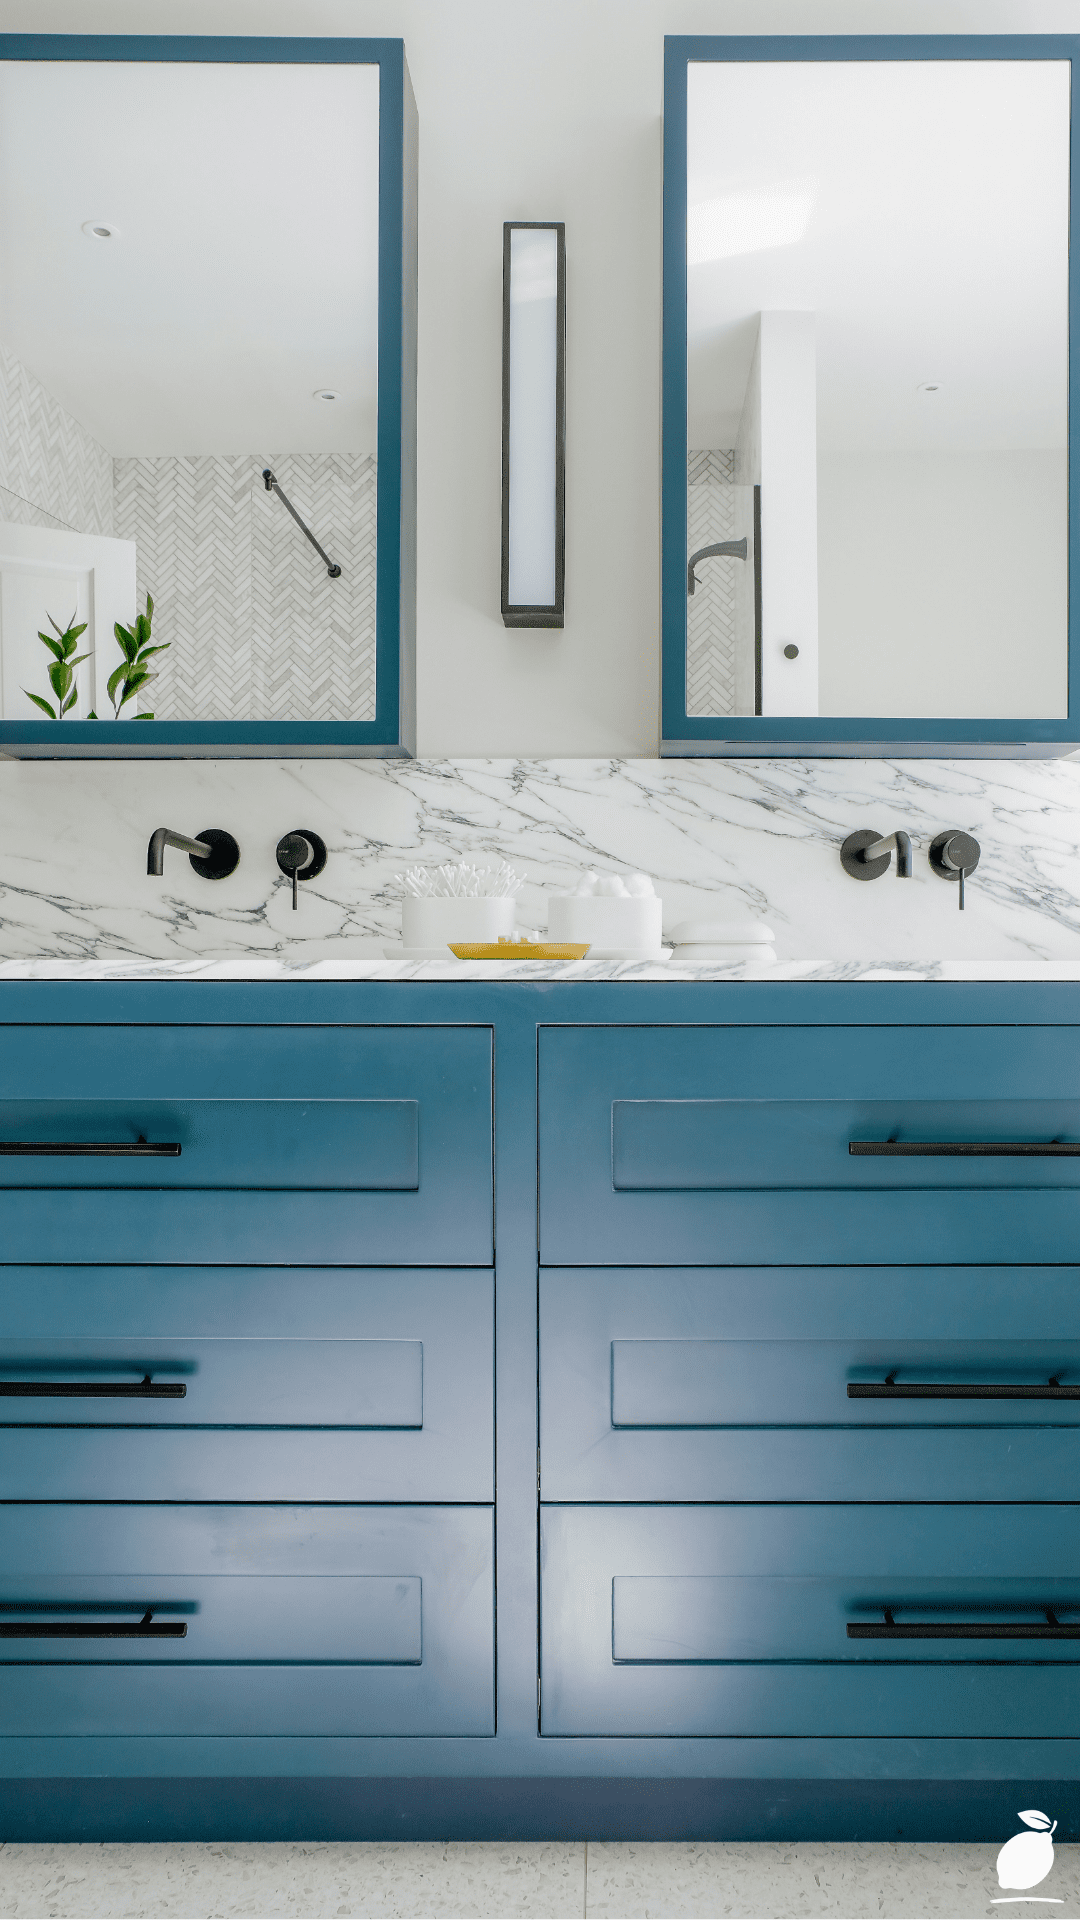
The bathroom in the image above is the answer to that specific problem, and it is an instructive one. The teal double vanity cabinet, matte finish, six drawers in two columns, long horizontal black metal handles, is the room’s single most dominant visual element, and it earns that dominance because it was chosen rather than defaulted to. The teal is not cautious. It does not hedge. It is a fully saturated, fully committed bathroom cabinet color that tells you exactly what kind of bathroom this is before you have registered the white marble countertop, the black wall-mounted faucets, or the large teal-framed mirrors that mirror the cabinet color at the wall level. The room is coordinated because one bold bathroom cabinet decision anchored every other decision in its palette. That decision did not require a new cabinet. It required paint, preparation, and the confidence to treat a bathroom cabinet as the designed element it can be.
Learning how to paint bathroom cabinets correctly, not just slapping color on wood and hoping, is the DIY skill that produces the highest return in bathroom transformation per dollar and hour invested. Painted bathroom cabinets that are properly prepared, properly primed, and properly finished hold their color and their surface quality through years of daily bathroom use without the peeling, chipping, or yellowing that incorrectly painted bathroom cabinets produce. This guide gives you every step of that process, from the cleaning and prep work that most tutorials skip to the finish selection that determines whether your painted bathroom cabinets look store-bought or DIY from three feet away. These are the bathroom cabinet painting steps that the image’s teal vanity was built on, and they are entirely within reach of a weekend and a well-chosen paint.
The Bathroom Cabinets Blueprint
Step 1: Remove Bathroom Cabinet Doors, Drawers, and All Hardware
The first step in any bathroom cabinet painting project that will produce a professional result is the removal of every element that can be removed: all cabinet doors, all drawers, all drawer fronts if they detach from the drawer box, all hinges, all handles, and all pulls. Painting bathroom cabinets in place, and doors on the hinges, drawers in the cabinet box, produces visible drips at the hinge points, uneven coverage at the edges where the door meets the cabinet frame, and brush marks at the corners where access was limited. Removing everything and painting flat on sawhorses or a clean floor surface is the single decision that most separates bathroom cabinet painting results that look like a professional refinish from those that look like a touch-up.
Label every door and drawer with a piece of painter’s tape on the inside surface marked with its position to the left, bottom center, and so on, before removing anything. Bathroom cabinet doors are rarely interchangeable because hinge positions are drilled for specific door sizes and hinge types, and mixing up the doors during the project means refitting hinges during reinstallation, which adds hours to a project that should take minutes. Photograph the fully assembled bathroom cabinet from the front and from each side before removing any component. The photographs serve as the reference for hinge position, hardware alignment, and overall layout when reinstalling.
Place all removed hardware, hinges, screws, and handles in labeled zip-lock bags corresponding to each door or drawer position. This is not a precaution against losing hardware; it is a precaution against the specific frustration of reassembling painted bathroom cabinets at the end of a long project day and discovering that the right-length screws for a specific hinge are not in the pile.
Step 2: Clean Every Bathroom Cabinet Surface Thoroughly
Bathroom cabinet surfaces accumulate a specific and particularly adhesion-resistant layer of contamination: the combination of hand soap residue, moisturizer transfer, toothpaste splash, hairspray drift, and general bathroom humidity that deposits on every surface in the room over years of daily use. This contamination layer is invisible; it looks clean even when it is not, and it is the most common cause of bathroom cabinet paint failure. A primer or topcoat applied over a contaminated bathroom cabinet surface bonds to the contamination rather than to the wood substrate, and the contamination eventually releases from the wood, taking the paint with it.
Clean every bathroom cabinet surface, door fronts, door backs, cabinet frame faces, drawer fronts, and all edges with a tri-sodium phosphate (TSP) cleaner or a degreasing cleaner designed for cabinet and furniture surfaces. TSP removes the soap-and-grease contamination layer that regular household cleaners do not fully address, and it leaves the wood surface in the condition that primer adhesion requires. Mix TSP according to package directions, apply with a sponge, allow to dwell for two to three minutes, and wipe clean with a damp cloth. Follow with a wipe-down of all surfaces using a lint-free cloth dampened with isopropyl alcohol. The isopropyl removes any TSP residue and dries quickly without raising the wood grain.
Allow all bathroom cabinet surfaces to dry completely before proceeding, a minimum of two hours in a ventilated room after the isopropyl wipe-down. Any remaining moisture in the wood when primer is applied will cause the primer to bubble and peel, repeating in the topcoat the same adhesion failure that the cleaning step was designed to prevent.
Step 3: Sand All Bathroom Cabinet Surfaces to the Right Grit Sequence
Sanding bathroom cabinet surfaces before primer application serves two purposes: it removes the existing finish’s surface gloss (creating the mechanical roughness that primer and paint need to grip), and it smooths any imperfections, scratches, minor dents, and raised grain from the cleaning step that would be amplified by the new paint finish. The existing finish on most bathroom cabinets is a factory-applied conversion varnish or catalyzed lacquer, extremely hard finishes that resist adhesion without mechanical abrasion.
Begin with 120-grit sandpaper on a sanding block for flat panel surfaces and a flexible sanding pad for recessed panel areas and profile edges. Sand in the direction of the wood grain until the entire surface has a uniform, matte, hazy appearance, the visual indicator that the gloss has been removed across the full surface. Follow with 150-grit on a fresh sanding block to smooth the scratches left by the 120-grit. Finish with 180-grit on all surfaces that will receive the topcoat color for the smoothest possible painting surface.
Wipe all sanded surfaces with a tack cloth, a slightly adhesive cloth designed specifically for removing sanding dust before priming. Sanding dust left on the surface embeds in the primer coat and produces a sandpaper-like texture in the finished bathroom cabinet surface that is visible and tactile at close range. The tack cloth step takes five minutes and eliminates a paint defect that is very difficult to correct after the topcoat is applied.
Step 4: Apply Bonding Primer Formulated for Bathroom Cabinet Surfaces
Primer selection for bathroom cabinet painting is not an area where a general-purpose interior primer is appropriate. Bathroom cabinet surfaces, particularly factory-finished wood, MDF, and thermofoil surfaces, require a bonding primer specifically formulated for adhesion-challenging substrates in high-humidity environments. The bathroom cabinet in the image’s teal finish holds its color and surface quality because it was built on the right primer foundation. Without that foundation, even the best topcoat paint will fail.
Shellac-based primer is the most reliable bonding primer for bathroom cabinets being painted over an existing factory finish: it adheres to virtually any substrate, including glossy factory finishes, blocks tannin and stain bleed-through from wood, and seals the surface against humidity infiltration in the bathroom environment. Apply one full coat of shellac-based primer with a high-density foam roller on flat surfaces and a 50mm brush for profile edges and recessed panel areas. Allow to dry per manufacturer instructions, typically 45 minutes to one hour for shellac-based primer before lightly sanding with 220-grit and wiping with a tack cloth.
Water-based bonding primer is a lower-odor alternative appropriate for bathroom cabinet painting in enclosed spaces where shellac primer’s alcohol fumes are a ventilation concern. Use a water-based bonding primer labeled specifically for cabinets and trim, not standard drywall primer, which lacks the adhesion formulation required for bathroom cabinet surfaces.
Step 5: Apply the Bathroom Cabinet Paint Color in Multiple Thin Coats
Paint application is the step that most visibly determines the quality of the finished bathroom cabinet surface, and the application technique that produces store-bought-quality bathroom cabinet results is not the one most people default to on their first attempt. Heavy single-coat application, the instinct to cover the surface completely in one pass, produces drips on vertical bathroom cabinet surfaces, sags in recessed panel areas, and brush marks that are visible in raking light. Multiple thin coats, each coat individually insufficient for full coverage, collectively building to a smooth, hard finish, produce the level, gloss-consistent surface that the teal bathroom cabinets in the image demonstrate.
For bathroom cabinets, use a cabinet-specific water-based alkyd or a high-quality cabinet enamel paint, not standard wall paint, which lacks the hardness and blocking properties required for bathroom cabinet surfaces that receive daily contact, cleaning spray, and humidity cycling. Cabinet enamel cures to a significantly harder film than wall paint and maintains its surface quality through the conditions that bathroom cabinet surfaces experience.
Apply the first coat with a high-density foam roller on all flat panel areas and a quality synthetic bristle brush for edges, profile details, and recessed panel areas. The foam roller produces an orange-peel-free surface on flat bathroom cabinet panels that a brush cannot replicate. Allow the first coat to dry fully a minimum of two hours for water-based cabinet enamel, then sand lightly with 220-grit and wipe with a tack cloth before the second coat. Apply a minimum of two topcoat coats; three coats are standard for the deep, saturated bathroom cabinet colors like the image’s teal, which require more pigment buildup for full opacity.
Step 6: Reinstall Hardware and Rehang Bathroom Cabinet Doors and Drawers
Allow the final topcoat a full 24-hour dry time before reinstalling hardware and rehang bathroom cabinet doors, and a full 7-day cure before returning the bathroom cabinets to full service with cleaning sprays and daily contact. Cabinet enamel is dry to the touch within hours but continues to cure and harden for up to 30 days; hardware installed before the paint film has achieved meaningful hardness can leave impression marks in the soft paint surface that are permanent once the paint fully cures.
Replace existing hardware with the new finish selected for the bathroom cabinet’s new palette before reinstalling. The image’s long horizontal black metal handles are installed in the same hole positions as the original hardware, no new drilling required, but their finish transforms the bathroom cabinet’s visual quality at the same moment the teal paint does. New handles installed on freshly painted bathroom cabinets complete the transformation simultaneously, so the first impression of the finished cabinet is the fully resolved result rather than the painted-but-still-old-hardware interim state.
Rehang doors using the labeled position photographs from Step 1. Check each door for level and for consistent reveal of the gap between the door edge and the cabinet frame before tightening the hinge screws fully. Adjust hinges as needed before final tightening; most concealed European-style hinges have adjustment screws for horizontal, vertical, and depth positioning that allow precise alignment without door removal.
Expert Secrets for Success
Pro-Tips for a Better Result
Spray paint bathroom cabinet doors for the smoothest possible finish. For bathroom cabinet painters with access to a paint sprayer, either a purchased unit or a rented airless sprayer from a home improvement center, spray application on flat-laid cabinet doors produces a finish indistinguishable from factory-sprayed bathroom cabinets. Spray application eliminates brush marks, roller texture, and lap marks simultaneously, and produces the smooth, high-build surface that makes bathroom cabinet colors like the image’s saturated teal read with full depth and clarity. Spray in a well-ventilated space with all surroundings masked, apply in thin passes, and maintain a consistent distance from the surface throughout each pass.
Use a paint additive formulated for cabinet enamel to extend open time in hot or dry conditions. Cabinet enamel applied in a warm or dry bathroom environment, particularly during summer months when bathroom ventilation fans accelerate moisture evaporation, can dry faster than the brush can blend, producing visible lap marks where the leading edge of one stroke dries before the next stroke overlaps it. A paint conditioner additive (Floetrol for water-based enamel, Penetrol for oil-based) added to the bathroom cabinet paint in small quantities extends the paint’s open time and self-leveling period, allowing brush strokes to flow together into a smooth, lap-mark-free finish.
Apply the new bathroom cabinet color to the inside edges of doors and the front face of the cabinet frame before applying it to the door fronts. The inside edge of a bathroom cabinet door, the strip of wood visible at a 90-degree angle when the door is open, and the cabinet frame’s face are the areas most seen during daily use. These areas should match the door front color, but they are the most frequently missed surfaces in bathroom cabinet painting projects. Painting them first, before the door front, ensures that any over-brush onto the door front surface is covered by the door front topcoat rather than sitting on top of it.
Coordinate new bathroom cabinet hardware with existing fixed fixture finishes before purchasing. The black horizontal handles in the image work because the black is repeated in the wall-mounted faucets and the vertical light fixture frames three black elements that create a consistent metallic layer across the bathroom. Before ordering replacement hardware for newly painted bathroom cabinets, inventory every fixed metal finish in the room, including faucets, towel bars, light fixtures, toilet flush plate, and choose hardware that either matches or creates a deliberate two-finish palette with those existing elements.
Common Mistakes to Avoid
Don’t skip the deglossing step on factory-finished bathroom cabinets. Factory-applied finishes on bathroom cabinets are designed for maximum durability and maximum surface hardness qualities that also make them specifically resistant to adhesion by subsequent paint coats without mechanical abrasion. Applying primer directly to a glossy factory finish without sanding produces a primer coat that appears to adhere during application and then peels away from the factory finish in sheets within weeks of bathroom cabinet service. The 30 minutes spent sanding all bathroom cabinet surfaces before priming is not optional; it is the step that determines whether the entire project holds or fails.
Don’t use latex wall paint as a bathroom cabinet topcoat. Standard interior latex wall paint, even a high-quality formulation, lacks the crosslinked film hardness that bathroom cabinet surfaces require. Latex wall paint on bathroom cabinets remains soft long after it appears dry, denting and scratching from daily door and drawer use, and picking up fingerprints and cleaning cloth abrasion. Cabinet enamel cures to a measurably harder film through a chemical crosslinking process that latex wall paint does not undergo. The price difference between standard latex and cabinet enamel is typically $10 to $20 per gallon, a cost difference that is entirely justified by the surface durability it provides.
Don’t rush the dry time between bathroom cabinet coats. The most common reason DIY bathroom cabinet painting projects require sanding and repainting within a year is insufficient dry time between coats, specifically, the application of a second coat before the first coat has achieved the surface hardness required to accept sanding without tearing. A coat of cabinet enamel that is dry to the touch after two hours has not achieved the hardness needed for inter-coat sanding; applying a second coat without sanding traps solvent in the first coat, and applying it after sanding a soft first coat produces a torn, rough surface texture that transfers through to the final topcoat. Wait the full manufacturer-recommended dry time, typically four hours for water-based cabinet enamel at room temperature, before sanding and recoating.
Don’t reinstall bathroom cabinet doors and drawers before the paint has achieved surface hardness. Newly painted bathroom cabinet surfaces are soft enough to be damaged by hardware contact, drawer side friction, and door-edge compression for up to seven days after the final topcoat application. Reinstalling bathroom cabinet components before this cure window produces pressure marks at hinge contact points, scratch marks along drawer edges where the drawer sides contact the cabinet box during operation, and handle mounting-screw impressions in the soft paint surface. Wait a minimum of 24 hours before careful reinstallation, and avoid cleaning or stressing the painted surfaces for the full seven-day cure period.
Why Bathroom Cabinets Matter
Bathroom cabinets occupy more visual surface area in most bathrooms than any other single element, more than the tile, more than the mirror, more than the countertop. A bathroom cabinet that looks dated, worn, or inconsistent with the rest of the room’s design is visible to every person who uses the bathroom multiple times each day, at the close viewing range that bathroom use requires, in the moments of the day that are most personal and most private. The quality of the bathroom cabinet’s appearance is not a cosmetic detail; it is the dominant visual impression of the room where daily self-care happens, and it communicates clearly whether that room was attended to or allowed to remain in whatever condition it arrived in.
Painting bathroom cabinets is among the highest-return maintenance investments available to any homeowner, a project that costs $50 to $150 in materials and one to two weekends in time, and that produces a result equivalent in visual impact to a cabinet replacement that would cost $2,000 to $8,000 for a double vanity of the image’s scale. This ratio significant transformation at modest cost through skilled application of effort and knowledge, which is the specific kind of home improvement that builds household confidence that good work is within reach. The bathroom cabinet painting project that succeeds, that holds its finish, that makes a bathroom look genuinely different than it did before, produces something beyond an improved bathroom: it produces the specific confidence of a household that solves its own problems skillfully and incrementally, making the home more beautiful and more personal with each completed project.
Easy Peasy Life Matters is built on the conviction that the best home improvements are the ones that return the home to the people who live in it. The bathroom, designed around a teal cabinet that was chosen rather than inherited, is a bathroom that belongs to its occupants in a way that the bathroom with the builder-grade espresso cabinet never did. Painting bathroom cabinets is how that ownership is asserted at the most practical possible level. The teal cabinet in the image is proof of what that assertion looks like when it is executed well. This guide is how you achieve the same result in your own bathroom, with your own color, in your own weekend.
Frequently Asked Questions
What is the best paint for bathroom cabinets?
The most durable and most consistently recommended paint for bathroom cabinets is a water-based cabinet enamel or a water-based alkyd hybrid formulated specifically for cabinets and trim. These formulations cure to a harder film than standard latex wall paint through a chemical crosslinking process, providing the surface hardness that bathroom cabinet surfaces require for durability under daily contact, cleaning, and humidity cycling. Top-performing products include Benjamin Moore’s Advance Interior Paint (water-based alkyd hybrid), Sherwin-Williams’ Emerald Urethane Trim Enamel, and Sherwin-Williams’ Cabinets and Accents, all of which provide professional-grade hardness in a water-based, low-odor formulation appropriate for interior bathroom use.
How long does it take to paint bathroom cabinets?
A standard single-vanity bathroom cabinet painting project requires two to three days of total elapsed time to complete correctly: Day 1 for cleaning, sanding, and primer application; Day 2 for first and second topcoat application with proper dry time between coats; Day 3 for the final topcoat and initial dry time before careful hardware reinstallation. A double vanity like the teal cabinet in the image adds one additional day for the increased surface area. The elapsed time is greater than the active working time: most of the project duration is dry and cure time rather than physical work, and the willingness to respect that dry time is the single most important factor in the project’s final quality.
Can I paint bathroom cabinets without removing the doors?
Technically, yes, but the result will be visibly inferior to a door-removed painting project. Painting bathroom cabinet doors in place produces hinge drips, uneven coverage at the edges where the door contacts the frame, and restricted brush access to the door’s full perimeter. If door removal is genuinely not possible because the hinge type does not allow removal, or because the bathroom cannot be without doors during the drying period, paint the door faces first with the door fully open and secured, then the door edges with the door closed and the frame edges masked with painter’s tape. Accept that the result will show the limitations of in-place painting and plan for a more complete project when conditions allow.
How do I choose the right color for painted bathroom cabinets?
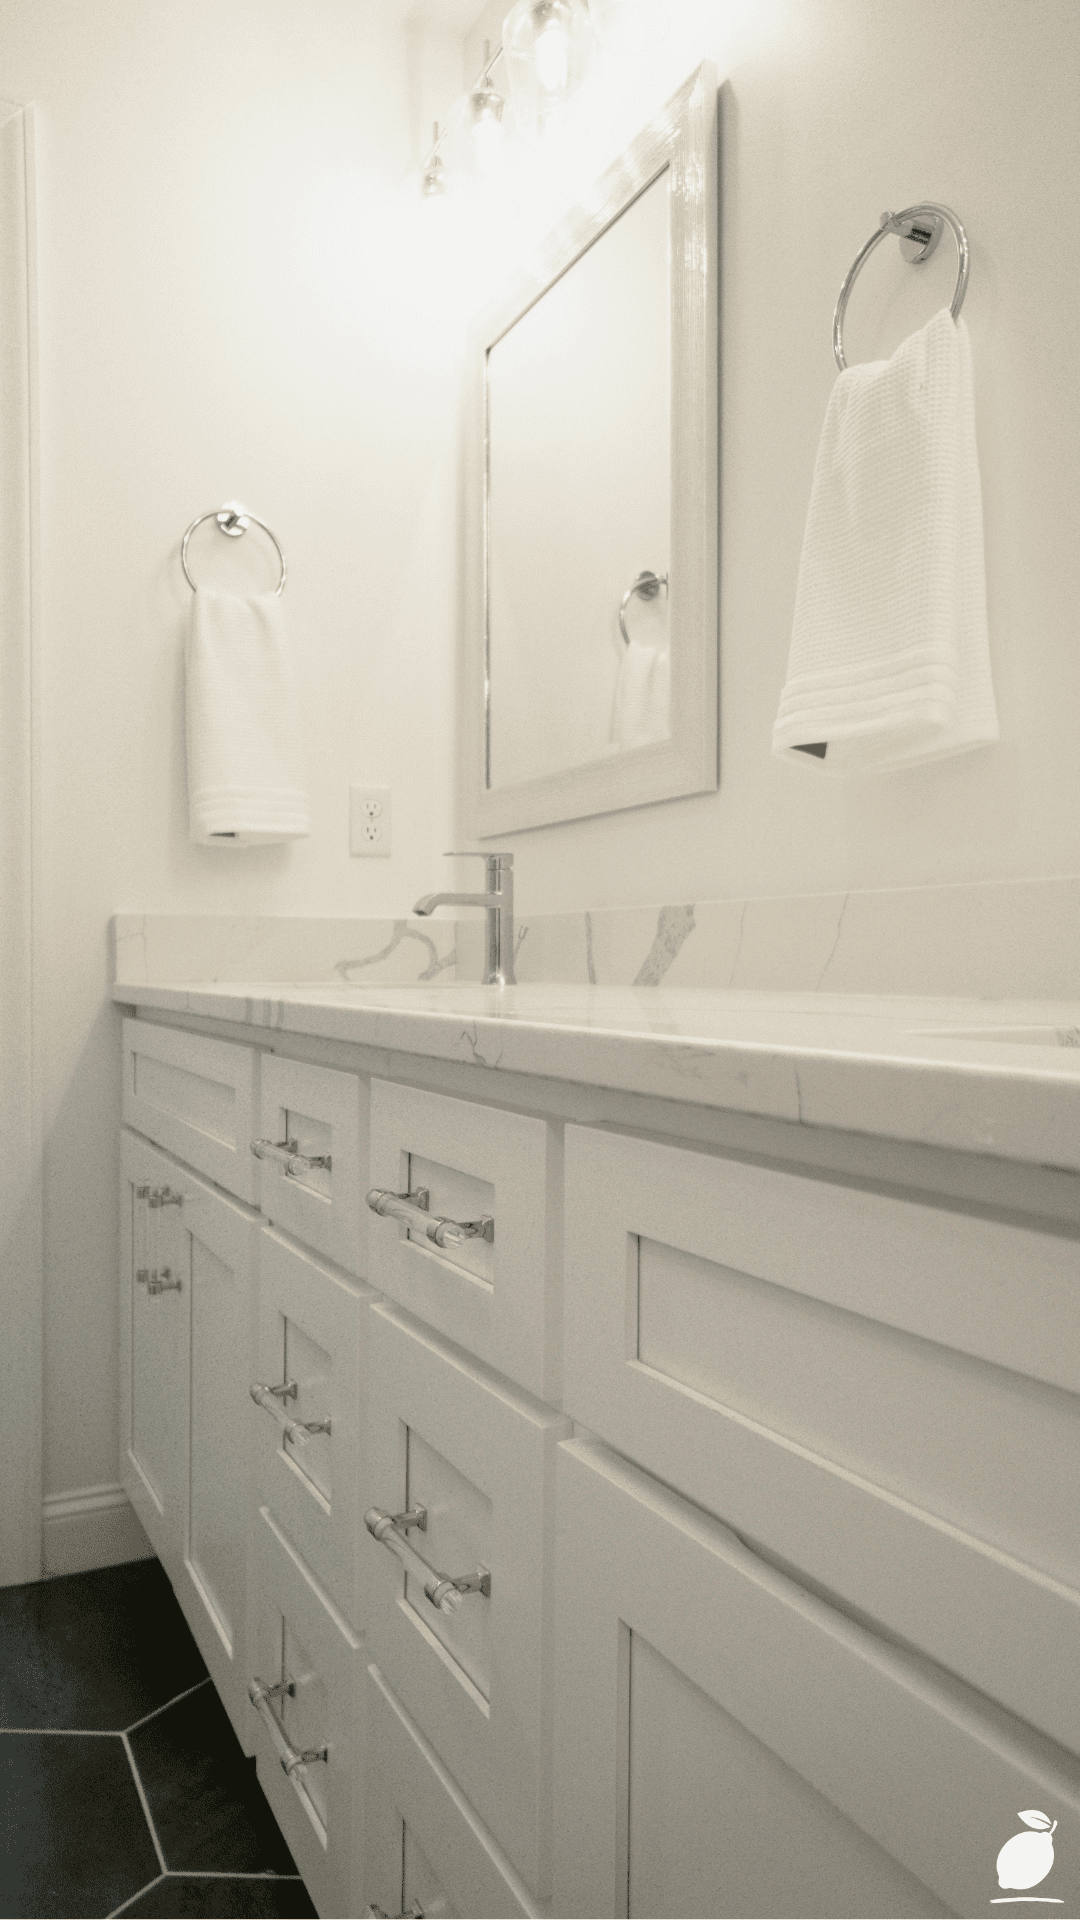
The most effective bathroom cabinet color selection process mirrors Step 3 of the design framework above: choose a color whose contrast relationship with the bathroom’s fixed elements, wall color, tile, and countertop produces the specific visual outcome you are building toward. Bold, saturated bathroom cabinet colors (teal, navy, forest green, terracotta) work best when the walls and floor are in neutral or near-neutral tones that allow the cabinet color to read as the room’s primary palette statement. Lighter, more restrained bathroom cabinet colors (warm white, pale sage, soft gray) work best in bathrooms with stronger existing tile or countertop patterns that would compete with a saturated cabinet color. Test physical color samples against the bathroom’s existing fixed surfaces before committing.
How do I maintain painted bathroom cabinets to keep them looking new?
Painted bathroom cabinets, maintained correctly, will hold their finish quality for five to seven years before repainting is needed. Clean with a soft, damp cloth and a pH-neutral cleaner; avoid abrasive cleaners, bleach-based sprays, and scrubbing pads, all of which damage the paint film surface. Dry any water splashes on the cabinet faces and edges promptly. Standing water at the bottom edge of a cabinet door is the primary cause of paint failure at that location. Inspect the cabinet face frame and door edges annually for early moisture intrusion, bubbling, or peeling at the bottom edges of doors or along the face frame where it meets the countertop, and address small areas with spot-touch-up before they expand into areas requiring full refinishing.